Page 2 - Type
Thank you for choosing to buy one of our products. Your appliance is made tohigh standards and is easy to use. Nevertheless, please take the time to readthese operating instructions in order to familiarise yourself with the applianceand get the best use out of it. Please follow the safety precaution...
Page 3 - Table of contents
Table of contents 1 Safety precautions 7 1.1 Symbols used ............................................................................................. 7 1.2 General safety precautions ...................................................................... 8 1.3 Appliance-specific safety precautio...
Page 6 - 6 Technical data
16 Technical data 102 16.1 Note for testing institutes ..................................................................... 102 16.2 Temperature measurement ................................................................. 102 16.3 Product data sheet.................................................
Page 7 - Safety precautions; Symbols used
1 Safety precautions 1.1 Symbols used Denotes important safety precautions.Failure to observe said precautions can result in injury or in dam-age to the appliance or fittings! Information and precautions that should be observed. Information on disposal Information about the operating instructions ▸ ...
Page 8 - General safety precautions
1 Safety precautions 1.2 General safety precautions ▪ Read the operating instructions before using the appliance forthe first time! ▪ This appliance can be used by children aged 8 and aboveand by persons with reduced physical, sensory or mental cap-abilities, or lack of experience and/or knowledge, ...
Page 9 - Appliance-specific safety precautions; A heatable appliance drawer and its contents get hot.
1 Safety precautions 1.3 Appliance-specific safety precautions ▪ READ THE IMPORTANT SAFETY PRECAUTIONS CAREFULLYAND RETAIN FOR FUTURE USE. ▪ WARNING: The appliance and its accessible parts get hotduring use. Be careful not to touch the heating elements. Chil-dren under 8 years of age must be kept aw...
Page 11 - Instructions for use; Before using for the first time
1 Safety precautions ▪ Eggs in their shell or whole hard-boiled eggs should not beheated in microwave appliances since they may explode,even after microwave heating has ended. ▪ Keep the appliance and the door seals clean. Remove anysoiling as soon as possible. Otherwise the appliance or thedoor sea...
Page 12 - Note on use
1 Safety precautions ▪ Retain these operating instructions for future reference. ▪ The appliance corresponds to recognised technology standards and the rel-evant safety regulations. Proper use of the appliance is essential to avoiddamage and accidents. Please therefore follow the precautions given i...
Page 13 - How to avoid damaging the appliance
1 Safety precautions ▪ Overheated fat and oil can easily catch fire. Heating oil in the cookingspace to sear meat is dangerous and should not be done. Never attempt toextinguish burning oil or fat with water. Danger of explosion! Smother theflames with a fire blanket. Keep doors and windows closed. ...
Page 15 - Disposal; Packaging
2 Disposal Packaging ▪ All packaging materials (cardboard, plastic film (PE) and polystyrene (EPS))are marked and should, if possible, be collected for recycling and disposedof in an environmentally friendly way. Disconnection ▪ Disconnect the appliance from the mains. With a fixed appliance, this i...
Page 16 - Using for the first time
3 Using for the first time Before operating the newly installed appliance for the first time, the followingsteps should be taken: ▸ Remove the packaging and transportation material as well as any blue pro- tective film from the cooking space. ▸ Clean the cooking space and the accessories. ▸ Press th...
Page 17 - Finishing the first-time use process
3 Using for the first time Finishing the first-time use process ▸ Heat the empty cooking space (without wire shelves, baking trays, etc.) us- ing the operating mode at 180 °C for about 30 minutes. As there is likely to be some smoke and odour given off, we recom-mend ventilating the room well during...
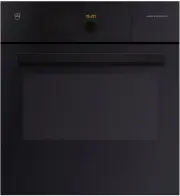
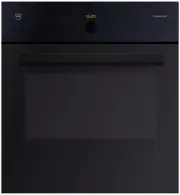
Page 18 - Appliance description; Construction
4 Appliance description 4.1 Construction 1 2 3 4 5 1 Operating and display elements 2 Ventilation opening 3 Door handle 4 Appliance door 5 Heatable appliance drawer * * Depending on model 18
Page 19 - Overview of touch buttons
4 Appliance description 4.2 Operating and display elements 12:00 곋2SHUDWLQJPRGHV 6WHDP 2 3 4 1 5 6 1 Display 4 Action buttons 2 Digital display (duration/timer/time) 5 Switch on the adjusting knob/ap-pliance 3 Menu buttons 6 V-ZUG Home (dependent onmodel) Overview of touch buttons Operating modes Go...
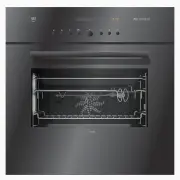
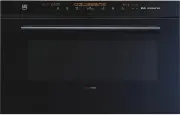
Page 20 - Cooking space
4 Appliance description 4.3 Cooking space Using protective inserts or aluminium foil can damage the appli-ance. Do not place any protective insert or aluminium foil on the floor ofthe cooking space. 11 6 5 13 14 1 2 3 4 9 7 2 4 1 3 12 10 8 1 Appliance door 8 Grill/top heat 2 Door seal 9 Water tank c...
Page 21 - Accessories; Dual enamel baking tray; Do not use the baking tray in the microwave and combi modes.
4 Appliance description 4.4 Accessories Incorrect handling can cause damage!Do not use knives or cutting wheels on the accessories. Do not use any metal accessories in the microwave and combimodes nor any baking tray or stainless steel tray. Dual enamel baking tray ▪ Baking tin for flans and biscuit...
Page 23 - Wire shelf; Using the wrong accessories can damage the appliance!; Hardened glass dish
4 Appliance description Wire shelf Using the wrong accessories can damage the appliance! 1 ▪ For standing roasting and baking tins on ▪ For standing meat, frozen pizza, etc. on ▸ Ensure that the cross strut 1 is to the back of the cooking space. It enables the food to be removedsafely from the cooki...
Page 24 - Heatable appliance drawer; Unauthorised storage of materials creates a fire hazard!
4 Appliance description Food probe ▪ For measuring the core temperature of food For recommended food probe temperatures, see «EasyCook». Not suitable for temperatures of over 230 °C. There must be a dis-tance between the food probe and the roof of the cooking space of atleast 5 cm. Special accessori...
Page 25 - Plate warmer
4 Appliance description ▸ Switch on the heatable appliance drawer by selecting . – The heatable appliance drawer switches off automatically when the setduration is over. 4.6 Plate warmer The «Plate warmer» is selectable if no heatable appliance drawer is installed. ▸ If the appliance is switched off...
Page 26 - Operating modes; Overview of operating modes; Uses
5 Operating modes 5.1 Overview of operating modes Do not use any metal accessories in the microwave and combimodes nor any baking tray or stainless steel tray. All the operating modes and fast heating are described below. Follow the advice given in «Tips and tricks» (see page 75) and in«EasyCook». 5...
Page 27 - Hot air
5 Operating modes 5.3 Top/Bottom heat Temperature range 30–230 °C Recommended value 200 °C Level 2 (or 1) The cooking space is heated by the top and bottom heating elements. Uses ▪ Classic operating mode for cooking and baking on one level ▪ Cakes, biscuits, bread and roasts Use a dark enamelled tra...
Page 28 - Hot air with steaming
5 Operating modes 5.5 Hot air with steaming Temperature range 80–230 °C Recommended value 180 °C Level 2 or 1 + 3 A heating element behind the back wall of the cooking space heats up the airinside the cooking space, which is circulated evenly. With condensing steam,the energy is transferred more eff...
Page 29 - PowerSteam; PowerRegeneration
5 Operating modes 5.6 PowerSteam Level 2 The cooking time is reduced as the food is microwaved as well as steamed. Uses ▪ Cooking vegetables, rice, cereal products and pulses Refer to the recommended cooking times in «EasyCook». 5.7 PowerRegeneration Level 2 Heating with steam and hot air cooks the ...
Page 30 - Microwave
5 Operating modes 5.8 Microwave Power range in levels from 50–700 W Recommended value 500 W/2 min. Level 2 Food and liquids are heated using microwaves. Uses ▪ Precooked foods ▪ Frozen and convenience foods ▪ Liquids Preparing eggs: ▸ Crack open the eggs and beat them before cooking. ▸ For fried egg...
Page 31 - Regeneration; PizzaPlus
5 Operating modes 5.9 Regeneration Temperature range 80–200 °C Recommended value 120 °C Level 2 or 1 + 3 The cooking space is heated by steam and hot air. The food is reheatedgently without drying it out. Uses ▪ Reheating precooked foods and convenience foods Possible to regenerate on several levels...
Page 32 - Grill; Grill-forced convection
5 Operating modes 5.11 Grill Temperature range 5 levels Recommended value Level 3 Level 3 or 4 The cooking space is heated by the grill element. Uses ▪ Flat food for grilling, e.g. steaks, chops, chicken parts, fish and sausages ▪ Gratinating ▪ Toast ▸ Place the food to be grilled directly on the wi...
Page 33 - Top/Bottom heat humid; Hot air humid
5 Operating modes 5.13 Top/Bottom heat humid Temperature range 30–230 °C Recommended value 200 °C Level 2 (or 1) The cooking space is heated by the top and bottom heating elements. Thesteam produced is largely retained in the cooking space. The food retains itsmoisture. Uses ▪ Bread, plaited bread, ...
Page 34 - Bottom heat; Fast heating
5 Operating modes 5.15 Bottom heat Temperature range 6 levels Recommended value Level 3 Level 2 (or 1) The cooking space is heated by the bottom heating element. Uses ▪ Baking flan bases ▪ Preserving Use a dark enamelled tray or a black tray or tin for crispy results. 5.16 Fast heating For fast heat...
Page 35 - Combi mode / PowerPlus; Switch off the combi mode if necessary.; PowerPlus ends during operation
5 Operating modes 5.17 Combi mode / PowerPlus Check the food from time to time during operation so that it doesnot burn. Switch off the combi mode if necessary. Thanks to PowerPlus, cooking times can be reduced as any operating modecan be combined with the microwave. Every PowerPlus level is allocat...
Page 36 - Overview of the PowerPlus levels; Intensity
5 Operating modes Overview of the PowerPlus levels Intensity Output Uses, e.g. Gentle 100–200 W Baking cakes, braising / roasting meat Moderate 300-400 W Cooking foods with fillings or gratinswith little toppings/liquid Intensive 500 W Cooking gratins / baked dishes with alot of toppings/liquid Supe...
Page 37 - Using the appliance; Adjusting knob functions
6 Using the appliance The different main menus and functions are selected by pressing the corres-ponding touch button. Selected touch buttons and functions are illuminated inwhite; other selectable functions are illuminated in orange.Settings and functions that cannot be selected or changed are grey...
Page 38 - Filling the water tank; Refilling water; Selecting and starting the operating mode
6 Using the appliance 6.1 Filling the water tank Do not use demineralised (filtered) or distilled water. ▸ If the appliance is switched off, first press the adjusting knob. ▸ Press the touch button. – The water tank is ejected. ▸ Remove the water tank to fill it. ▸ Fill the water tank with fresh, co...
Page 39 - Press and go; HWWHPSHUDWXUH
6 Using the appliance Press and go Once all the necessary settings for the operating mode have been made, abar appears in the display and counts down 20 seconds. If no further settingsare made during this time, operation starts automatically. If a setting ischanged, Press and go starts again. The du...
Page 42 - Food probe temperature; food probe temperature; Setting
6 Using the appliance 6.6 Food probe temperature Only use the supplied food probe.Do not clean the food probe in the dishwasher. Always keep theplug clean. The food probe is used to measure the temperature inside the food (referredto as the food probe temperature ). As soon as the food reaches the t...
Page 43 - Measuring the food probe temperature; Cancelling / ending the operating mode before time
6 Using the appliance Measuring the food probe temperature If you only wish to measure the food probe temperature without operationstopping automatically when the target temperature is reached, proceed as fol-lows: ▸ Select the desired operating mode and set the temperature and, if you wish, the dur...
Page 44 - Timer; Setting and starting the timer
6 Using the appliance ▸ Press the touch button and choose a new operating mode. 6.9 Timer The timer functions like an egg timer. It can be used at any time and inde-pendently of all other functions. Setting and starting the timer ▸ Press the touch button. ▸ Select . – A suggested value of «10mins» a...
Page 45 - End of operation
6 Using the appliance When the timer finishes When the set duration is up: – An acoustic signal is emitted. – «Timer finished» appears in the display. ▸ To close the message, select . Switching the timer off before time ▸ Press the touch button. ▸ Select . – The countdown to the remaining time appea...
Page 47 - Removing food from cooking space; The accessories get hot. Use protective gloves or oven cloths.; Switching the appliance off
6 Using the appliance Removing food from cooking space Risk of scalding! Hot steam or hot air may escape from the cooking space when theappliance door is opened. The accessories get hot. Use protective gloves or oven cloths. ▸ Take the food out of the cooking space when done. ▸ Any condensate or foo...
Page 48 - Emptying the water tank
6 Using the appliance – An acoustic signal is emitted. – Any running operating mode or application is ended; if switched on,the timer, cooking space illumination, heatable appliance drawer orplate warmer will remain active. – The following appears in the display: « Residual heat». – If the food prob...
Page 49 - Refer to the «Safety precautions» section.
7 Microwave 7.1 Note on use Refer to the «Safety precautions» section. Porcelain, ceramic and earthenware dishes may have cavities. Thesecan fill with water, causing them to crack. Follow the manufacturers' in-structions. Suitable for microwave and combi mode Not suitable for microwave and combi mod...
Page 50 - Tips for microwave mode; Microwave operation; Extending the operation
7 Microwave 7.2 Tips for microwave mode Do not switch the microwave mode on until you have put the foodin the cooking space. ▸ Cover food when just using the microwave mode to prevent it from drying out. Suitable covers include microwave food covers, glass or porcelain cov-ers and microwaveable film...
Page 51 - GourmetGuide; Recipe book
8 GourmetGuide The GourmetGuide encompasses several programmes which make prepar- ing meals as easy as possible for you. The following programmes can becalled up: Recipes Defrosting BakeOmatic Wellness * Professional baking Hygiene * Soft roasting Keep warm * RegenerateOmatic * * applies only to app...
Page 53 - In the course of the recipe; Aborting the recipe
8 GourmetGuide ▸ To start the recipe, select . – The recipe starts. – The display shows the current recipe step, the time remaining in thisstep and the entire duration of the recipe. – The digital display shows the remaining time for the current recipestep. In the course of the recipe In the course ...
Page 54 - Own recipes; Creating your own recipe
8 GourmetGuide 8.2 Own recipes Up to 24 of your own favourite recipes can be created and saved. A recipecan consist of several steps with any operating modes (including Professionalbaking), pauses and hold times, which run automatically once started. Youcan also change and save existing recipes. Cre...
Page 55 - Step duration; Aborting recipe entry/change
8 GourmetGuide – The overview of the available storage spaces is displayed. ▸ Select the desired (empty) storage space and confirm. ▸ Enter the recipe name using the on-screen keypad and confirm by pressing . – The recipe is now saved. – The following appears in the display: «Do you want to run the ...
Page 58 - BakeOmatic; Degree of browning
8 GourmetGuide 8.3 BakeOmatic BakeOmatic comprises applications for different food groups. The size andshape of the food are recognised and the duration and cooking space climateare adjusted automatically. BakeOmatic is suitable for the following foodsand dishes: Fresh aperitif nibbles Frozen pizza ...
Page 60 - Professional baking; Tips
8 GourmetGuide 8.4 Professional baking With professional baking , the cold cooking space is heated by a steam phase (about 10 minutes) and a hot air phase, which follows automatically.This makes yeast and puff pastries light and airy while also forming a nice,glistening crust. «Proofing» allows you ...
Page 61 - Selecting and starting professional baking; Soft roasting; How it functions
8 GourmetGuide Selecting and starting professional baking ▸ Put in the food. ▸ If the appliance is switched off, first press the adjusting knob. ▸ Press the touch button. ▸ Select . ▸ Select the desired application. – The operating mode settings are displayed. ▸ Set the temperature, duration and, if...
Page 62 - «Soft roasting seared»
8 GourmetGuide Soft roasting table for «Soft roasting with steam» and «Soft roastingseared» Cut of meat Degree of doneness Recommended target temperature °C With steam Seared Fillet of veal rare medium 54 58 58 62 Rump or loin of veal medium 59 63 Fillet of beef rare medium 49 53 53 57 Rib-eye or si...
Page 63 - «Soft roasting with steam»
8 GourmetGuide The food probe must be inserted as far into the middle of the meat aspossible to get a correct reading of the food probe temperature. Thetemperature inside the meat is crucial for optimal results at the end ofcooking. ▸ Put the wire shelf at level 2 and place the dish on it. ▸ Insert ...
Page 64 - Selecting and starting soft roasting
8 GourmetGuide Selecting and starting soft roasting The longer the meat is cooked, the more tender and succulent it be-comes. This applies particularly for thicker pieces of meat.The target temperature cannot be changed once soft roasting hasstarted. ▸ If the appliance is switched off, first press t...
Page 66 - RegenerateOmatic; Degree of moisture; Regeneration time
8 GourmetGuide 8.6 RegenerateOmatic How it functions With «RegenerateOmatic», food can be heated without having to set an op-erating mode, temperature or duration. The quantity and shape of the food arerecognised and the regeneration time and cooking space climate are adjustedindividually and automa...
Page 67 - Selecting and starting RegenerateOmatic
8 GourmetGuide Selecting and starting RegenerateOmatic Before starting, the cooking space should have cooled down and bedry in order to determine the optimum duration. The appliance door should not be opened during operation. The filled water tank must be in position in the water tank compart-ment. ...
Page 68 - Defrosting; Selecting and starting defrosting
8 GourmetGuide 8.7 Defrosting Different types of food can be defrosted using «Defrosting». After the de-sired quantity has been entered, the duration and cooking space climate areadjusted automatically. Selecting and starting defrosting No delayed start can be set. ▸ If the appliance is switched off...
Page 70 - Baby bottles
8 GourmetGuide 8.9 Hygiene * * * applies only to appliances which were produced after February 2016 orhave received a software update. You can sterilise containers using «Hygiene». The following applications are available: ▪ «Sterilise baby bottles» replaces the need to boil baby bottles in hot wate...
Page 71 - EasyCook; Overview of food groups
9 EasyCook EasyCook helps you to prepare any food simply and conveniently. After choosing the food group and food, the appliance suggests the suitable operat-ing modes or GourmetGuide applications, including the settings and accessor-ies. The brochure of the same name, which you received with the op...
Page 72 - Selecting foods and starting
9 EasyCook 9.2 Selecting foods and starting ▸ If the appliance is switched off, first press the adjusting knob. ▸ Press the touch button. – The overview of food groups is displayed. ▸ Select the food group. ▸ Select the desired type of food. ▸ If necessary, select the shape (whole, in pieces, etc.) ...
Page 73 - Favourites; Creating favourites
10 Favourites Up to 24 operating modes, GourmetGuide and EasyCook applications to-gether with the settings made can be saved as favourites. 10.1 Creating favourites ▸ Select an operating mode, GourmetGuide or EasyCook application. ▸ Make the settings. ▸ Press the touch button. – The favourites menu ...
Page 75 - Tips and tricks; Result
11 Tips and tricks 11.1 Unsatisfactory cooking result... ...when baking and roasting Result Solution ▪ The baking or roast looksgood on the outside but isstill doughy or raw on theinside. ▸ Next time, set a lower temperature and lengthen the operating time. ▪ The cake collapses. ▸ Check that the set...
Page 76 - General tips
11 Tips and tricks Result Solution ▪ The baking has brownedunevenly. ▸ Next time, set a lower temperature and ad- just the operating time. ▸ If using , , and , check that the levels used correspond to those recommen-ded in «EasyCook». ▸ Do not push baking tins or bulky foodstuff right to the back of...
Page 77 - Saving energy
11 Tips and tricks 11.3 Saving energy The and operating modes consume less energy than the and operating modes. ▸ Avoid opening the appliance door frequently. ▸ Only switch the illumination on when needed. ▸ For gratins, use the residual heat: for cooking times over 30 minutes, switch the appliance ...
Page 78 - User settings; Overview of user settings
12 User settings 12.1 Overview of user settings Language Assistance functions Display Temperature Date V-ZUG-Home(depending on model) Clock Childproof lock Notifications Appliance information Descale appliance Demo mode Water hardness Factory settings Volume 12.2 Adjusting user settings ▸ If the app...
Page 79 - Brightness; Date
12 User settings All user settings are retained in the event of a power failure. 12.3 Language The language in the display can be changed. Different languages are availablefor selection. 12.4 Display Brightness The brightness of the display can be changed. Background images You can turn the backgrou...
Page 80 - Clock; Time format
12 User settings 12.6 Clock The following time functions are available: ▪ Time ▪ Time format ▪ Time display ▪ Automatic daylight saving time adjustment ▪ Mains synchronization Time format The time can be displayed in the European 24-hour time format or the US12‑hour format (a.m./p.m.). The «12 h» se...
Page 81 - Mains synchronisation; Notifications; Volume
12 User settings Mains synchronisation Mains synchronisation synchronises the appliance clock with the mains fre-quency. Irregular mains frequency can cause the clock to not run correctly. Apulse generator inside the appliance is used when mains synchronisation isswitched off. 12.7 Notifications Aco...
Page 82 - Assistance functions; Illumination; Temperature; Temperature unit
12 User settings 12.11 Assistance functions Illumination The «Automatic» setting switches on the cooking space illumination: ▪ 3 minutes before a cooking process ends, e.g. in the case of an automaticprogramme or an operating mode with a set duration, ▪ if the operation is ended before time, i.e. ca...
Page 83 - Default value for soft roasting; Childproof lock
12 User settings Default value for soft roasting The default value is the target temperature that is automatically set when softroasting. With this user setting, it can be increased or decreased by up to4 °C; the setting then applies for all cuts of meat.Example: When using «Soft roasting seared» wi...
Page 84 - Demo mode
12 User settings 12.16 Demo mode In demo mode, almost all the appliance functions are available but it is notpossible to cook with the appliance. This ensures operating safety duringproduct demonstrations and consultations.It is only possible to switch demo mode on and off with a safety code. 12.17 ...
Page 85 - Care and maintenance; Risk of burns from hot surfaces!; Cleaning the exterior
13 Care and maintenance Risk of burns from hot surfaces! You should allow the appliance and the accessories to cool beforecleaning. Do not reach into the water tank compartment if the following ap-pears in the display: «Please do not remove the water tank». Improper use can result in damage to the a...
Page 86 - Cleaning the cooking space; Improper use can result in damage to the appliance!
13 Care and maintenance 13.2 Cleaning the cooking space Improper use can result in damage to the appliance! Do not bend the temperature sensor. Do not clean the microwave entry point with sharp objects as it issensitive to impacts. ▸ Clean the cooking space regularly, especially when food has been s...
Page 87 - Cleaning the appliance door; Cleaning the door seal; Replacing the door seal
13 Care and maintenance 13.3 Cleaning the appliance door Under no circumstances may the appliance door be removed, oth-erwise the protection against leaking microwaves is no longer guar-anteed.Do not use abrasive cleaning agents or cleaning aids such as steelwool, knives, glass scrapers, razor blade...
Page 88 - Cleaning the accessories and shelf guides; Improper use can cause damage!
13 Care and maintenance 13.7 Cleaning the accessories and shelf guides Improper use can cause damage! Do not clean the food probe and the water tank in the dishwasher. ▪ The glass dish, the stainless steel tray, the perforated cooking tray, the wireshelf and the shelf guides can be cleaned in the di...
Page 89 - Descaling; Water hardness; Read remaining operating time
13 Care and maintenance 13.8 Descaling How it functions Whenever steam is produced, depending on the hardness of the local watersupply (i.e. the limescale content of the water), limescale is deposited in theboiler.The appliance automatically detects when descaling is necessary and indic-ates this in...
Page 91 - Starting the descaling process; The appliance must have cooled down before descaling.
13 Care and maintenance Starting the descaling process The appliance must have cooled down before descaling. Remove accessories, dishes or other objects from the cookingspace.Do not leave the appliance unattended: During the descaling pro-cess, the descaler must be filled and the water tank must be ...
Page 93 - What to do if ...; ... the appliance is not working
14 Trouble-shooting 14.1 What to do if … This section lists faults that can be solved simply by following the instructionsgiven. If another fault is displayed or the fault cannot be remedied, please callCustomer Services. Before calling Customer Services, please note down the error messagein full. F...
Page 96 - ... the following appears in the display; Possible cause
14 Trouble-shooting ...the following appears in the display FX/EXX see operating instructionsFN XXX XXXXXX Possible cause Solution ▪ Various situations can leadto an error message. ▸ Cancel the error message by pressing the touch button. ▸ Disconnect from the power supply for about 1 minute. ▸ Reco...
Page 98 - After a power failure; Brief power failure during operation; Brief power failure during descaling; Prolonged power failure
14 Trouble-shooting 14.2 After a power failure The user settings remain unchanged. Brief power failure during operation – The current operation of the appliance is aborted. – The following appears in the display when the appliance is switchedon: «Power failure. Operation aborted». ▸ To confirm the m...
Page 100 - Accessories and spare parts
15 Accessories and spare parts The accessories listed below, as well as spare parts, can also be ordered inaddition to the scope of delivery of the appliance. Ordering is subject to a fee,except in the event of warranty claims. Please give the product family of theappliance and exact description of ...
Page 102 - Technical data; Dimensions; Electrical connection; Note for testing institutes; General note; Temperature measurement
16 Technical data Dimensions ▸ See installation instructions Electrical connection ▸ See identification plate 1 1 16.1 Note for testing institutes The energy efficiency class according to EN 50304/EN 60350 is determined using the and operating modes. Placing thermocouples between the appliance door ...
Page 103 - Product data sheet; Saving energy while cooking
16 Technical data 16.3 Product data sheet In accordance with EU Regulation No.: 66/2014 Brand – V-ZUG Ltd Type of appliance – Steam cooker Model designation – CSTMSLQ Mass of SMS 55 appliance kg 58 Mass of EURO 60 appliance kg 52 Number of cavities – 1 Heat source per cavity – Electric Volume per ca...
Page 104 - Reference to «Open Source» licence
16 Technical data 16.4 Automatic energy-saving stand-by To prevent unnecessary energy consumption, the appliance is equipped withan automatic energy-saving stand-by feature. To reduce power consumption to a minimum, select «Hide time» inthe user settings. Despite automatic energy-saving stand-by, al...
Page 106 - Index
17 Index A Aborting Changing recipes .............................. 55Creating your own recipe ................ 55Operating mode ................................ 43Recipes ............................................... 53 Accessories ..................................... 21, 100 Cleaning .........
Page 109 - Notes
Page 112 - Quick instructions; Active menu; Menu and action buttons
Quick instructions Here you will find an overview of key operating information. 12:00 곋2SHUDWLQJPRGHV 6WHDP Active menu Menu buttons Action buttons Press to switch on the appliance or to select/confirm Turn to set the temperature and time or to navigate within the menu Adjusting knob as a central op...