Page 2 - Type
2 Thank you for choosing to buy one of our products. Your appliance is made to high standards and is easy to use. Nevertheless, please take the time to read these operating instructions in order to familiarize yourself with the appliance and get the best use out of it. Please follow the safety preca...
Page 3 - Contents
3 Contents 1 Safety precautions 5 1.1 Symbols used . . . . . . . . . . . . . . . . . . . . . . . . . . . . . . . . . . . . . . . . . . . . . . 5 1.2 General safety precautions . . . . . . . . . . . . . . . . . . . . . . . . . . . . . . . . . . . . 6 1.3 Appliance-specific safety precautions . . . . ...
Page 5 - Safety precautions; Symbols used; Information and precautions that should be observed.
5 1 Safety precautions 1.1 Symbols used Denotes important safety precautions. Failure to observe said precautions can result in injury or in damage to the appliance or fittings! Information and precautions that should be observed. Information on disposal. Information about the Operating Instructions...
Page 6 - Safety precautions; General safety precautions
1 Safety precautions 6 1.2 General safety precautions • Read the operating instructions before using the appliance for the first time! • This appliance is not intended for use by persons (including children) with reduced physical, sensory or mental capabilities, or lack of experience and/or knowledg...
Page 7 - Appliance-specific safety precautions
1 Safety precautions 7 1.3 Appliance-specific safety precautions • WARNING: The appliance and its accessible parts get hot during use. Be careful not to touch the heating elements. • Children under 8 years of age must be kept away unless constantly supervised. • This appliance can be used by childre...
Page 9 - Instructions for use; Before using for the first time; Repair service
1 Safety precautions 9 1.4 Instructions for use Before using for the first time • The appliance must be installed and connected to the mains supply in accordance with the separate installation instructions. Have a qualified fitter/electrician carry out the necessary work. Correct use • The appliance...
Page 10 - Note on use
1 Safety precautions 10 Note on use • Use the childproof locking facility. • If the appliance is visibly damaged, do not use it. Contact our Customer Services. • If the appliance is not operating property, disconnect it from the mains power supply immediately. • Ensure there are no foreign bodies or...
Page 11 - How to avoid damaging the appliance
1 Safety precautions 11 Caution: Risk of injury! • Be careful not to put fingers in the door hinges. There is otherwise a risk of injury if the appliance door is moved. Particular care should be taken when children are around. • Only leave the appliance door open in the at-rest position. An open app...
Page 12 - Disposal; Packaging
12 2 Disposal Packaging • All packaging materials (cardboard, plastic film (PE) and polystyrene (EPS)) are marked and should, if possible, be collected for recycling and disposed of in an environmentally friendly way. Disconnection • Disconnect the appliance from the mains power supply. With a fixed...
Page 13 - Appliance description; Construction; Operating and display elements
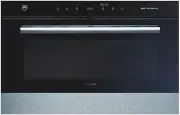
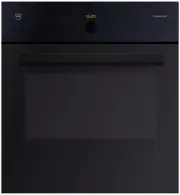
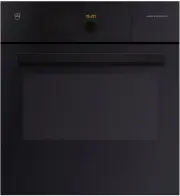
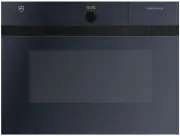
13 3 Appliance description 3.1 Construction 1 Operating and display elements 2 Ventilation opening 3 Door handle 4 Appliance door 123 4
Page 14 - Digital displays
3 Appliance description 14 3.2 Operating and display elements Digital displays Operating mode symbols Symbols Buttons Temperature TimeOperating timeSwitch-off timeTimer Hot air Grill Hot air humid Grill-forced convection Cooking space temperature Switch-off time Timer Time Operating time Illuminatio...
Page 15 - Cooking space
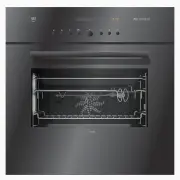
3 Appliance description 15 3.3 Cooking space Using protective inserts or aluminium foil can damage the appliance.Do not place any protective insert or aluminium foil on the cooking space floor. 1 Appliance door 5 Grill/Top heat 2 Door seal 6 Cooking space ventilation 3 Hot air fan 7 Cooking space te...
Page 16 - Accessories; Original TopClean baking tray
3 Appliance description 16 3.4 Accessories Original TopClean baking tray Wire shelf Special accessories Incorrect handling can cause damage!Do not use knives or cutting wheels to cut food in the accessories. • Baking tin for flans and biscuits • Use together with the wire shelf as a drip tray • If n...
Page 17 - Operating the appliance
17 4 Operating the appliance The operating mode, the cooking space temperature, the operating time, the switch-off time and various other functions can be selected – with the appliance switched off – by pressing the appropriate button once or more. • The symbol for the function selected illuminates ...
Page 18 - Using for the first time
4 Operating the appliance 18 4.1 Using for the first time Before operating the newly installed appliance for the first time, the following steps should be taken: ➤ Remove packaging and transport materials from the cooking space. ➤ If flashes in the display, turn the adjusting knob to set the time. ➤...
Page 19 - Selecting the operating mode; Operating modes; Selecting the cooking space temperature; Press the
4 Operating the appliance 19 4.2 Selecting the operating mode ➤ Press the button repeatedly until the desired operating mode flashes. – The recommended temperature flashes in the display. – The operating mode symbol and flash. Operating modes 4.3 Selecting the cooking space temperature ➤ Turn the ad...
Page 20 - Removing the cooked food from the cooking space
4 Operating the appliance 20 4.4 Checking and changing the cooking space temperature ➤ Press the button. – The cooking space temperature set flashes in the display. – The symbol flashes. ➤ Turn the adjusting knob to change the cooking space temperature. 4.5 Changing the operating mode A Press the bu...
Page 21 - User settings
21 5 User settings You can adjust the settings. ➤ With the appliance switched off, hold the adjusting knob depressed until – appears in the display. ➤ Press the adjusting knob to confirm. – appears in the display for «Childproof lock off». ➤ Turn the adjusting knob to select setting. ➤ Press the adj...
Page 22 - User settings; Possible settings
5 User settings 22 Possible settings off * on visible * invisible high * low off 12 h 24 h * ˚C * ˚F no change restore * Factory setting Temperature unit Acoustic signal Time display Time format Childproof lock Factory settings off on * Mains synchronisation
Page 23 - Childproof lock; Operating the appliance when the childproof lock is activated; Time display
5 User settings 23 5.1 Childproof lock The childproof lock is to prevent the appliance being inadvertently switched on. If the button is pressed when the childproof lock is activated, – a double acoustic signal is emitted, – nothing happens when the button is pressed. Operating the appliance when th...
Page 25 - Time functions; Setting and changing the time
25 6 Time functions The following time functions are available: • Time • Timer • Operating time – time-controlled switch-off of the appliance • Delayed start – time-controlled switch-on and switch-off of the appliance 6.1 Setting and changing the time ➤ Press the button. – The hour flashes in the di...
Page 26 - Timer; Setting
6 Time functions 26 6.2 Timer The timer functions like an egg timer. It can be used at any time and independently of all other functions. Setting ➤ Press the button. – flashes in the display. – The symbol flashes. ➤ Turn the adjusting knob to set the duration. The timer can be set for: • up to 10 mi...
Page 27 - Operating time
6 Time functions 27 Checking and changing ➤ Press the button. – The countdown to the time remaining flashes in the display. – The symbol flashes. ➤ Turn the adjusting knob to change the duration of the timer. Switching off before time ➤ Press the button 2×. – flashes in the display. – The symbol fla...
Page 29 - Delayed start; Setting the operating time
6 Time functions 29 6.4 Delayed start The delayed start is activated when for the operating mode selected both an operating time and a switch-off time are set.The appliance switches automatically on and off again at the desired times. ➤ Place the food in the cooking space. ➤ Select the desired opera...
Page 32 - Hot air; Use; Tips and tricks
32 7 Operating modes All the operating modes are described below. ➤ Place tins, moulds, etc. on the wire shelf. ➤ Push the original baking tray into the cooking space with the «sloped» side to the back. ➤ The desired operating mode can be selected by pressing the button once or more. 7.1 Hot air A h...
Page 33 - Hot air humid; Grill
7 Operating modes 33 7.2 Hot air humid A heating element behind the back wall of the cooking space heats up the air inside the cooking space, which is circulated evenly. The steam produced is largely retained in the cooking space. The food retains its moisture. Use • Savouries and biscuits on 2 leve...
Page 34 - Grill-forced convection
7 Operating modes 34 7.4 Grill-forced convection The cooking space is heated by the grill element. The hot air fan distributes the air evenly in the cooking space. Use • Large, bulky food for grilling • Gratins and baked dishes Temperature range 30–250 °C Recommended value 200 °C Level 1 or 2 Partic...
Page 35 - Baking and roasting; Result
35 8 Tips and tricks 8.1 Baking and roasting 8.2 Cakes Result Solution • The baking or roast looks good on the outside but is still doughy or raw on the inside. ➤ Next time, set a lower cooking space temperature and lengthen the operating time. Result Solution • The cake collapses. ➤ Check the setti...
Page 36 - Uneven browning; Saving energy
8 Tips and tricks 36 Uneven browning 8.3 Saving energy The operating mode consumes less energy than the operating mode. ➤ Avoid opening the appliance door frequently. ➤ Only switch the illumination on when needed. ➤ Use residual heat: for longer cooking times, i.e. over 30 minutes, switch the applia...
Page 37 - Care and maintenance; Cleaning the exterior; Remove any soiling or excess cleaning solution immediately.; Cleaning the door seal; Removing the door seal; Pull the seal slightly out at the corners and unhook.
37 9 Care and maintenance 9.1 Cleaning the exterior ➤ Remove any soiling or excess cleaning solution immediately. ➤ Clean the surfaces with a soft cloth dampened with water and a little washing-up liquid – for metallic surfaces rub in the direction of the original polish lines. Dry with a soft cloth...
Page 38 - Cleaning the appliance door; Removing the appliance door
9 Care and maintenance 38 9.3 Cleaning the appliance door ➤ Clean the appliance door with a soft cloth dampened with water and a little washing-up liquid. Dry with a soft cloth. Removing the appliance door ➤ Open the appliance door as far as it will go. ➤ Fold the clips 2 on both door hinges 1 forwa...
Page 39 - Cleaning the accessories and shelf guides; Removing and reassembling the shelf guides; Cleaning the cooking space
9 Care and maintenance 39 9.4 Cleaning the accessories and shelf guides • The wire shelf and shelf guides can be cleaned in the dishwasher. • The original baking tray can be cleaned in the dishwasher; however, this will affect its TopClean non-stick properties. Removing and reassembling the shelf gu...
Page 40 - Replacing the halogen light bulb
9 Care and maintenance 40 9.6 Replacing the halogen light bulb ➤ Remove the left shelf guide. ➤ Place a screw driver at the edge of the glass light cover in the middle and carefully remove the glass light cover 1 from its fixture. ➤ Remove the defective halogen light bulb. ➤ Carefully fit the new ha...
Page 41 - Technical data; ... the appliance is not working and the displays are not illuminated; Possible cause
41 10 Trouble-shooting This section lists faults that can be solved simply by following the instructions given. If another fault is displayed or the fault cannot be remedied, please call Customer Services. Before calling Customer Services: ➤ Please note down the serial number (FN) (see Technical dat...
Page 42 - Tips on settings
10 Trouble-shooting 42 … when grilling, thick smoke is given off … in the display appears … the following displays flash alternately and Possible cause Solution • The food is too near to the heating elements. ➤ Check that the level selected is as recom-mended in the Tips on settings . • The cooking ...
Page 44 - After a power failure
10 Trouble-shooting 44 10.2 After a power failure After a power failure – flashes in the display – the symbol flashes ➤ Turn the adjusting knob to set the hour. ➤ Press the adjusting knob to confirm. ➤ Turn the adjusting knob to set the minutes. ➤ Press the adjusting knob to confirm. The user settin...
Page 45 - Accessories and spare parts; Wire shelf
45 11 Accessories and spare parts Please give model number of the appliance and exact description of the accessory or spare part when ordering parts. Accessories Special accessories Spare parts Original TopClean baking tray Wire shelf Tips on settings For information see: www.vzug.com Shelf guidesle...
Page 46 - External dimensions; See Installation Instructions; Electrical connection; See identification plate; Note for testing institutes; operating mode. Placing thermocouples between the appliance; Measurement of the temperature in the cooking space; To reduce power consumption to a minimum, select
46 12 Technical data External dimensions ➤ See Installation Instructions Electrical connection ➤ See identification plate 1 Note for testing institutes The energy efficiency class according to EN 50304/EN 60350 is determined using the operating mode. Placing thermocouples between the appliance door ...
Page 47 - Notes
Page 49 - Index
49 14 Index A Accessories . . . . . . . . . . . . . . . 16, 45 Cleaning . . . . . . . . . . . . . . . . . . . 39 Acoustic signal . . . . . . . . . . . . 22, 24Appliance description . . . . . . . . . . 13Appliance door Removing . . . . . . . . . . . . . . . . . . 38 Appliance:Switching off . . . . . ...
Page 52 - Quick instructions; To set the time
Quick instructions Please first read the safety precautions in the operating instructions! To set the time ➤ Press the button. ➤ Turn the adjusting knob to set the hour. ➤ Press the button again. ➤ Turn the adjusting knob to set the minutes. To select the operating mode ➤ Press the button repeatedly...