Page 2 - Type
Thank you for choosing to buy one of our products. Your appliance is made tohigh standards and is easy to use. Nevertheless, please take the time to readthese operating instructions in order to familiarise yourself with the applianceand get the best use out of it. Please follow the safety precaution...
Page 3 - Table of contents
Table of contents 1 Safety precautions 6 1.1 Symbols used ........................................................................................................ 6 1.2 General safety precautions ................................................................................. 7 1.3 Appliance-spe...
Page 6 - Safety precautions; Symbols used; Information and precautions that should be observed.
1 Safety precautions 1.1 Symbols used Denotes important safety precautions.Failure to observe said precautions can result in injury or in damageto the appliance or fittings! Information and precautions that should be observed. Information on disposal Information about the operating instructions ▸ In...
Page 7 - Safety precautions; General safety precautions
1 Safety precautions 1.2 General safety precautions ▪ Read the operating instructions before using the appliance forthe first time! ▪ This appliance can be used by children aged 8 and aboveand by persons with reduced physical, sensory or mental cap-abilities, or lack of experience and/or knowledge, ...
Page 8 - Appliance-specific safety precautions
1 Safety precautions 1.3 Appliance-specific safety precautions ▪ READ THE IMPORTANT SAFETY PRECAUTIONS CAREFULLYAND RETAIN FOR FUTURE USE. ▪ WARNING: The appliance and its accessible parts get hotduring use. Be careful not to touch the heating elements. Chil-dren under 8 years of age must be kept aw...
Page 9 - Instructions for use; Before using for the first time; Correct use
1 Safety precautions ▪ This appliance is not intended for use in vehicles or on boardships or aircraft or in rooms where there are special condi-tions such as, for instance, a corrosive or explosive atmo-sphere (dust, steam or gas) or condensing moisture. ▪ See the «Accessories» section for the prop...
Page 12 - Disposal; Packaging; The
2 Disposal Packaging ▪ All packaging materials (cardboard, plastic film (PE) and polystyrene (EPS))are marked and should, if possible, be collected for recycling and disposedof in an environmentally friendly way. Disconnection ▪ Disconnect the appliance from the mains. With a fixed appliance, this i...
Page 13 - Using for the first time; Completing the initial set-up
3 Using for the first time Before operating the newly installed appliance for the first time, the followingsteps should be taken:▸ Remove packaging and transport materials as well as any protective blue film from out of the cooking space. ▸ Clean the cooking space and the accessories.▸ Press the pow...
Page 14 - Appliance description; Construction; Overview of touch buttons
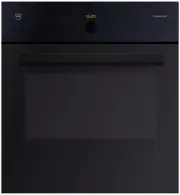
4 Appliance description 4.1 Construction 1 3 4 2 1 Operating and display elements 2 Ventilation opening 3 Door handle 4 Appliance door 4.2 Operating and display elements 12:00 곋2SHUDWLQJPRGHV 7RSERWWRPKHDW 2 3 4 1 5 1 Display 4 Action buttons 2 Digital display (duration/timer/time) 5 Adjusting knob ...
Page 15 - TopClean baking tray
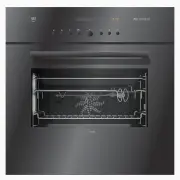
4 Appliance description 4.3 Cooking space Using protective inserts or aluminium foil can damage the appliance. Do not place any protective insert or aluminium foil on the floor of thecooking space. 8 7 9 1 3 1 2 3 4 6 10 2 5 1 Appliance door 6 Cooking space ventilation 2 Door seal 7 Grill/top heat 3...
Page 17 - Appliance description; Plate warmer; ▸ Press the
4 Appliance description 4.5 Plate warmer ▸ If the appliance is switched off, first press the adjusting knob.▸ Put the wire shelf at level 1 and place the tableware on it. ▸ Press the touch button. ▸ Set the required duration. Select a duration of at least 1 hour. ▸ Set the end time if necessary.▸ Sw...
Page 18 - Operating modes; Overview of operating modes; Hot air; Uses
5 Operating modes 5.1 Overview of operating modes All the operating modes and fast heating are described below. Follow the advice given in «Tips and tricks» (see page 45) and in«EasyCook». 5.2 Top/Bottom heat Temperature range 30–280 °C Recommended value 200 °C Level 1 or 2 The cooking space is heat...
Page 19 - PizzaPlus; Grill
5 Operating modes Select a lower temperature (reduce by approximately 20 °C) than for as the heat transfer is more efficient. 5.4 PizzaPlus Temperature range 30–250 °C Recommended value 200 °C Level 2 (or 1) The cooking space is heated by hot air and bottom heat. The base of the foodis baked particu...
Page 20 - Grill-forced convection; Top/Bottom heat humid
5 Operating modes 5.6 Grill-forced convection Temperature range 30–250 °C Recommended value 200 °C Level 2 or 3 The cooking space is heated by the grill element. The hot air fan distributesthe air evenly in the cooking space. Uses ▪ Suitable for a whole chicken ▪ Large, bulky food for grilling ▸ Put...
Page 21 - Hot air humid; Bottom heat
5 Operating modes 5.8 Hot air humid Temperature range 30–250 °C Recommended value 180 °C Level 1 + 3 or 2 A heating element behind the back wall of the cooking space heats up the airinside the cooking space, which is circulated evenly. The steam produced islargely retained in the cooking space. The ...
Page 22 - Fast heating
5 Operating modes 5.10 Fast heating For fast heating , the cooking space is heated with hot air and bottom heat, which shortens the preheating process. Fast heating can be used with the fol-lowing operating modes: and . ▸ Select the desired operating mode and adjust the settings.▸ To start the opera...
Page 23 - Using the appliance; Adjusting knob functions; Selecting and starting the operating mode
6 Using the appliance The different main menus and functions are selected by pressing the corres-ponding touch button. Selected touch buttons and functions are illuminated inwhite; other selectable functions are illuminated in orange.Settings and functions that cannot be selected or changed are grey...
Page 24 - Press and go; Display overview; Checking and changing the settings
6 Using the appliance Press and go Once all the necessary settings for the operating mode have been made, abar appears in the display and counts down 20 seconds. If no further settingsare made during this time, operation starts automatically. If a setting ischanged, Press and go starts again. The du...
Page 25 - Before setting the delayed start
6 Using the appliance 6.3 Setting a duration The operating mode selected ends automatically when the operating time isup.▸ Select the desired operating mode.▸ Select in the operating mode settings. ▸ Set the desired duration – max. 9 hours and 59 minutes – and confirm. – The duration is displayed in...
Page 26 - Example; Food probe temperature; food probe temperature; Setting
6 Using the appliance – The appliance remains switched off until 3 minutes before the auto-matic start of operation. ▸ Check and change the settings (see page 24). Example ▸ Select the operating mode and 180°C. ▸ At 8:00, set a duration of 1 hour and 15 minutes.▸ Set the end time to 11:30. – The app...
Page 27 - Measuring the food probe temperature; Cancelling/ending the operating mode before time
6 Using the appliance – Operation ends automatically once the target temperature has beenreached – see also End of operation (see page 29). If the meat is left in the cooking space after having switched off theappliance, the food probe temperature will continue to rise due to theresidual heat. Measu...
Page 28 - Timer; Setting and starting the timer
6 Using the appliance If an operating mode is already running: ▸ Select or press the touch button. – The set operating mode is cancelled. ▸ Press the touch button and select a new operating mode. 6.8 Timer The timer functions like an egg timer. It can be used at any time and inde-pendently of all ot...
Page 29 - End of operation
6 Using the appliance When the timer finishes When the set duration is up: – An acoustic signal is emitted. – «Timer finished» appears in the display. ▸ To close the message, select . Switching the timer off before time ▸ Press the touch button. – The countdown to the time remaining appears in the d...
Page 30 - Removing food from cooking space; Switching the appliance off
6 Using the appliance The food can be kept warm with residual heat for some time. As soonas the temperature falls below 80 °C, all the displays go out. If at thispoint the food probe is still plugged in, the displays only go out whenthe food probe is unplugged. *The cooling fan can continue to run. ...
Page 32 - GourmetGuide; Recipe book; Starting a recipe
7 GourmetGuide The GourmetGuide encompasses several programmes which make prepar- ing meals as easy as possible for you. The following programmes can becalled up: Recipes Soft roasting BakeOmatic Keep warm * * Depending on the software version 7.1 Recipe book A recipe book contains recipes which are...
Page 33 - Own recipes; Creating your own recipe
7 GourmetGuide – The digital display shows the remaining time for the current recipestep. In the course of the recipe In the course of the recipe, it may be necessary to open the appliance door,e.g. to turn over the food or to spread a topping over it. In such an instance,operation is paused and the...
Page 34 - Step duration
7 GourmetGuide If you are only making temperature settings, this step takes as long asis necessary for the cooking space to reach the required temperature.This represents the preheating process. ▸ To confirm the settings, select .▸ To add a new step, select .▸ Set an operating mode, pause or hold ti...
Page 35 - Cancelling recipe entry/change; Ending a step before time; Changing a step
7 GourmetGuide Cancelling recipe entry/change ▸ Select in the overview of the set steps. – The following appears in the display: «Do you really want to cancel therecipe entry?» ▸ To cancel the recipe entry, select «Yes». – The menu for your own recipes or, if a recipe from a recipe book waschanged, ...
Page 36 - Deleting your own recipe
7 GourmetGuide Deleting a step ▸ Select . – An overview of the steps in the recipe is displayed. ▸ Select the step. – The following appears in the display: «Do you want to delete thisstep?» ▸ To delete the step, select «Yes». – The step is deleted. Saving a changed recipe ▸ Select . ▸ Select storage...
Page 37 - BakeOmatic; Degree of browning; Preheating
7 GourmetGuide 7.3 BakeOmatic BakeOmatic comprises applications for different food groups. The size and shape of the food are recognized and the duration and cooking space climateare adjusted automatically. BakeOmatic is suitable for the following foodsand dishes: Fresh aperitif nibbles Fresh pizza ...
Page 38 - Selecting and starting BakeOmatic; Soft roasting; How it functions
7 GourmetGuide Selecting and starting BakeOmatic A delayed start is only possible for applications where preheating isnot required and is only suitable for food that does not need to be re-frigerated or to rise. ▸ If the appliance is switched off: first press the adjusting knob. ▸ Press the touch bu...
Page 39 - Cut of meat
7 GourmetGuide Tips for an optimal result ▪ Take the meat out of the refrigerator some 30–60 minutes before soft roast-ing. ▪ Weight of meat: 500–2000 g ▪ Meat thickness: at least 4 cm ▪ Quality: lean, high-quality meat Soft roasting table for «Soft roasting seared» Cut of meat Degree of doneness Re...
Page 40 - Selecting and starting soft roasting
7 GourmetGuide ▸ Then place the meat in a glass or porcelain roasting dish. If you do not intend to sear the meat until after the soft roasting, lowerthe recommended target temperature by around 3–4 °C. ▸ Insert the food probe into the meat so that the tip is in the centre of the thickest part. The ...
Page 42 - EasyCook; Overview of food groups
8 EasyCook EasyCook helps you to prepare any food simply and conveniently. After choosing the food group and food, the appliance suggests the suitable operat-ing modes or GourmetGuide applications, including the settings and accessor-ies. The brochure of the same name, which you received with the op...
Page 43 - Selecting and starting foods
8 EasyCook 8.2 Selecting and starting foods ▸ If the appliance is switched off, first press the adjusting knob. ▸ Press the touch button. – The overview of food groups is displayed. ▸ Select the food group.▸ Select the desired type of food.▸ If necessary, select the shape (whole, in pieces, etc.) of...
Page 44 - Favourites; Creating favourites
9 Favourites Up to 24 operating modes, GourmetGuide and EasyCook applications to-gether with the settings made can be saved as favourites. 9.1 Creating favourites ▸ Select an operating mode, GourmetGuide or EasyCook application.▸ Make the settings. ▸ Press the touch button. – The favourites menu ope...
Page 45 - Tips and tricks; ... when baking and roasting; Result
10 Tips and tricks 10.1 Unsatisfactory cooking result... … when baking and roasting Result Solution ▪ The baking or roast looksgood on the outside but isstill doughy or raw on theinside. ▸ Next time, set a lower temperature and lengthen the operating time. ▪ The cake collapses. ▸ Check that the sett...
Page 46 - Saving energy
10 Tips and tricks 10.2 Saving energy The and operating modes consume less energy than the and operating modes.▸ Avoid opening the appliance door frequently. ▸ Only switch the illumination on when needed.▸ For gratins, use the residual heat: for cooking times over 30 minutes, switch the appliance of...
Page 47 - User settings; Overview of user settings; 괫8VHUVHWWLQJV
11 User settings 11.1 Overview of user settings Language Assistance functions Display Temperature Date Childproof lock Clock Appliance information Notifications Demo mode Pyrolytic self-cleaning (depending on model) Factory settings Loudness 11.2 Adjusting user settings ▸ If the appliance is switche...
Page 48 - Brightness; Date
11 User settings 11.3 Language The language in the display can be changed. Different languages are availablefor selection. 11.4 Display Brightness The brightness of the display can be changed. Background images You can turn the background image display on and off. If background imagesare activated, ...
Page 49 - Notifications
11 User settings Time format The time can be displayed in the European 24-hour time format or the US12‑hour format (a.m./p.m.). Time display With the «Show time» setting (factory setting), the time is dimmed between00:00 and 06:00 (24-hour format) or 12:00 a.m. and 06:00 a.m. (12-hourformat).If «Hid...
Page 50 - Assistance functions; Illumination; Temperature; Temperature unit
11 User settings 11.10 Assistance functions Illumination The «Automatic» setting switches on the cooking space illumination: ▪ 3 minutes before a cooking process ends, e.g. in the case of an automaticprogramme or an operating mode with a set duration, or ▪ if the operation is ended before time, i.e....
Page 51 - Childproof lock; Under; Demo mode
11 User settings Default value for soft roasting The default value is the target temperature that is automatically set when softroasting. With this user setting, it can be increased or decreased by up to4 °C; the setting then applies for all cuts of meat.Example: When using «Soft roasting seared» wi...
Page 52 - Care and maintenance; Risk of burns from hot surfaces!; Cleaning the exterior; ▸ Wipe dry with a soft cloth.; Cleaning the cooking space; Damage to the appliance from incorrect treatment!; Never clean appliances with pyrolysis using oven cleaner; as the surface could otherwise be damaged.
12 Care and maintenance Risk of burns from hot surfaces! Allow the appliance and the accessories to cool down before cleaningthem. Damage to the appliance from incorrect treatment! Do not use any abrasive or caustic cleaning agents, metal scrapersthat are sharp or scratch, steel wool, abrasive scour...
Page 53 - Cleaning the appliance door; Removing the appliance door; Reassembling the appliance door; Cleaning the door seal
12 Care and maintenance 12.3 Cleaning the appliance door ▸ Clean the appliance door with a soft cloth dampened with water and a little washing-up liquid. ▸ For appliances without handles, ensure that water does not run into the handle openings. ▸ Dry with a soft cloth. Removing the appliance door Ri...
Page 55 - Replacing the halogen light bulb
12 Care and maintenance ▸ Ensure that only the thinner part 4 of the seal is pressed into the groove; the thicker part 5 must not be in the groove. 4 5 ▸ Starting from the bottom, press the seal evenly into the groove. 12.7 Replacing the halogen light bulb WARNING: Risk of electric shock! Disconnect...
Page 56 - Cleaning the accessories and shelf guides; Incorrect handling can cause damage!; Pyrolytic self-cleaning; Danger of explosion through deposits and cleaning agents!
12 Care and maintenance 12.8 Cleaning the accessories and shelf guides Incorrect handling can cause damage! Do not clean the food probe in the dishwasher. ▪ The wire shelf and shelf guides can be cleaned in the dishwasher. ▪ The baking tray can be cleaned in the dishwasher; however, this will affect...
Page 58 - 2 Care and maintenance; Cancelling; ▸ Select in the display.; End
12 Care and maintenance Cancelling ▸ Select in the display. – Pyrolytic self-cleaning is cancelled. ▸ The residual heat appears in the display.▸ The appliance door remains locked until the temperature drops below 300 °C. End The appliance door cannot be opened until the temperature has dropped be-lo...
Page 59 - What to do if ...
13 Trouble-shooting 13.1 What to do if … This section lists faults that can be solved simply by following the instructionsgiven. If another fault is displayed or the fault cannot be remedied, please callCustomer Services. Before calling Customer Services, please note down the error mes-sage in full....
Page 62 - ... the following appears in the display; Possible cause; After a power failure; Brief power failure during operation
13 Trouble-shooting … the following appears in the display UX/EXX see operating instructionsFN XXX XXXXXX Possible cause Solution ▪ An interruption in thepower supply. ▸ Cancel the error message by pressing the button. ▸ Disconnect from the power supply for about 1 minute. ▸ Reconnect the power sup...
Page 64 - Accessories and spare parts; Accessories; Special accessories; For information see:
14 Accessories and spare parts The accessories listed below, as well as spare parts, can be ordered in addi-tion to the scope of delivery of the appliance. Ordering is subject to charge,except in the event of warranty claims. Please give the product family of theappliance and exact description of th...
Page 65 - 4 Accessories and spare parts; Spare parts; Halogen light bulb
14 Accessories and spare parts 14.3 Spare parts Shelf guides left/right Halogen light bulb Door seal Door seal forpyrolytic appliances The halogen light bulb is also available from specialist retailers. 65
Page 66 - Technical data; Dimensions; Note for testing institutes
15 Technical data Dimensions ▸ See installation instructions Electrical connection ▸ See identification plate 1 1 15.1 Note for testing institutes The energy efficiency class according to EN 50304 / EN 60350 is determinedusing the and operating modes. Placing thermocouples between the appliance door...
Page 67 - Saving energy while cooking; EcoStandby
15 Technical data Energy consumption in hot air / forced con-vection mode 2 ) kWh/ cycle 0.65 | 0.66 Energy-efficiency index per cavity 3 ) – 85.5 | 86.8 Measurement and calculation methods used – IEC 60350 1 ) Required to heat a standardized load in cavity 2 ) Required to heat a standardized load i...
Page 68 - Index
16 Index A Accessories ............................................ 15, 64 Cleaning .............................................. 56 Acoustic signals ............................................ 49 Appliance door Cleaning .............................................. 53Removing ....................
Page 71 - Appliance; Your repair order
17 Service & Support The «Troubleshooting» chapter provides valuable information for dealing with minor operating faults. This saves you the time, effort and potential cost of having to call out a service technician. Information on the V-ZUG warranty can be found at www.vzug.com →Service →Warran...
Page 72 - Quick instructions; Here you will find an overview of key operating information.; Active menu; Menu and action buttons
Quick instructions Here you will find an overview of key operating information. Active menu Action buttons Menu buttons 12:00 곋2SHUDWLQJPRGHV 7RSERWWRPKHDW Press to switch on the appliance or to select/confirm Turn to set the temperature and time or to navigate within the menu Adjusting knob as a ce...