Page 2 - – Describes how the appliance reacts to the steps taken.; Validity; Variations depending on the model are noted in the text.
2 Thank you for choosing to buy one of our products. Your appliance is made to high standards and is easy to use. Nevertheless, please take the time to read these operating instructions in order to familiarize yourself with the appliance and get the best use out of it. Please follow the safety preca...
Page 3 - Contents; Safety precautions
3 Contents Safety precautions 5 Before using for the first time . . . . . . . . . . . . . . . . . . . . . . . . 5 Correct use . . . . . . . . . . . . . . . . . . . . . . . . . . . . . . . . . . . . . . 6 Children in the home . . . . . . . . . . . . . . . . . . . . . . . . . . . . . . 6 Note on use ....
Page 4 - ... Contents
… Contents 4 Operating modes 30 Fast heating . . . . . . . . . . . . . . . . . . . . . . . . . . . . . . . . . . . . . 34 Tips on settings 35 Optimal use . . . . . . . . . . . . . . . . . . . . . . . . . . . . . . . . . . . . . 35 Cooking/Baking tables . . . . . . . . . . . . . . . . . . . . . . . ....
Page 5 - In accordance with the requirements of IEC 60335-1:; Before using for the first time; Make the desired user settings.
5 Safety precautions In accordance with the requirements of IEC 60335-1: 䡲 This appliance is not intended for use by persons (including children) withreduced physical, sensory or mental capabilities, or lack of experience andknowledge, unless supervised or unless they have been given instructionconc...
Page 6 - ... Safety precautions; Correct use; Never use the appliance to dry animals, textiles or paper!; Children in the home; Use the childproof locking facility.
… Safety precautions 6 Correct use 䡲 The appliance is designed for use in the home for preparing food. Underno circumstances, for instance, flambé or cook food using a lot of fat in thecooking space! No liability is assumed for any damage caused by improp-er or incorrect use. 䡲 Never use the applian...
Page 7 - Note on use
… Safety precautions 7 Note on use 䡲 If the appliance is visibly damaged, do not use it. Contact our CustomerServices. 䡲 If the appliance is not operating property, disconnect it from the powersupply immediately. 䡲 Ensure the mains cables of other electrical appliances do not get caughtin the door o...
Page 9 - How to avoid damaging the appliance; Close the appliance door carefully.
… Safety precautions 9 Caution: Danger of injury! 䡲 Be careful not to put fingers in the door hinges, there is otherwise a risk ofinjury if the appliance door is moved. Particular care should be taken whenchildren are around. 䡲 Only leave the appliance door open in the at-rest position. An openappli...
Page 10 - Appliance description; Construction; Operating and display elements
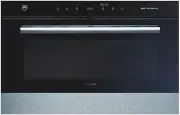
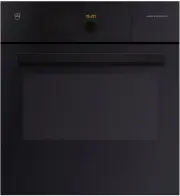
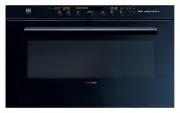
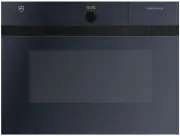
10 Appliance description Construction 1 Operating and display elements 2 Ventilation opening 3 Door handle 4 Appliance door 5 Appliance/Warming drawer * * Depending on the model 1 23 4 5
Page 11 - Buttons
… Appliance description 11 Operating and display elements Buttons Displays Symbols Operating modes Self-cleaning * Depending on the model Warming drawer * Adjusting knob Illumination Timer Cooking space temperature Time, operating time, switch-off time Operating mode Off Temperature Time, operating ...
Page 12 - Cooking space
… Appliance description 12 Cooking space Do not place any protective insert or aluminium foil on the floor of the cooking space. 1 Appliance door 5 Grill/Top heat 2 Door seal 6 Cooking space ventilation 3 Illumination 7 Cooking space temperature sensor 4 Hot air fan 8 Levels (labelled) The bottom he...
Page 13 - Accessories; Original TopClean baking tray
… Appliance description 13 Accessories The baking trays and wire shelves are inserted into the oven between the two rails of a shelf runner.The wire shelves have non-tip safety notches which prevent them being pulled right out when they only need to be partially pulled out. The wire shelves can then...
Page 14 - ... Appliance description; Round TopClean baking tray; Serves as a baking tin for flans and quiches.; Porcelain dish; For keeping food warm.; Roller runner
… Appliance description 14 The following accessories are not included in the scope of delivery. Round TopClean baking tray 䡲 Serves as a baking tin for flans and quiches. Available in 3 different sizes Porcelain dish 䡲 For preparing various dishes such as lasagne, potato gratin, etc. 䡲 For grilling ...
Page 15 - Operating the appliance
15 Operating the appliance The operating mode, the cooking space temperature, the operating time, the switch-off time and various other functions can be selected by pressing the appropriate button once or more. 䡲 The symbol for the function selected illuminates or flashes. 䡲 A recommendation flashes...
Page 18 - ... Operating the appliance; Removing food from the cooking space; Take the cake out of the cooking space when it is done.; Switching off; Press the
… Operating the appliance 18 Removing food from the cooking space A Take the cake out of the cooking space when it is done. Switching off A Press the button. – The and symbols go out. A To prevent corrosion, leave the appliance door open in the at-rest position until the cooking space has cooled dow...
Page 19 - User settings
19 User settings You can adjust the settings. A With the appliance switched off, hold the adjusting knob depressed for 5 seconds. – appears in the digital display. A Press the adjusting knob to confirm. – appears in the digital display for «Childproof locke off». A Turn the adjusting knob to select ...
Page 20 - ... User settings; Possible settings
… User settings 20 Possible settings off * on visible * invisible high * low off 12 h 24 h * ˚C * ˚F no change restore * Factory setting Temperature unit Acoustic signal Time display Time format Childproof lock Factory settings
Page 21 - Childproof lock; Operating the appliance when the childproof lock is activated; Time display
… User settings 21 Childproof lock The childproof lock is to prevent the appliance being inadvertently switched on. If the or button are pressed when the childproof lock is activated: – A double acoustic signal is emitted. – Nothing happens when the button is pressed. Operating the appliance when th...
Page 23 - Time functions; Setting and changing the time
23 Time functions The following time functions are available: 䡲 Time 䡲 Timer – can be used at any time and independently of all other functions 䡲 Operating time – time-controlled switch-off of the appliance 䡲 Delayed start – time-controlled switch-on and switch-off of the appliance Setting and chang...
Page 24 - Timer; Setting
… Time functions 24 Timer The timer functions like an egg timer. It can be used at any time and independently of all other functions. Setting A Press the button. – flashes in the digital display. – The symbol flashes. A Turn the adjusting knob to set the timer duration. The timer can be set for: 䡲 u...
Page 25 - Switching off before time; Operating time
… Time functions 25 Switching off before time A Press the button 2×. – flashes in the digital display. – The symbol flashes. A Press the adjusting knob to confirm. Operating time The operating mode selected automatically switches off when the operating time is up. Setting A Select the desired operat...
Page 27 - Delayed start; Setting the operating time
… Time functions 27 Delayed start The delayed start is activated when for the operating mode selected both an operating time and a switch-off time are set. The appliance switches automat-ically on and off again at the desired times. A Place the food in the cooking space. A Select the desired operati...
Page 30 - Operating modes
30 Operating modes A Follow the advice in 'Tips on settings' and in 'Tips and tricks'. A Press the button once or more to select the desired operating mode. Operating mode Symbol Temperature range Recommended temperature Level Top/Bottom heat 30–300 °C 200 °C 2 (or 1) Bottom heat 30–250 °C 200 °C 2 ...
Page 32 - ... Operating modes
… Operating modes 32 Operating mode Symbol Temperature range Recommended temperature Level Hot air humid 30–280 °C 180 °C 2 1 + 3 (or 1 + 2 + 3) PizzaPlus 30–280 °C 200 °C 2 (or 1) Grill 30–300 °C 250 °C 3 or 4 Grill-forced convection 30–280 °C 200 °C 2 or 3
Page 34 - Fast heating
… Operating modes 34 Fast heating Fast heating can be used to shorten the preheating time. Fast heating can be used only with the / / and operating modes. A Select the desired operating mode and cooking space temperature. A Hold the adjusting knob depressed for 2 seconds. – A single acoustic signal ...
Page 35 - Tips on settings; Symbols used; Optimal use
35 Tips on settings Symbols used Optimal use The recommended cooking space temperatures given in older recipe books are likely to be too high and the recommended shelf levels in the cooking space not ideal. The following tables show how to get the best use out of the appliance. Operating mode Cookin...
Page 36 - ... Tips on settings; Cooking/Baking tables; Cakes
… Tips on settings 36 Cooking/Baking tables A Always push the «sloped» side of the original baking tray right to the back of the cooking space. Cakes Ring cake (chocolate, carrot, nut, marbled, etc.) 165–175 yes Torte (chocolate, carrot, nut, etc.) 170–180 yes Whisked sponge cake 180–190 yes Roulade...
Page 38 - Savouries and biscuits
… Tips on settings 38 Savouries and biscuits * After baking, allow to dry over night. Aperitif nibbles 190–200 yes 180–190 yes Puff pastries with a filling (ham, nut, etc.) 170–190 yes Yeast pastries 170–190 yes Eclairs, profiteroles 160–180 yes Macaroons 160–180 yes Brunsli (chocolate almond spice ...
Page 40 - Flans and pizzas
… Tips on settings 40 Flans and pizzas A With frozen or fresh fruit that is very juicy add the glaze after the first 15–20 minutes. * According to the manufacturer’s instructions. Fruit flan 200–210 yes 170–190 yes 180–190 yes Pizza (fresh) 200–220 yes 200–220 yes 190–200 yes Pizza (frozen) * – – – ...
Page 42 - Bread and plaited bread
… Tips on settings 42 Bread and plaited bread Baked dishes and gratins Bread 200–210 5 mins. 190–200 5 mins. Bread rolls 210–220 5 mins. 190–200 5 mins. Plaited bread 190–200 5 mins. 170–190 5 mins. Baked dish (sweet) 190–200 yes Gratin (vegetable, meat, potato) 190–200 yes Lasagne, moussaka 200–210...
Page 44 - Meat
… Tips on settings 44 Meat * Turn halfway through the cooking time. Shoulder of veal 200–210 yes Roast beef 200–220 yes Shoulder of beef 180–190 yes Neck of pork 200–210 yes Shoulder of pork, roasted 180–190 yes Shoulder of pork, braised 210–220 yes Leg of lamb 210–220 yes Meat loaf 190–210 yes Flei...
Page 46 - Poultry and fish
… Tips on settings 46 Poultry and fish * Turn halfway through the cooking time. Low temperature cooking Cooking using a Römertopf (clay cooking pot) Whole chicken * 180–190 no Chicken, 4 halves* 220–230 5 mins. Chicken leg * 250 5 mins. Whole fish (trout, gilthead seabream, etc.) * 200–220 yes Fille...
Page 48 - Desiccating and drying; Clean and chop the fruit, mushrooms or herbs into small pieces.
… Tips on settings 48 Desiccating and drying A Only use undamaged, ripe fruit, fresh mushrooms and herbs. A Clean and chop the fruit, mushrooms or herbs into small pieces. A Line the original baking trays or wire shelf with baking paper, spread the food on them and put in the cooking space at the ap...
Page 51 - Tips and tricks; Hot air; Result
51 Tips and tricks Hot air Baking and roast Cakes Result Solution 䡲 The baking or roast looks good on the outside but is still doughy or raw on the inside. A Next time, set a lower cooking space tem-perature and lengthen the operating time. Result Solution 䡲 The cake collapses. A Check settings with...
Page 52 - Uneven browning; Saving energy
… Tips and tricks 52 Uneven browning Saving energy The operating mode consumes comparatively less energy than the operating mode. A Avoid opening the appliance door frequently. A Only switch the illumination on if needed. A Use residual heat: for longer cooking times, i.e. over 30 minutes, switch th...
Page 53 - Optional; Warming drawer
53 Optional Warming drawer The warming drawer can be used to preheat the tableware or to briefly keep covered food warm. A Press the button to switch the warming drawer on and off. A Preheat the tableware for about 1 hour. Do not store food or combustible or flammable material in the warming drawer!...
Page 54 - Care and maintenance; Cleaning the exterior; Remove any soiling or excess cleaning solution immediately.; Appliance/Warming drawer; The drawer can be removed for ease of cleaning.
54 Care and maintenance Cleaning the exterior A Remove any soiling or excess cleaning solution immediately. A Clean the surface with a soft cloth dampened with water and a little washing-up liquid – for metallic surfaces rub in the direction of the original polish lines. Dry with a soft cloth. A Cle...
Page 55 - Cleaning the appliance door; Removing the appliance door
… Care and maintenance 55 Cleaning the appliance door A Clean the appliance door with a soft cloth dampened with water and a little washing-up liquid. Dry with a soft cloth. Removing the appliance door A Open the appliance door as far as it will go. A Fold the clips 2 on the door hinges 1 forward. A...
Page 56 - ... Care and maintenance; Removing the shelf guides
… Care and maintenance 56 Removing the shelf guides A Press the shelf guides at the top to the back and remove from the opening. A Swing the shelf guides down into the middle of the cooking space and remove at the bottom from the opening. A Reassemble in the reverse order.
Page 57 - Replacing the door seal
… Care and maintenance 57 Replacing the door seal A Remove the damaged door seal. A Clean the groove 3 . A Press the new door seal 1 into the groove, with the seam joint 2 at centre bottom. A Ensure that only the thinner part 4 of the seal is pressed into the groove; the thicker part 5 of the seal s...
Page 58 - Cleaning the accessories; The wire shelf and shelf guides can be cleaned in the dishwasher.; Cleaning the cooking space
… Care and maintenance 58 Cleaning the accessories 䡲 The wire shelf and shelf guides can be cleaned in the dishwasher. 䡲 The original baking tray can be cleaned in the dishwasher; however, thiswill affect its TopClean non-stick properties. Cleaning the cooking space A Wipe the cooking space clean wh...
Page 59 - Pyrolytic self-cleaning; Lightly soiled
… Care and maintenance 59 Pyrolytic self-cleaning In pyrolytic self-cleaning, any soiling is burned off at a high temperature. Possible settings Over time and with use the cooking space can turn slightly matt. Fruit acid and fatty acid deposits can leave stains. This will not affect the cooking or b...
Page 61 - End
… Care and maintenance 61 Switching off before time A Press the button 1×. The appliance door cannot be opened until the temperature of the cooking space has dropped below 300 °C. End The appliance door cannot be opened until the temperature of the cookingspace has dropped below 300 °C. A After the ...
Page 62 - Replacing the halogen light bulb
… Care and maintenance 62 Replacing the halogen light bulb A Remove the left shelf guide. A Place a screw driver at edge of the glass light cover in the middle and carefully re-lease the glass light cover 1 from its fixture. A Remove the defective halogen light bulb. A Carefully fit the new halogen ...
Page 63 - What to do if ...; ... the appliance is not working and the displays are not illuminated; Possible cause
63 Trouble-shooting This section lists faults that can be solved simply by following the instructions given. If another fault is displayed or the fault cannot be remedied, please call Customer Services. What to do if … … the appliance is not working and the displays are not illuminated Before callin...
Page 64 - Reset the automatic circuit breaker.
… Trouble-shooting 64 … the illumination is not working … the appliance door cannot be opened … when grilling, thick smoke is given off Possible cause Solution 䡲 The fuse or circuit breaker for electrical installations in the home is defective. A Change the fuse. A Reset the automatic circuit breake...
Page 66 - After a power failure
… Trouble-shooting 66 After a power failure After a power failure, and the symbol flash in the digital display. A Turn the adjusting knob to set the hour. A Press the adjusting knob to confirm. A Turn the adjusting knob to set the minutes. A Press the adjusting knob again to confirm the time. The us...
Page 67 - Accessories and spare parts; * Included in the scope of delivery
67 Accessories and spare parts Please give model number and exact description when ordering parts. Accessories * Included in the scope of delivery Original TopClean baking tray * Wire shelf * Roller runner Round TopClean baking tray ø 24 cm/ø 29 cm/ø 31 cm
Page 68 - Spare parts
… Accessories and spare parts 68 Spare parts Width × Depth × Length [mm] Porcelain dish 325 × 65 × 177 Porcelain dish 325 × 65 × 265 Porcelain dish 325 × 65 × 354 Shelf guide, left/right Halogen light bulb Door seal
Page 69 - Technical data; External dimensions; See Installation Instructions; Electrical connection; See identification plate; Note for testing institutes; Measurement of the temperature in the cooking space; To reduce power consumption to an absolute minimum, select
69 Technical data External dimensions A See Installation Instructions Electrical connection A See identification plate 1 Note for testing institutes The energy efficiency class according to EN 50304/EN 60350 is deter-mined using the and operating modes. The usable volume within the meaning of EN 503...
Page 70 - Packaging; Remove or disable the lock on the appliance door.; Disposal; The
70 Disposal Packaging 䡲 All packaging materials (cardboard, plastic film (PE) and polystyrene(EPS)) are marked and should, if possible, be collected for recycling anddisposed of in an environmentally friendly way. Disconnection 䡲 Disconnect the appliance from the mains. With a fixed appliance, this ...
Page 71 - Notes
Page 72 - Index; Cooking space temperature
72 Index A Accessories ........................... 13, 67 Cleaning .................................... 58 Acoustic signal ...................... 20, 22Appliance description ................. 10Appliance door............................. 12 Removing.................................. 55 Appliance dra...
Page 73 - ... Index
… Index 73 I Identification plate ........................ 69Illumination .................................... 12 L Levels ............................................. 12Lower temperature cooking ....... 46 M Maintenance.................................. 54Meat ........................................
Page 75 - Repair service; Open the appliance door.
75 Repair service Whether you contact us about a malfunction or an order, please always statethe serial number (FN) and the model type of your appliance. Enter thesedetails below and also on the service sticker which comes with the appliance.Stick it in a conspicuous place or in your telephone or ad...
Page 76 - Quick instructions; To set the time
Quick instructions Please first read the safety precautions in the operating instructions! To set the time A Press the button. A Turn the adjusting knob to set the hour. A Press the button again. A Turn the adjusting knob to set the minutes. To select the operating mode A Press the button repeatedly...