Page 2 - Unique Gas Products Ltd
M A N U F A C T U R E D A N D C E R T I F I E D B Y Unique Gas Products Ltd 2245 Wyecroft Road #5 Oakville, Ontario Canada L6L 5L7 Ph: 905-827-6154 Toll Free: 1-877-427-2266 Fax: 905-827-2027 www.UniqueOffGrid.com E-mail: [email protected] “ “ “ P P P e e e r r r s s s o o o n n n a a a l l l S S S ...
Page 3 - Table of Contents; Chapters
Table of Contents Chapters Welcome, Safety and Warnings 1 Appliances Installation/ Operating Instructions 2 Maintenance & Service 3 Troubleshooting & Suggested Spares 4 Food Storage & Cleaning 5 Wiring Diagram 6 Carbon Monoxide Instructions (CM Model) 7 Parts & Warranty 8
Page 4 - ongratulations on your purchase of a; PLEASE READ AND SAVE THESE INSTRUCTIONS; Chapter; Please mail in the; Warranty Registration Card; included with your freezer.
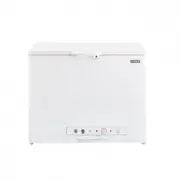
U N I Q U E U G P 6 F 1 Welcome & Congratulations ongratulations on your purchase of a UNIQUE Freezer!. We are very proud of our product and we are completely committed to providing you with the best service possible. Your satisfaction is our #1 priority. Please read this manual very carefully. ...
Page 5 - Safety and Warnings; If you smell gas
U N I Q U E U G P 6 F 2 Safety and Warnings If you smell gas Open Windows Don’t touch electrical switches Extinguish any open flame Immediately call your gas supplier For your Safety Do not store or use gasoline or other flammable vapors and liquids in the vicinity of this unit or any othe...
Page 6 - Installation and Operating Instructions; Installation; If you purchased a
U N I Q U E U G P 6 F 3 Installation and Operating Instructions Installation For best performance at high ambient temperatures, there must be free air circulation over the cooling unit at the rear of the freezer. Ensure that there is a free air space above the freezer and that the flue (chimney) on ...
Page 7 - Clearances; Minimum clearances to combustible materials are:; Gas Connection
U N I Q U E U G P 6 F 4 Clearances Minimum clearances to combustible materials are: Top 27”, Sides 2”, Rear 4” Note: DO NOT install the appliance directly on carpeting. Carpeting must be removed or protected by a metal or wood panel beneath the appliance, which extends at least the full width and de...
Page 8 - Levelling; Importance of Leveling a Freezer
U N I Q U E U G P 6 F 5 Make sure the freezer and any other high BTU appliances on your line are turned on when checking the gas pressure. The appliance and its individual shut-off valve must be disconnected from the gas supply piping system during any pressure testing of that system at pressures in...
Page 9 - Gas Operation; OFF
U N I Q U E U G P 6 F 6 evaporator tubing. This will slow the circulation of hydrogen and ammonia gas, or in severe cases, completely block it, resulting in a loss of cooling. Warranty will not cover recharge/rebuild if caused by not running the freezer level. This freezer operates LP Gas (Propane),...
Page 10 - Thermostat; “MAX” Setting of the Thermostat:; D E
U N I Q U E U G P 6 F 7 110V Operation 1. Ensure the electrical cord is plugged into a grounded outlet 2. Turn the selector switch G to AC position, AC power indicator F will illuminate 3. Turn the thermostat knob E to maximum setting, #4. 4. Adjust the thermostat knob to desired temperature setting...
Page 11 - How to Use the Freezer; FROZEN FOOD STORAGE COMPARTMENT; Defrosting; Shut off and empty the freezer, leaving the freezer lid open.; DO; Cleaning; Never use strong chemicals or abrasives; to clean these parts as the
U N I Q U E U G P 6 F 8 appliance drops below 60F (15.5 C) the freezer will get colder inside and could freeze the product inside. How to Use the Freezer FROZEN FOOD STORAGE COMPARTMENT This compartment is not designed for deep or quick freezing of food. Meat or fish, whether raw or prepared, can be...
Page 12 - Maintenance & Service; Installation must be by a licensed gas fitter in; more often based upon usage/environment.
U N I Q U E U G P 6 F 9 Maintenance & Service The user should be aware of service that must be done on a regular schedule to keep the freezer operating properly. Installation must be by a licensed gas fitter in accordance with local codes or must comply with Propane Installation Code B149.2 (lat...
Page 13 - immediately; by a qualified serviceman.; Before cleaning, cover the burner to protect it from dirt
U N I Q U E U G P 6 F 10 Check all connectors in the complete freezer LP gas system for gas leaks. The LP gas supply must be turned on. Apply a non-corrosive bubble solution to all LP connections. The appearance of bubbles indicates a leak and should be repaired immediately by a qualified servicem...
Page 14 - Replace burner; extremely dangerous; levels of carbon; dirty burner or orifice and needs to be cleaned.
U N I Q U E U G P 6 F 11 3. Check that the spark is created by pressing the electronic ignition button on the control panel. 4. Before removing burner orifice, clean burner area of any soot, scale or dirt Remove the orifice and soak it in alcohol (isopropyl alcohol or thinners) and blow it out with ...
Page 15 - Button; Operation Instructions, Chapter 2
U N I Q U E U G P 6 F 12 W ARNING – Button (D) Fig#1, page 7, must be manually depressed to allow gas pressure to flow to the burner orifice. Be sure to apply the leak check solution before depressing this button. DO NOT allow any open flame, sparks, smoking, etc. in the area of the test. DO NOT dep...
Page 16 - FREEZER DOES NOT COOL, CHECK LIKELY CAUSES:
U N I Q U E U G P 6 F 13 TROUBLESHOOTING INSTRUCTIONS & SUGGESTED SPARE PARTS TO KEEP ON HAND FREEZER DOES NOT COOL, CHECK LIKELY CAUSES: 1. Burner orifice clogged. Clean. See section M AINTENANCE & S ERVICE , C HAPTER 3 2. Check to ensure freezer is level – (left to right and front to back)...
Page 17 - Suggested Spare Parts; The following is a list of commonly used parts which are available:
U N I Q U E U G P 6 F 14 Suggested Spare Parts The following is a list of commonly used parts which are available: Burner orifice Electronic ignition lead wire Thermocouple Contact your dealer or an authorized service center for parts and repairs as needed. Quote Model & Serial # - See CSA...
Page 18 - Food Storage Ideas & Cleaning; Do not refreeze meat that has thawed.; Care and Cleaning; Never; use metallic scouring pads,
U N I Q U E U G P 6 F 15 Food Storage Ideas & Cleaning F ROZEN F OOD S TORAGE The freezer compartment should be kept at 8.6°F (-13°C) at a 77°F (25°C) room ambient A freezer operates most efficiently when it is slowly loaded to 2/3 full. P ACKAGING F OODS FOR F REEZING To minimize dehydrat...
Page 19 - Do not; wash any; Do not remove the certification/serial plate.
U N I Q U E U G P 6 F 16 brushes, abrasive cleaners or strong alkaline solutions on any surface. Do not wash any removable parts in a dishwasher. NOTES: Do not use razor blades or other sharp instruments, which can scratch the appliance surface when removing adhesive labels. Any glue left from tape ...
Page 20 - Wiring Diagram
Page 21 - Instructions for Model; Carbon Monoxide Alarm for Appliance Safety Shutoff; (See Additional Instruction Sheet for Safety Shutoff Connection); WARNING; WHAT YOU SHOULD KNOW ABOUT CO
U N I Q U E U G P 6 F 18 Instructions for Model UGP-6F CM OWNER’S MANUAL Model 9RV-SSO Carbon Monoxide Alarm for Appliance Safety Shutoff ATTENTION: PLEASE READ, FOLLOW AND SAVE! (See Additional Instruction Sheet for Safety Shutoff Connection) Dear New COSTAR 9RV-SSO Owner, Congratulations as you ha...
Page 22 - Severe throbbing headache, drowsiness, confusion, fast heart rate; Activation of this device indicates the
U N I Q U E U G P 6 F 19 tasteless gas. It is a cumulative poison. The following symptoms are related to CARBON MONOXIDE POISONING and should be discussed with ALL members of the household: MILD EXPOSURE Slight headache, nausea, vomiting, fatigue (often described as "flu–like" symptoms) MEDI...
Page 23 - For users in Canada, follow the protocol in steps 1 and 2 below:; has been designed and is warranted to operate for six
U N I Q U E U G P 6 F 20 For Users in the United States, follow the protocol in steps 1 through 4 below: 1 Operate reset/silence button; 2 Call your emergency services (____ - ______) [fire department or 911]; 3 Immediately move to fresh air – outdoors or by an open door/window. Do a head count to c...
Page 24 - DEVELOPING YOUR OWN CO SAFETY PLAN; how they must exit the residence by themselves if necessary.; IMPORTANT: WHAT YOUR CO ALARM CAN AND CANNOT DO
U N I Q U E U G P 6 F 21 3.0 DEVELOPING YOUR OWN CO SAFETY PLAN This CO alarm can quickly alert you to the presence of CO — it cannot prevent toxic CO emissions. Please note that there are hazards against which CO detection may not be effective, such as gas leaks or explosions. The ultimate responsi...
Page 25 - INSTALLING THE COSTAR; This CO alarm may be mounted on the wall.
U N I Q U E U G P 6 F 22 4.3 This CO alarm may not provide early warning for occupants if it is placed outside of the house, such as on outside porches. 4.4 When properly located, installed, and maintained, this CO alarm is designed to provide early warning of developing poisonous CO conditions at a...
Page 26 - CONDITIONS WHICH CAN RESULT IN TEMPORARY CO; A mounting plate is provided on the back of the alarm. Remove the
U N I Q U E U G P 6 F 23 In very cold or very hot environments or in unheated buildings or outdoor rooms where the temperature can go below or above the operating range of the alarm. Temperature limits for proper operation are -20° F to 120° F ( -29° C to 49° C); Operating Humidity is 10 – 95% RH....
Page 27 - UP; : Battery is required for operation of appliance, alarm operation; Figure 2: Installation Instructions
U N I Q U E U G P 6 F 24 plate and twisting the alarm in the direction indicated by the "OFF" arrow on the alarm cover. Step A: Wall Alignment Step B: Alarm Activation Step C: Removal and Installation 6.3 To insure aesthetic alignment of the alarm with the hallway or wall, the UP ↑ arrow on ...
Page 28 - ALARM SIGNALS; indicating that the alarm is powered; ALARM CONDITION; : Repeating signal pattern: RED LED turns; TROUBLE/SERVICE CONDITION; : RED LED flashes and horn chirp every 30 seconds.
U N I Q U E U G P 6 F 25 alarm cover (see step C) until it locks in place. 6.7 To make your carbon monoxide alarm tamper resistant, a locking pin has been provided in the bag with the screws and anchors. Using this pin will deter children and others from removing the alarm from the mounting plate. T...
Page 29 - : Do not use any household cleaning agents, paints, varnishes or
U N I Q U E U G P 6 F 26 8.0 MAINTENANCE CLEANING YOUR ALARM: 8.1. Keep your CO alarms clean – use a damp (water only) cloth or vacuum. 8.2 To clean your alarm, remove it from the mounting bracket as outlined in Figure 2 Step C: Installation/Removal. IF TAMPER RESISTANT PIN HAS BEEN USED, REFER TO S...
Page 31 - Parts Diagram and List; XPLODED
U N I Q U E U G P 6 F 28 Parts Diagram and List UNIQUE UGP ‐ 6F E XPLODED D IAGRAM Chapter 8
Page 32 - UNIQUE UGP 6F – Parts List; Item
U N I Q U E U G P 6 F 29 UNIQUE UGP 6F – Parts List No. Item Code 1 Cooling unit UGP ‐ DL20003111 2 Insulation cover UGP ‐ DL20001265 3 Cap UGP ‐ DL22501173 4 Baffle UGP ‐ DL27501007 5 Baffle holder UGP ‐ DL20001268 6 Iron hinge UGP ‐ DL00002014 7 ...
Page 35 - YEAR LIMITED WARRANTY*
U N I Q U E U G P 6 F 32 UNIQUE UGP-6F 3 YEAR LIMITED WARRANTY* Unique Gas Products Ltd. warrants that this UNIQUE freezer is free from defects in material and workmanship under normal usage and service under the following terms: 1. This Warranty is made only to the first purchaser (”original purcha...
Page 36 - LIMITED WARRANTY
U N I Q U E U G P 6 F 33 LIMITED WARRANTY UNIQUE Model 9RV-SSO UNIQUE GAS PRODUCTS LTD offers you this limited warranty on your new carbon monoxide alarm, including all of its component parts except the battery. This limited warranty extends solely to the original end- user purchaser of this product...