Page 2 - USE AND CARE MANUAL; TRG MODELS; PROFESSIONAL; TILT PANEL
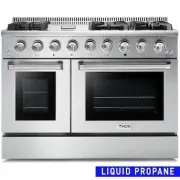
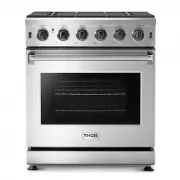
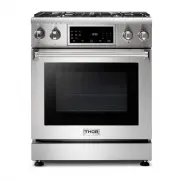
USE AND CARE MANUAL TRG MODELS 1 TRG300 | TRG3601 PROFESSIONAL GAS RANGET TILT PANEL
Page 3 - TABLE OF CONTENTS
TABLE OF CONTENTS WARNINGS ....................................................................................................................... 1 WELCOME ........................................................................................................................ 2 BEFORE YOU START ......
Page 4 - Trouble Shooting Guide
TABLE OF CONTENTS Using Keep Warm .......................................................................................................... 30 Using Sabbath ................................................................................................................ 30 Temp Adjust .................
Page 5 - WARNING; These are the most critical warnings summarized below; WARNINGS
If the information in these instructions is not followed exactly, a fire or explosion may result causing property damage, personal injury or death. - Do not store or use gasoline or other flammable vapors and liquids in the vicinity of this or any other appliance. - WHAT TO DO IF YOU SMELL GAS · Do ...
Page 6 - BEFORE YOU START
Thank you for purchasing your indoor range. We appreciate your business and we recommend that you read this entire User’s Manual before operating your new appliance for the first time. This manual contains instructions on how to properly install and set up your new range, as well as insights into th...
Page 7 - CAUTION; SYMBOL; SAFETY SYMBOLS
WARNING CAUTION CAUTION IMPORTANT SYMBOL DEFINITION SAFET Y AND WARNINGS SAFETY SYMBOLS ELECTRICAL SHOCK HAZARD Before removing a faulty oven light bulb, make sure you turn OFF the power to the range at the main fuse or circuit breaker panel. If you don’t know how to do this, contact an electrician....
Page 8 - SAFET Y AND WARNINGS
TIPPING HAZARD All ranges can tip and cause injuries to adults and children. To prevent tipping, install the anti-tip device supplied with your range. Follow all installation instructions. Even after the safety device is installed, do not step, lean or sit on the oven door or place any heavy objects...
Page 13 - GA S SUPPLY REQUIREMENTS
GA S SUPPLY REQUIREMENTS Installation of this range must conform with local codes, or in the absence of local codes, with national Fuel Gas Code ANSIZ223.1 / NFPA 54. In Canada, installation must conform to the current natural Gas Installation /code, CAN 1-1.1-M81 and with local codes where applicab...
Page 14 - DIMENSIONS AND CLEAR ANCE
DIMENSIONS AND CLEAR ANCE The range may be installed flush to the rear wall. You may install a non-combustible material, such as tile, on the rear wall above the range and up the vent hood. It is not necessary to install non-combustible materials behind the range below the counter top height. The mi...
Page 15 - Top hood and cabinet specifications
DIMENSIONS AND CLEAR ANCE Top hood and cabinet specifications 11
Page 16 - Anti-Tip Device Installation - Wall Mount; ANTI-TIP DEVICE INSTALL ATION
Anti-Tip Device Installation - Wall Mount ANTI-TIP DEVICE INSTALL ATION 12 Tipping Hazard. To reduce the risk of the appliance tipping, it must be secured by a properly installed anti-tip bracket(s). To make sure the bracket has been installed properly, look behind the range with a flashlight to ver...
Page 17 - ELECTRIC POWER SUPPLY REQUIREMENTS
ELECTRIC POWER SUPPLY REQUIREMENTS Your range must be electrically grounded in accordance with local codes or, in the absence of local codes, in accordance with the National Electrical Code (ANSI/NFPA 70, latest edition). In Canada, electrical grounding must be in accordance with the current CSA C22...
Page 19 - INSTALL OVEN KNOBS
ELECTRIC POWER SUPPLY REQUIREMENTS This indoor gas cooking appliance is equipped with a three-prong (grounding) plug for your protection against shock hazard and should be plugged directly into a properly grounded threepronged receptacle. Where a standard two-prong wall receptacle is encountered, it...
Page 20 - INSTALL OVEN HANDLE
ELECTRIC POWER SUPPLY REQUIREMENTS 1. Your Thor range might have a KD handle that needs to be installed. Please Follow up the following procedures for the oven door handle installation INSTALL OVEN HANDLE 2. Check if the oven door handle is level and stable. 16
Page 21 - INSTALL RUBBER PAD ON BACK PANEL; please find the accessories and follow the below steps:; ELECTRICAL GROUNDING INSTRUCTIONS
INSTALL RUBBER PAD ON BACK PANEL ELECTRIC POWER SUPPLY REQUIREMENTS To Prevent the range too close to the wall, there are 2 plastic pads offered with the user's manual, please find the accessories and follow the below steps: 1. check the installation kit packed with manual. 2. Install the 2 plastic ...
Page 22 - CONNECT R ANGE TO GA S SUPPLY; CONNECT RANGE TO GAS SUPPLY
CONNECT R ANGE TO GA S SUPPLY Most localities will require that the stove shutoff valve and gas connections be installed by a certified technician or plumber. These instructions are for a professional. Gas installation specifications and reg- ulations may vary so please consult your local codes befo...
Page 23 - FIRST USE; CONDITIONING THE OVEN
FIRST USE Conditioning will burn off any manufacturing residues and ensure that you get the best results right from the start. Follow these steps to condition your new stove’s oven: 1. Insert all the shelves. See ‘Positioning the shelves’ for instructions. 2. Turn on the ventilation hood above your ...
Page 24 - COOK TOP SAFET Y GUIDELINES; SURFACE BURNER IGNITION
COOK TOP SAFET Y GUIDELINES There are dual burners have the same low turn-down setting (SIM) for gentle simmering (620 BTU/hr.). Use the SIM setting for melting chocolate and butter, cooking rice and delicate sauces, simmering soups and stews, and keeping cooked food hot. Never leave the cooktop una...
Page 26 - THE OVEN CONTROL PANEL
THE OVEN CONTROL PANEL COOK TOP SAFET Y GUIDELINES 22
Page 27 - OVEN COOKING GUIDELINES
SETTING THE KITCHEN TIMER CONTROL LOCKOUT SETTING THE CLOCK OVEN COOKING GUIDELINES The Clock must be set to the correct time of day for the automatic oven timing functions to work properly. · The time of day cannot be changed during timed cooking,delay-timed cooking, or a self-cleaning cycle. · You...
Page 29 - TURNING THE LIGHT ON AND OFF; MINIMUM AND MAXIMUM SETTINGS; FEATURE
OVEN COOKING GUIDELINES · The oven light turns on and door light turns off automatically when the door is opened. · The oven light turns off automatically when the door is closed. You can turn the oven and door light on and off manually by touching the Light. TURNING THE LIGHT ON AND OFF All of the ...
Page 30 - REMOVING THE RACKS; a. Pull the rack straight out until it stops.; REPL ACING THE RACKS; c. Place the end of the rack on the support.
OVEN COOKING GUIDELINES Rack and Pan placement Centering baking pans in the oven as much as possible will produce better results. If baking with more than one pan, place the pans so each has at least 1 to 1 ½ of air space around It. When baking on a single oven rack, place the oven rack in position ...
Page 31 - CONVECTION BAKING
OVEN COOKING GUIDELINES The oven can be programmed to bake at any temperature from 150 °F to 550°F.Baking temperature and time will vary depending on the ingredients and the size and shape or the baking pan used. Dark or nonstick coatings may cook faster with more browning. How to set the oven for b...
Page 44 - TROUBLESHOOTING GUIDE; COOK TOP; Problem
If you can’t find an answer to your problem in the chart below, or if the problem cannot be fixed, you will need technical help. Contact your Authorized Service Center or Customer Care. TROUBLESHOOTING GUIDE COOK TOP 40 Problem Possible Cause Solution Some burners will not light. Flames do not burn ...
Page 45 - OVEN
TROUBLESHOOTING GUIDE OVEN 41 Problem Possible Cause Solution The oven will not turn on. The range is not completely plugged into the electric outlet. The appliance is not completely plugged into the electrical outlet or a fuse in your home may be blown or the circuit breaker tripped. Make sure the ...
Page 48 - INFORMATION CODE
TROUBLESHOOTING GUIDE INFORMATION CODE 44 ERROR CODE ERROR DESCRIPTION E0 E1 E2 E3E5 E8 E9 E10 E11 E12 E13 E14 E15 E16 E17 E18 Oven temperature detection circuit failure. The oven heats up slowly after it starts to heat up. Oven door switch detection failure. The oven cannot be heated. The oven’s no...
Page 49 - REMOVING THE OVEN DOOR
TROUBLESHOOTING GUIDE REMOVING THE OVEN DOOR CAUTION Remark: a. When E5, E6, E7 appears, you can press Cancel to cancel. b. E9 is the power supply frequency monitoring: the power supply frequency range is between (38Hz~75Hz), each monitoring time is 5 minutes, if the frequency continuously exceeds t...
Page 53 - WARR ANT Y; Warranty and Service; For in-warranty service requests, please visit our website at
WARR ANT Y 49 Warranty and Service This product has been manufactured by Thor Group, 4651 E Airport Drive, California 91761 For Customer Service, please call (877) 288 - 8099 For the most up to date warranty and service policy, please refer to our website WWW.THORKITCHEN.COM/WARRANTY-REGISTRATION Fo...
Page 54 - WARRANTY REGISTRATION; WELCOME; WARRANTY
WARRANTY REGISTRATION Scan theQR code or visit thorkitchen.com/warranty Input your product info and select register You’re done. Let’s get cookin’. You chose THOR Kitchen to enhance your culinary journey and we’re stoked to have you in the club. Think of it as a secret society of really savvy people...