Page 3 - Contents; Preparations for Drying
Contents Service Guide--------------------------------------------------------------- 16 Main Technical Parameters---------------------------------------------- Cleaning and Maintenance---------------------------------------------- 14 17 Environmental Protection- ------------------------------------...
Page 4 - Safety Warning; This is a Class I appliance. Please pay attention to electrical; Intended Use
Warning: Violating the identified items may result in serious injury or death. Note: Violating the identified items may result in minor injury or property damage. This symbol indicates the prohibited item. The symbol indicates the item that must be executed. The symbol is a warning and indicates the...
Page 5 - Addition
WARNING: Never stop a tumble dryer before the end of the drying cycle unless all items are quickly removed and spread out so that the heat is dissipated. 3 If the supply cord is damaged, it must be replaced by the manufacturer, its service agent or similarly qualified persons in order to avoid a haz...
Page 6 - Indicates prohibited items
The dryer shall not be installed in outdoor F or appliances with ventilation openings in the base, a carpet must not obstruct the open- ings; T he appliance must not be installed behind a lockable door, a sliding door or a door with a hinge on the opposite side to that of the tumble dryer, in such a...
Page 7 - Indicates executed items
5 - Do not unplug the power cord or power off the dryer when it is in normal operation.- When the dryer is not in use or under cleaning, the power cord must be unplugged.- Do not pull the power cord. Indicates executed items - Do not plug or unplug the power cord with wet hands. Drikold Do not place...
Page 8 - Installation Instructions; Dryer Schematic; List of Accessories; Dryer Installation
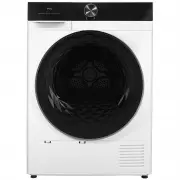
Installation Instructions Dryer Schematic List of Accessories I. Precautions before Installation Dryer Installation Note: Please use the above figure as reference only. Due to product improvement and series expansion, the appearance, color and functional components of the product you have purchased ...
Page 9 - II. Dryer Installation
II. Dryer Installation • All packaging materials should be removed from the dryer. Make sure no items are • The dryer shall not be placed in a dusty place to prevent the accumulated dust from blocking the air duct of the dryer. placed on the top. • The dryer should be placed on a solid flat surface....
Page 10 - I. Drying preparation; Quick Start; Notes; II
Notes Before using the dryer, please make sure that the dryer has been properly installed according to the installation instructions. I. Drying preparation Quick Start Notes When the drying program is complete, the tone will be triggered, and “End” will be Clothes should be wrung out before putting ...
Page 11 - Steam Dry Use
A light spray of water mist is introduced to produce a gentle steam layer over your garments. This reduces wrinkles and creases and helps to lighten and fluff your garments so that they're comfortable and ready to wear. Notes Notes If the socket with a switch is used, please power off the dryer by d...
Page 12 - Check before drying clothes; Common sense and guidelines of the dryer
10 Check before drying clothes Preparations for Drying • Empty the water tank and install it in place. • Clean the lower lint filter and install it in place. • Check the clothes for any special drying requirements Common sense and guidelines of the dryer • The clothes shall be wrung out before putti...
Page 13 - Instructions for Use
• This dryer is for household use only; and please operate it according to the recom- mended drying capacity and programs. • Do not dry fine fabrics that may be easily damaged, such as silks and man-made fabrics, to prevent winkles. • It is recommended to use“Time Dry”function to dry when there is a...
Page 16 - Cleaning and Maintenance
Open the dryer Take the filter screen from the dryer Open the filter screen Use a wet towel to clean up the fluff • Clean the Lint Filter Screen • Clean the Dryer • The above programs are only recommendations, users can choose the suitable program according to personal habits. • In any program, the ...
Page 17 - • Empty the Water Tank
• Clean the Bottom Lint Filter For the best drying effect, please regularly check whether there is cotton wool in the lint filter and clean it in time. Please disconnect the power before cleaning the lower lint filter: Note: Do not clean the lint filter with any sharp tool to protect the filter scre...
Page 18 - Service Guide; Troubleshooting
Service Guide Alarm Alarm Cause Water tank full Failure of drain pump or water level sensor Humidity sensor failure Temperature sensor failure Door not closed properly. Door lock failure Close the door of the dryer Solution Empty the water tank Please contact the service center Please contact the se...
Page 19 - Main Technical Parameters
Note: Our Company reserves the right to change the design of the product. The product you purchase may have been improved, and may not be exactly the same as that indicat-ed herein. However, the performance and usage of the product remain the same. Please rest assured to use it. Main Technical Param...
Page 20 - Energy Saving information; Environmental Protection
Packaging materials •“ ” stands for recyclable materials. >PE = Polyethylene >PS = Polystyrene >PP = Polypropylene Materials made from above substances can be recycled and directly disposed of into the appropriate dustbins. • The symbol “ ” on the product or package means that the product o...
Page 21 - Wiring Diagram
Compressor Cooling Fan Drain Pump Micro switch on the door Float Switch Sprayer Humidity sensor Temperature Sensor Temperature Sensor Motor Main Control Board UI Board Wiring Diagram Wiring Diagram Lamp Earth 1 9