Page 3 - Specifications
PRECAUTIONS TO AVOID POSSIBLEEXPOSURE TO EXCESSIVE MICROWAVEENERGY (a) Do not attempt to operate this oven with the door open since operation can result in harmful exposure to microwave energy. It is important not to defeat or tamper with the safety interlocks. (b) Do not place any object between th...
Page 4 - IMPORTANT SAFETY INSTRUCTIONS
IMPORTANT SAFETY INSTRUCTIONS WARNING - 1. Read all instructions before using the appliance. 2. Read and follow the specific: EXCESSIVE MICROWAVE ENERGY" found on page 2. combustible materials are placed inside the oven to facilitate cooking. only to properly grounded outlet. See found on page a...
Page 6 - RADIO INTERFERENCE
1. Operation of the microwave oven may cause interference to your radio, TV or similar 2. When there is interference, it may be reduced or eliminated by taking the following 1) Clean door and sealing surface of the oven 2) Reorient the receiving antenna of radio or television. 3) Relocate the microw...
Page 7 - UTENSILS; Materials you can use in microwave oven
Personal Injury Hazard Tightly-closed utensils could explode. Closed containers should be opened and plastic pierced before cooking. Utensil Test: 1. Fill a microwave-safe container with 1 cup of cold water (250ml) along with the 2. Cook on maximum power for 1 minute.3. Carefully feel the utensil. I...
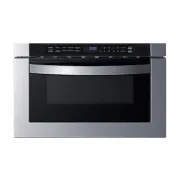
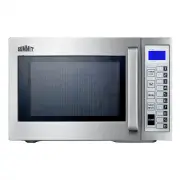
Page 9 - SETTING UP YOUR OVEN; Names of Oven Parts and Accessories
A) Control panelB) Turntable shaftC) Turntable ring assemblyD) Glass trayE) Observation windowF) Door assemblyG) Safety interlock system F G A C B E D SETTING UP YOUR OVEN Names of Oven Parts and Accessories Remove the oven and all materials from the carton and oven cavity.Your oven comes with the f...
Page 10 - Installation; Countertop Installation
Installation A minimum clearance of 3.0 inches(7.5cm) is required between the oven andany adjacent walls. One side must be open.(1) Leave a minimum clearance of 12 inches (30cm) above the oven. (2) Do not remove the legs from the bottom of the oven. (3) Blocking the intake and/or outlet openings can...
Page 11 - Clock; Operation; Kitchen Timer
10 power levels are available. Level 10 9 8 7 6 5 4 3 2 1 Power Display PL-HI PL-90 PL-80 PL-70 PL-60 PL-50 PL-40 PL-30 PL-20 PL-10 100% 90% 80% 70% 60% 50% 40% 30% 20% 10% 1) the screen will display "12:00 PRESS CLOCK 2) Press the number keys and enter the correct time. For example, time is 10:...
Page 12 - Power Level
1) ress the number keys to set the cooking time.(The maximum cooking time and 99 seconds) 2) Press " " repeatedly to adjust the power level. The default power is PL-HI. 3) Press " " to start microwave cooking. In waiting state, p Power Level Start/+30 Sec 5 . Time Cook Two stages can...
Page 13 - Auto Defrost programs; Meat; Press button; Popcorn
1) Press " " once, the screen will display "MEAT". " repeatedly to choose the desired function. And "MEAT", "POULTRY" , "FISH" or "BREAD" will display in turn . 2) Press " 3) Press " " to confirm the function. The screen will display &#...
Page 14 - plate
Sensor Reheat programs 10. Sensor Reheat " repeatedly until the menu you wish appears in the display. " Sensor Sensor 11. Sensor Cook 1) Press " 2) Press " 3) Press " " to start sensor cook mode. The appliance starts sensing. The microwave is operating during sensing. When se...
Page 15 - 2 .Operating the Ventilation Fan; Menu; LO
Potato 1 - 4 potatoes Quantity Sensor Cook programs 12 .Operating the Ventilation Fan 1) Press " " once to start ventilation fan, the screen will display "HIGH" . Vent HI-LO-OFF The oven will return to waiting state after 2 seconds. " twice, the screen will display "LOW" ...
Page 16 - The; Turntable; 5 .Inquiring Function
For best cooking results, leave the turntable on. It can be turned off for To turn the turntable off, press" " once. The large dishes. 14 .Turning the turntable on / off Turntable screen will display "OFF" for 2 seconds. Press" " ON/OFF Turntable ON/OFF 15 .Inquiring Function...
Page 17 - MAINTENANCE
Troubleshooting Check your problem by using the chart below and try the solutions for each problem. If themicrowave oven still does not work properly, contact the nearest authorized service center. TROUBLE Oven will not start POSSIBLE CAUSE POSSIBLE REMEDY a. Electrical cord for oven is not plugged ...
Page 18 - LIMITED WARRANTY
16 LIMITED WARRANTY 90-DAY LIMITED WARRANTY Within the 48 contiguous United States, for 90 days from the date of purchase, when this appliance is operated and maintained according to instructions attached to or furnished with the product, warrantor will pay for factory-specified parts and repair lab...