Summit Appliance FFBF235PL - Manuals
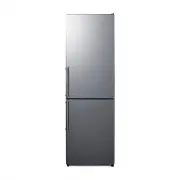
User Manual Summit Appliance FFBF235PL


Summary
2 Contents Safety and warning information For your safety and correct usage, read this user manual carefully before installing and using the appliance, including its hints and warnings. To avoid unnecessary mistakes and accidents, it is important to make sure that all persons using the appliance are...
6 Installing your new appliance Before using the appliance for the first time, you should be informed of the following tips. Ventilation of appliance To improve the efficiency of the cooling system and save energy, it is necessary to maintain good ventilation around the appliance for the dissipation...
7 Reversing the door The side at which the door opens can be changed, from the right side (as supplied) to the left side, if the installation site requires it. WARNING: Unplug the unit from the outlet. TOOLS NEEDED ● Tilt the refrigerator backward to access the base, you should rest the appliance on...
Summit Appliance Refrigerators Manuals
-
 Summit Appliance ADA36FD
User Manual
Summit Appliance ADA36FD
User Manual
-
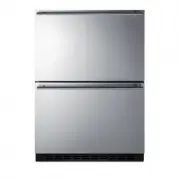
 Summit Appliance ADRD24
User Manual
Summit Appliance ADRD24
User Manual
-
 Summit Appliance ADRF244
User Manual
Summit Appliance ADRF244
User Manual
-
 Summit Appliance AL54
User Manual
Summit Appliance AL54
User Manual
-
 Summit Appliance AL55
User Manual
Summit Appliance AL55
User Manual
-
 Summit Appliance AL55IF
User Manual
Summit Appliance AL55IF
User Manual
-
 Summit Appliance ALBV15
User Manual
Summit Appliance ALBV15
User Manual
-
 Summit Appliance ALBV2466
User Manual
Summit Appliance ALBV2466
User Manual
-
 Summit Appliance ALR15B
User Manual
Summit Appliance ALR15B
User Manual
-
 Summit Appliance ALR15BIF
User Manual
Summit Appliance ALR15BIF
User Manual
-
 Summit Appliance ALR15BSS
User Manual
Summit Appliance ALR15BSS
User Manual
-
 Summit Appliance ALR46W
User Manual
Summit Appliance ALR46W
User Manual
-
 Summit Appliance ALR46WSSHV
User Manual
Summit Appliance ALR46WSSHV
User Manual
-
 Summit Appliance ALR47B
User Manual
Summit Appliance ALR47B
User Manual
-
 Summit Appliance ALR47BSSHV
User Manual
Summit Appliance ALR47BSSHV
User Manual
-
 Summit Appliance ALRF48
User Manual
Summit Appliance ALRF48
User Manual
-
 Summit Appliance ALRF48SSHV
User Manual
Summit Appliance ALRF48SSHV
User Manual
-
 Summit Appliance ALRF49B
User Manual
Summit Appliance ALRF49B
User Manual
-
 Summit Appliance ALRF49BSSHV
User Manual
Summit Appliance ALRF49BSSHV
User Manual
-
 Summit Appliance AR5BIF
User Manual
Summit Appliance AR5BIF
User Manual