Page 2 - Page 1; Table of Contents
Page 1 Table of Contents Technical Information ........................................................................................ 2 Safety Instructions ......................................................................................... 3 - 4 Installation Instructions .......................
Page 3 - Page 2; Technical Information
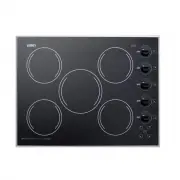
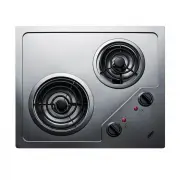
Page 2 Technical Information Model Number (black) Model Number (White) Brand Name Electrical Rating (Number of Burners) Wattage rating [ Size of Burners] CR5B271B CR5B272W SUMMIT 220V, 60 Hz, 25 Amps (1) 1500W [7" element]; (4) 1200W [6" element] CRS5B11B CRS5B12W SUMMIT PROFESSIONAL 6,300 W...
Page 4 - Page 3; SAFETY INSTRUCTIONS; Read this section BEFORE operating the cooktop.; AUTHORIZED
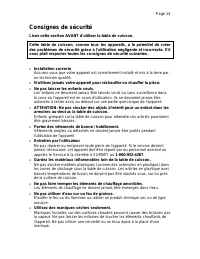
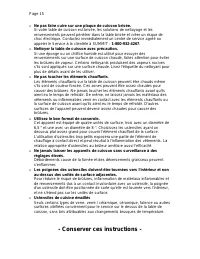
Page 3 SAFETY INSTRUCTIONS Read this section BEFORE operating the cooktop. This cooktop, like all appliances, has the potential to create safety problems through careless and improper use. Please observe all of the following safety precautions. Proper Installation Be sure your appliance is properl...
Page 6 - Page 5; Installation Instructions
Page 5 Installation Instructions IMPORTANT! Save this manual for review by local inspector. This appliance must be properly installed and grounded by a qualified technician. 1. Unpacking the Cooktop Carefully unpack the cooktop from its shipping container. If possible, keep the original shipping car...
Page 9 - Page 8; Installing the Cooktop
Page 8 4. Installing the Cooktop The cooktop should be bedded to the countertop using a soft bedding compound that will prevent damage if later removal for service is necessary. A very small bead of silicone sealant should be laid around the edges of the cutout. Place the cooktop in the cutout openi...
Page 10 - Page 9; Electrical Connection
Page 9 5. Electrical Connection Before proceeding further, verify that the power supply is disconnected. Verify that the appropriate electrical supply requirements have been met. Please refer to the table on page 4 for appropriate electrical requirements. The cooktop is supplied with a 48-inch long ...
Page 11 - Operation; READ; AFETY; BEFORE OPERATING YOUR APPLIANCE.; – not much wider or much; Heating Elements; This cooktop contains radiant heating elements. The radiant
Page 10 Operation READ S AFETY I NSTRUCTIONS BEFORE OPERATING YOUR APPLIANCE. The cooking surface areas of your glass ceramic cooktop are identified by permanent patterns in the cooktop. The appliance is easy to maintain and easy to clean. Keeping the cooktop at its top performance levels can be ach...
Page 12 - Cleaning; Do not let anything that melts
Page 11 clockwise. The heating elements will stay at full power for longer periods and at zero power for shorter periods as you turn the knob counter-clockwise, thus increasing the heat output. There is a light associated with each of the control knobs that provides an indication of burner operation...
Page 13 - ONE-YEAR LIMITED WARRANTY; ITEMS WARRANTOR WILL NOT PAY FOR:; DISCLAIMER OF IMPLIED WARRANTIES LIMITATION OF REMEDIES
Page 12 ONE-YEAR LIMITED WARRANTY Within the 48 contiguous United States, for one year from the date of purchase, when this appliance is operated and maintained according to instructions attached to or furnished with the product, warrantor will pay for factory-specified parts and repair labor to cor...
Page 15 - Consignes de sécurité
Page 14 Consignes de sécurité Lisez cette section AVANT d'utiliser la table de cuisson. Cette table de cuisson, comme tous les appareils, a le potentiel de créer des problèmes de sécurité grâce à l'utilisation négligente et incorrecte. S'il vous plaît respecter toutes les consignes de sécurité suiva...
Page 17 - Instructions d’installation
Page 16 Instructions d’installation IMPORTANT! Conservez ce manuel pour examen par l'inspecteur local. Cet appareil doit être correctement installé et mise à la terre par un technicien qualifié. 1. Déballage de la table de cuisson Déballez soigneusement la table de cuisson de son emballage. Si possi...
Page 18 - Préparer le comptoir
Page 17 3. Préparer le comptoir S'il vous plaît lire cette section avant de faire une découpe dans le comptoir de la table de cuisson. Il est important de planifier à l'avance pour l'installation de la table de cuisson, en gardant les dimensions suivantes à l'esprit. (Se référer à la Fig. A.) A. La ...
Page 20 - Installation de la table de cuisson
Page 19 Remarque: Lorsque vous faites le comptoir, mettez un rayon dans les coins de la découpe (un rayon de ¼ " est typique). Cela permet de garder le comptoir de la fissuration. Suivez les instructions du fabricant de comptoir concernant le rayon minimal et le renforcement des coins. 4. Instal...
Page 21 - l’utilisation de la table de cuisson,; Opération; Batterie de cuisine
Page 20 Placez la table de cuisson dans l'ouverture de découpe et appuyez fermement sur tous les côtés pour sceller le cadre dans le mastic. Le mastic tiendra la table de cuisson bien en place sur le comptoir. 5. Raccordement électrique Avant de poursuivre, vérifiez que l'alimentation électrique est...
Page 23 - Nettoyage; immédiatement
Page 22 Nettoyage Pour vous assurer que votre table de cuisson reste propre, suivez ces conseils pour un entretien facile: Nettoyez la table de cuisson avant de l'utiliser pour la première fois. Un nettoyage en profondeur avec un nettoyant pour table de cuisson recommandée fournira un revêtement s...
Page 24 - UN AN DE GARANTIE LIMITÉE; Commander des pièces en ligne à
Page 23 UN AN DE GARANTIE LIMITÉE Dans les 48 États américains contigus, pendant un an de la date d’achat, lorsque cet appareil est utilisé et entretenu conformément aux instructions jointes à ou fournies avec le produit, le garant paiera pour les pièces spécifiées en usine et pour la main- d’œuvre ...