Page 2 - TABLE OF CONTENTS
2 TABLE OF CONTENTS Appliance Safety 3 Important Safeguards 3-4 Location of Parts 5 Installation Instructions 6-8 Before Using Your Appliance 6 Installation of Your Appliance 6 Electrical Connection 6-7 Extension Cord 7 Reversing the Door Swing of Your Appliance 7-8 Installing the Stainless Steel Ha...
Page 3 - APPLIANCE SAFETY; IMPORTANT SAFEGUARDS
3 APPLIANCE SAFETY Your safety and the safety of others are very important. We have provided many important safety messages in this manual and on your appliance. Always read and obey all safety messages. This is the Safety Alert Symbol. The symbol alerts you to potential hazards that can kill or inj...
Page 4 - Risk of child entrapment!
4 - Avoid open flames and anything that creates a spark, - Disconnect from the power supply, - Air the room in which the appliance is located for several minutes and - Contact the Service Department for advice. The more coolant there is in an appliance, the larger the room it should be installed i...
Page 5 - LOCATION OF PARTS
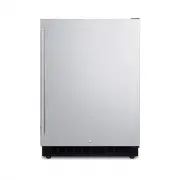
5 LOCATION OF PARTS Digital Control Panel Shelves (3) Ventilation Grille Adjustable Legs LED Light Security Lock Stainless Steel Door Stainless Steel Handle Door Racks (2)
Page 6 - INSTALLATION INSTRUCTIONS; WARNING
6 INSTALLATION INSTRUCTIONS BEFORE USING YOUR APPLIANCE Remove the exterior and interior packing. Before connecting the appliance to the power source, let it stand upright for approximately 2 hours. This will reduce the possibility of a malfunction in the cooling system from handling during tran...
Page 8 - OPERATING YOUR APPLIANCE
8 hand side. 5. Screw the alternative left top hinge (6), included in the fittings, on the left hand side of cabinet. (Fig. 3) 6. Relocate the door to the designated position. Then screw the bottom hinge assembly on the left designated position and tighten it after the door is leveled. 7. Remove the...
Page 11 - CARE AND MAINTENANCE
11 CARE AND MAINTENANCE CLEANING YOUR APPLIANCE Turn off the power, unplug the appliance, and remove all items, including shelves. Wash the inside surfaces with a solution of warm water and baking soda (about 2 tablespoons of baking soda to a quart of water). Wash the shelves with a mild deter...
Page 12 - TROUBLESHOOTING; Troubleshooting Guide
12 TROUBLESHOOTING You can solve many common problems easily, saving you the cost of a possible service call. Try the suggestions below to see if you can solve the problem before calling the servicer. Troubleshooting Guide PROBLEM POSSIBLE CAUSE REMEDY Appliance does not operate. Appliance is not ...
Page 14 - LIMITED WARRANTY; ONE-YEAR LIMITED WARRANTY; ITEMS WARRANTOR WILL NOT PAY FOR:; DISCLAIMER OF IMPLIED WARRANTIES LIMITATION OF REMEDIES
14 LIMITED WARRANTY ONE-YEAR LIMITED WARRANTY Within the 48 contiguous United States, for one year from the date of purchase, when this appliance is operated and maintained according to instructions attached to or furnished with the product, warrantor will pay for factory-specified parts and repair ...