Snow Joe SJ625E - Manuals
User Manual Snow Joe SJ625E


Summary
Electrical Safety 1. Ground fault circuit interrupter (GFCI) protection should be provided on the circuit(s) or outlet(s) to be used for the snow thrower. Receptacles are available having built-in GFCI protection and may be used for this measure of safety. 2. To prevent electric shock, use only with...
3 Personal Safety 1. Stay alert – Watch what you are doing and use common sense when operating the snow thrower. Do not use the machine when tired, ill or under the influence of drugs, alcohol or medication. A moment of inattention may result in serious personal injury. 2. Wear proper clothing – Wea...
4 Safety Symbols The following table describes safety symbols that may appear on this product. Read, understand and follow all instructions on the machine before attempting to assemble and operate. Double insulation. Always keep the power cable away from heat sources, oils or sharp edges. Immediatel...
Snow Joe Snow Blowers Manuals
-
 Snow Joe 24V-SS10
User Manual
Snow Joe 24V-SS10
User Manual
-
 Snow Joe 24V-SS11
User Manual
Snow Joe 24V-SS11
User Manual
-
 Snow Joe 24V-SS13
User Manual
Snow Joe 24V-SS13
User Manual
-
 Snow Joe 24V-X2-20SB
User Manual
Snow Joe 24V-X2-20SB
User Manual
-
 Snow Joe 24V-X2-SB15
User Manual
Snow Joe 24V-X2-SB15
User Manual
-
 Snow Joe 24V-X2-SB18
User Manual
Snow Joe 24V-X2-SB18
User Manual
-
 Snow Joe 323E
User Manual
Snow Joe 323E
User Manual
-
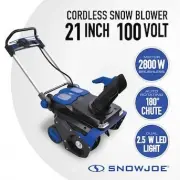 Snow Joe ION100V-21SB
User Manual
Snow Joe ION100V-21SB
User Manual
-
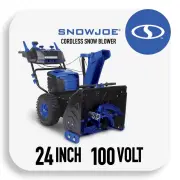 Snow Joe ION100V-24SB
User Manual
Snow Joe ION100V-24SB
User Manual
-
 Snow Joe SJ618E
User Manual
Snow Joe SJ618E
User Manual
-
 Snow Joe SJ619E
User Manual
Snow Joe SJ619E
User Manual
-
 Snow Joe SJ623E
User Manual
Snow Joe SJ623E
User Manual
-
 Snow Joe SJ626E
User Manual
Snow Joe SJ626E
User Manual
-
 Snow Joe SJ627E-CVR
User Manual
Snow Joe SJ627E-CVR
User Manual