Snow Joe ION100V-24SB - Manuals
User Manual Snow Joe ION100V-24SB


Summary
2 6. Do not expose battery packs or appliance to fire or excessive temperature. Exposure to fire or temperature above 265°F (130°C) may cause explosion. 7. Follow all charging instructions and do not charge the battery packs or appliance outside of the temperature range specified in the instructions...
3 6. When cleaning, repairing, or inspecting the snow blower, stop the motor and make sure the auger/impeller and all moving parts have stopped. 7. Do not run the motor indoors, except when starting the motor and for transporting the snow blower in or out of the building. Open the outside doors. Exh...
4 wired extension cord poses a risk of fire and electric shock. If an extension cord must be used, plug the charger into a properly wired 18 gauge or larger extension cord with the female plug matching the male plug on the charger. Make sure that the extension cord is in good electrical condition. •...
Snow Joe Snow Blowers Manuals
-
 Snow Joe 24V-SS10
User Manual
Snow Joe 24V-SS10
User Manual
-
 Snow Joe 24V-SS11
User Manual
Snow Joe 24V-SS11
User Manual
-
 Snow Joe 24V-SS13
User Manual
Snow Joe 24V-SS13
User Manual
-
 Snow Joe 24V-X2-20SB
User Manual
Snow Joe 24V-X2-20SB
User Manual
-
 Snow Joe 24V-X2-SB15
User Manual
Snow Joe 24V-X2-SB15
User Manual
-
 Snow Joe 24V-X2-SB18
User Manual
Snow Joe 24V-X2-SB18
User Manual
-
 Snow Joe 323E
User Manual
Snow Joe 323E
User Manual
-
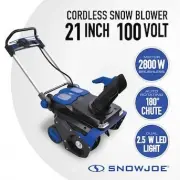 Snow Joe ION100V-21SB
User Manual
Snow Joe ION100V-21SB
User Manual
-
 Snow Joe SJ618E
User Manual
Snow Joe SJ618E
User Manual
-
 Snow Joe SJ619E
User Manual
Snow Joe SJ619E
User Manual
-
 Snow Joe SJ623E
User Manual
Snow Joe SJ623E
User Manual
-
 Snow Joe SJ625E
User Manual
Snow Joe SJ625E
User Manual
-
 Snow Joe SJ626E
User Manual
Snow Joe SJ626E
User Manual
-
 Snow Joe SJ627E-CVR
User Manual
Snow Joe SJ627E-CVR
User Manual