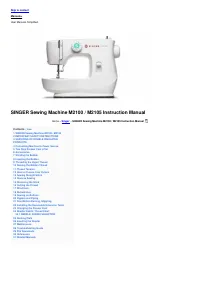
Page 2 - IMPORTANT SAFETY INSTRUCTIONS; DANGER – To reduce the risk of electric shock:
SINGER Sewing Machine M2100 / M2105 This household sewing machine is designed to comply with IEC/EN 60335-2-28 and UL1594 IMPORTANT SAFETY INSTRUCTIONS When using an electrical appliance, basic safety precautions should always be followed, including the following: Read all instructions before using ...
Page 3 - SERVICING OF DOUBLE INSULATED PRODUCTS; Principal Parts of the Machine
The noise level under normal operating conditions is less than 75dB(A). The machine must only be used with foot control of type KD-1902, FC-1902 (110120V) / KD2902, FC-2902A, FC-2902C, FC-2902D, (220-240V) manufactured by Zhejiang Founder Motor Corporation, LTD. (Vietnam) / 4C-316B (110-125V) /4C-31...
Page 5 - Accessories; Standard accessories; Winding the Bobbin
AttentionYour SINGER® machine is adjusted to provide the best stitch result at normal room temperature. Extreme hot and cold temperatures can affect the sewn result. Accessories Standard accessories 1. All purpose foo2. Zipper foot3. Buttonhole foot4. Button sewing foot5. L-screwdriver6. Seam ripper...
Page 6 - Inserting the Bobbin
Place the thread and spool pin felt (a) onto the spool pin. (1)Draw the thread from the spool through the upper thread guide. (2)Wind the thread clockwise around bobbin winder tension discs. (3)Thread bobbin as illustrated and place on spindle. (4)Push bobbin spindle to right. (5)Hold thread end. (6...
Page 8 - Thread Tension; Lower thread tension; How to Choose Your Pattern
Note:If it is difficult to raise the bobbin thread, check to make sure the thread is not trapped by the hinged cover or the Removable Extension Table. Gently pull on the upper thread to bring the bobbin thread up through the needle plate hole. (2) Lay both threads to the back under the presser foot....
Page 9 - Sewing Straight Stitch
To select a stitch, simply turn the pattern selector dial. The pattern selector dial may be turned in either direction. For straight stitch, select pattern ” ” with the pattern selector dial. For zigzag stitch, select pattern ” ” with the pattern selector dial. 1. Pattern Selector Dial2. Reverse Sew...
Page 10 - Blind hem for stretch fabrics.; Buttonholes
Removing the Work Turn the handwheel toward you (counterclockwise) to bring the thread take up lever to its highest position and the needle begins to descend, raise the presserfoot and remove work behind the needle and presser foot. (2) Cutting the Thread Pull the threads under and behind the presse...
Page 11 - Prepare; Sewing on Buttons
Prepare 1. Take off the all purpose foot and attach the buttonhole foot.2. Measure diameter and thickness of button and add 0.3 cm (1/8”) for bar tacks to obtain correct buttonhole length; mark buttonhole length on fabric (a).3. Place fabric under the foot, so that marking on the buttonhole foot ali...
Page 12 - Zippers and Piping; Set the machine as illustrated.; Free Motion Darning, Stippling
If a shank is required, place a darning needle on top of the button and sew. (4) For buttons with 4 holes, sew through the front two holes first, push the work forward and then sew through the back two holes. Zippers and Piping Set the machine as illustrated. Change to zipper foot. The zipper foot c...
Page 14 - Always use the same thread on top and bottom.; Standard sharp needles. Sizes; Darning Plate
NEEDLE SIZE FABRICS THREAD 9-11 (70-80) Lightweight fabrics-thin cottons, voile, silk, muslin, interlocks, cotton knits,tricots, jerseys, crepes, woven polyester, shirt & blouse fabrics. Light-duty thread in cotton, nylon, polyester or cottonwrapped polyester. 11-14 (80-90) Medium weight fabrics...
Page 15 - Inserting the Needle; Insert the needle as illustrated as follows:; Maintenance
For certain types of work, (e.g. darning or free-hand embroidery), the darning plate must be used.Install the darning plate as illustrated.For normal sewing, remove the darning plate.For free-motion sewing it is recommended to use a darning/ embroidery foot, available as an optional accessory from a...
Page 16 - Cleaning and lubricating the hook:; Troubleshooting Guide; Problem; Upper thread breaks
Attention:Disconnect the machine from the electrical supply by removing the plug from the main socket. When cleaning the machine, it must always be disconnectedfrom the electrical supply. Remove the needle plate:Turn the handwheel until the needle is fully raised. Open the hinged front cover and uns...