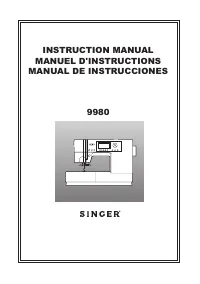
Singer 9980 - Manuals
Singer 9980 – User Manual in PDF format online.
Manuals:
User Manual Singer 9980
Summary
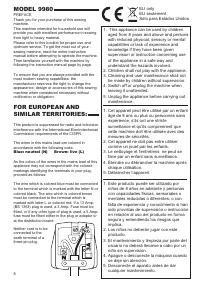
2 INSTRUCTION MANUAL This sewing machine is intended for household use.This sewing machine is not intended for use by young children or infirmed persons withoutsupervision. IMPORTANT SAFETY INSTRUCTIONS When using a sewing machine, basic safety precautions should always be followed,including the fol...
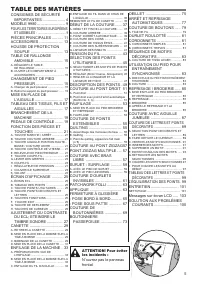
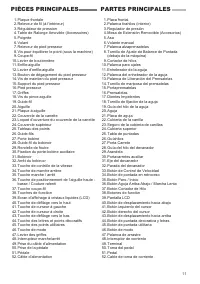
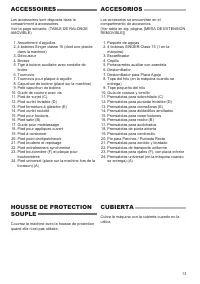
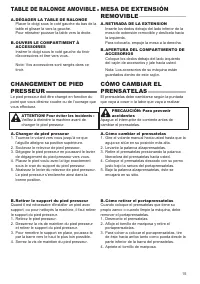
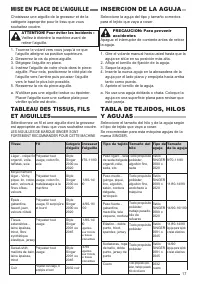
3 CONTENTS IMPORTANT SAFETY INSTRUCTIONS .................... 2 MODEL 9980 ............................ 8FOR EUROPEAN AND SIMILAR TERRITORIES: ........................... 8 MAIN PARTS .......................... 10ACCESSORIES ...................... 12DUST COVER ........................ 12REMOVABLE EX...
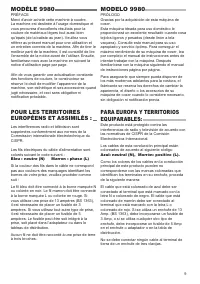
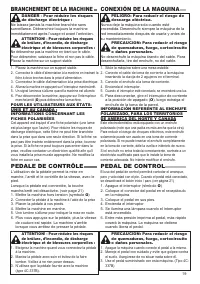
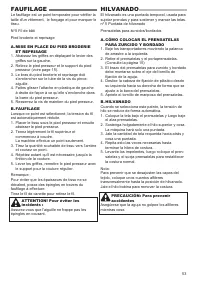
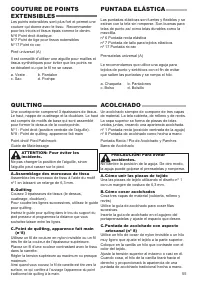
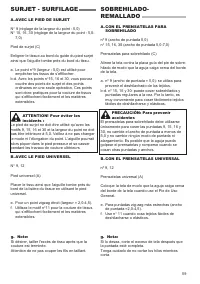
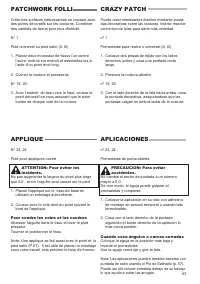
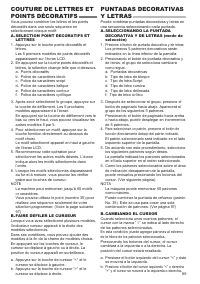
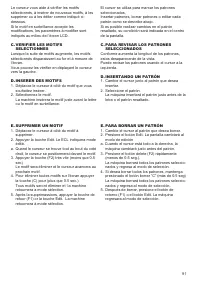
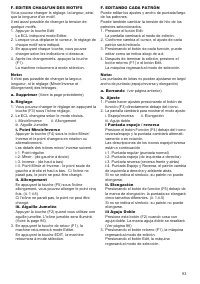
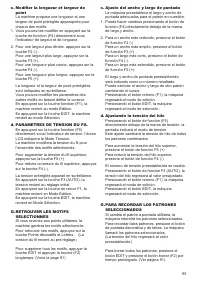
4 MANUEL D'INSTRUCTIONS La machine à coudre est exclusivement destinée à l’usage domestique. Cette machine à coudre n’a pas été conçue pour être utilisée par de jeunes enfants ni des personneshandicapées sans supervision. CONSIGNES DE SÉCURITÉ IMPORTANTES Il est important d’observer des précautions ...
5 TABLE DES MATIÈRES CONSIGNES DE SÉCURITÉ IMPORTANTES ..................... 4 MODÈLE 9980 .......................... 9POUR LES TERRITOIRES EUROPÉENS ET ASSIMILÉS : ................................. 9 PIÈCES PRINCIPALES .......... 11ACCESSOIRES ...................... 13HOUSSE DE PROTECTION SOUPLE .....
6 MANUAL DE INSTRUCCIONES Esta máquina de coser está diseñada sólo para uso doméstico. Esta máquina de coser no está diseñada para ser utilizada por niños pequeños o personas enfermassin la debida supervisión NORMAS DE SEGURIDAD IMPORTANTES Cuando utilice la máquina de coser, debe seguir siempre una...
7 ÍNDICE NORMAS DE SEGURIDAD IMPORTANTES ..................... 6 MODELO 9980 ......................... 9PARA EUROPA Y TERRITORIOS EQUIPARABLES: ........................ 9 PARTES PRINCIPALES ......... 11ACCESORIOS ........................ 13CUBIERTA .............................. 13MESA DE EXTENSIÓN ...
10 MAIN PARTS 1. Face Plate2. Thread Take-Up Lever (Inside)3. Pressure Regulator4. Removable Extension Table (Accessories)5. Handle6. Hand Wheel7. Presser Foot Lifter8. Stitch Balance Adjusting Screw (underneath machine) 9. Thread Cutter 10. Buttonhole Lever11. Needle Threader12. Needle Threader Lev...
11 PIÈCES PRINCIPALES 1. Plaque frontale2. Releveur de fil (à l’intérieur)3. Régulateur de pression4. Table de Ralonge Amovible (Accessoires)5. Poignée6. Volant7. Releveur de pied presseur8. Vis pour équilibrer le point (sous la machine)9. Coupe-fil 10. Levier de boutonnière11. Enfile-aiguille12. Le...
13 ACCESSOIRES Les accessoires sont disposés dans lecompartiment à accessoires.Voir la page suivante, (TABLE DE RALONGEAMOVIBLE) 1. Assortiment d’aiguilles2. 4 bobines Singer classe 15 (dont une placée dans la machine) 3. Découseur4. Brosse5. Tige à bobine auxiliaire avec rondelle de feutre 6. Tourn...
15 TABLE DE RALONGE AMOVIBLE A. DÉGAGER LA TABLE DE RALONGE Placer le doigt sous le coté gauche du bas de latable et glisser la vers la gauche.Pour réinsérer pousser la table vers la droite. B. OUVRIR LE COMPARTIMENT À ACCESSOIRES Insérer le doigt sous le coté gauche du tiroird'accessoires et tirer ...
18 CONNECTING THEMACHINE DANGER: To reduce the risk ofelectric shock. Never leave unattended when plugged in. Alwaysunplug this machine from the electric outletimmediately after using and before maintenance. WARNING: To reduce the risk ofburns, fire, electric shock, or injuryto persons. Do not unplu...
20 FUNCTION OF EACH PART A. START/STOP BUTTON The machine will start running when start/stopbutton is pressed and will stop when pressed thesecond time. The machine will rotate slowly atstart of sewing. Note: When the foot controller is connected, start/stopbutton will be deactivated. MONITOR LAMPGr...
24 CONTROL PANEL When you turn on the power, machine will selectthe straight stitch and indicate information of stitchon the LCD. A. LCD DISPLAY Stitch information is indicated on this display.According to the pattern or mode, information willbe changed. If you want to adjust the contrast of LCD, se...
28 BOBBIN SETTING Be sure to use only SINGER Class 15 bobbins inthis machine. A. REMOVING THE BOBBIN 1. Pull the bobbin cover latch to the right and remove the bobbin cover. 2. Lift up the bobbin from the machine. B. SETTING SPOOL OF THREAD ON SPOOL PIN 1. Pull up the left end of spool pin and set t...
32 THREADING THE MACHINE A. PREPARING TO THREAD MACHINE 1. RAISE THE PRESSER FOOT LIFTER. It is very important to raise the presser foot lifterbefore you proceed to thread the machine. 2. Press the needle up/down button and set the needle in up position.(Keep this position for threading the eye of t...
33 ENFILAGE DE LA MACHINE A. PRÉPARATION EN VUE DE L’ENFILAGE 1. Relever le pied presseur. Il est très important de lever le pied presseur avant d'enfiler lamachine. 2. Appuyez sur la touche de positionnement de l’aiguille et réglez l’aiguille en position haute.Gardez cette position pour enfiler le ...
36 STARTING TO SEW The machine will be set to sew straight stitch whenpower switch is turned on. CAUTION: To prevent accidents. While sewing, special care is required around theneedle.Machine automatically feeds the fabric, do not pullor push the fabric. A. START AND END OF SEAM 1. Check the presser...
42 THREAD TENSION This machine adjusts the thread tensionautomatically when pattern is selected.However you can change the thread tension asfollows. 1. Press the function F5 button directly under the tension mark.LCD changes to the thread tension mode. 2. To increase the upper thread tension, press ...
43 TENSION DU FIL Cette machine ajuste automatiquement la tensiondu fil lorsque le motif est sélectionné.Cependant vous pouvez modifier la tension telleque ci-dessous 1. Appuyez sur la touche F5 sous l’indicateur de tension.L’écran ECL se met en mode tension du fil. 2. Pour augmenter la tension du f...
44 SELECTING UTILITYSTITCH PATTERN Utility stitches are indicated in the pattern chartlocated inside of the top cover.When you turn on the machine, straight stitch willbe selected automatically.Select utility stitch pattern as follows. A. SELECTING UTILITY STITCH PATTERNS 1. Press the utility button...
48 WHERE TO USE EACH STITCH 01. Straight stitch center needle positon • For top stitching, for basic sewing, zipper sewing etc. 02. Straight stitch left needle position • For top stitching, for basic sewing etc. 03. Straight stitch with auto-reverse stitch center needle position04. Straight stitch w...
51 COUTURE AU POINTDROIT Les motifs au point droit doivent être sélectionnésen fonction du type de tissu à coudre.La position de l’aiguille à gauche (n ° 2) est la mieux adaptée pour la couture des tissus légers. N ° 1 : Point droit (Position centrale de l’aiguille) N ° 2 : Point droit (Position de ...
52 BASTING Basting is temporary stitching, used for fittinggarments, and for gathering and marking fabric. No. 5 Basting Stitch Darning/Embroidery Foot A. ATTACHING THE DARNING/ EMBROIDERY FOOT 1. Lower the feed dogs by moving the drop feed lever to the left. 2. Remove the presser foot and holder. (...
53 FAUFILAGE Le faufilage est un point temporaire pour vérifier lataille d'un vêtement, le fonçage et pour marquer letissu. N ° 5 Fil de bâti Pied broderie et reprisage A. MISE EN PLACE DU PIED BRODERIE ET REPRISAGE 1. Abaissez les griffes en déplaçant le levier des griffes sur la gauche. 2. Retirez...
54 QUILTING A quilt always consists of three layers of material.The topper, batting, and backing fabric.The top layer is formed by shaped pieces of fabricsjoined together, creating the quilt topper.No. 1 Straight stitch (Center Needle Position) No. 8 Hand look Quilting Stitch Straight Stitch / Patch...
55 COUTURE DE POINTSEXTENSIBLES Les points extensibles sont plus fort et permet unecouture qui donne avec le tissu. Recommanderpour les tricots et tissus épais comme le denim.N ° 6 Point droit élastique N ° 7 Point de tige pour tissus extensibles N ° 17 Point ric rac Pied universel (A) Il est consei...
57 COUTURE AU POINTZIGZAG La machine peut effectuer des points zigzag dedifférentes largeurs et longueurs quand vouschangez les réglages de la largeur et de lalongueur du point. N ° 9 : Point zigzag Pied Universel ou Pied Satin (A,B) Le point zigzag est très efficace pour les appliqueset la couture ...
60 5mm 1cm 5mm BLIND HEM STITCHING The hem is sewn without stitches showing on rightside of fabric. No. 10 Blind hemming for stretch fabric.No. 11 Blind hem for non-stretch fabric. Blind Hem Foot (D) 1. Fold the fabric as shown in the illustration. a. Medium, Heavy weight fabricb. Light weight fabri...
63 PATCHWORK FOLLI Créer des surfaces intéressantes en cousant avecdes points décoratifs sur les coutures. Combinerdes variétés de tissue pour plus d'intérêt. N ° 1 Pied universel ou pied satin (A, B) 1. Placez deux morceaux de tissus l’un contre l’autre, endroit sur endroit et assemblez-les àl’aide...
68 BUTTONHOLE SEWING Select the buttonhole style you want to sew.This machine can sew 13 types of buttonholes. 104. Bar-tack Buttonhole (Narrow) for light to medium weight fabrics 105. Bar-tack Buttonhole (Wide) for large buttons106. Keyhole Buttonhole for heavy weight fabrics107. Keyhole Buttonhole...
72 BOUND BUTTONHOLE A bound buttonhole provides a professional touchto tailored garments like suits, coats and jackets. 116. Bound Buttonhole Buttonhole Foot (F) 1. Cut a patch of fabric 2.5 cm (1”) wide, 1 cm (1/3”) longer than the finished buttonhole.Baste a patch so that the center line of patchw...
73 BOUTONNIEREPASSEPOILEE Une boutonnière passepoilée fournie une toucheprofessionnelle aux vêtements comme lesmanteaux et les tailleurs. 116. Boutonnière passepoilée Pied à boutonnière (F) 1. Coupez un morceau de tissu de 2,5cm de largeur et d’1cm plus long que votreboutonnière finie.a. Endroit du ...
74 10.Fold the fabric and stitch along the seams on each side, just a needle width from the originalstitching line. Remove the basting. c. Wrong side of fabric 11.Fold the fabric along the buttonhole end and stitch triangular ends on the original stitchingline. 12.Press and trim the patch to within ...
78 SEWING ON BUTTONS No. 13 Button Sewing Foot 1. Lower the feed dogs by moving the drop feed lever to the left. 2. Attach the button sewing foot. Align two holes of the button with slot of presser foot and lowerfoot to hold the button securely. 3. Adjust the stitch width so that the needle enters t...
80 NARROW HEMMING No. 1 Straight Stitch (Center Needle Position) Rolled Hem Foot CORDING No. 9 Zigzag Stitch for Single CordingNo. 12 Multi Zigzag for Triple Cording Cording Foot 3 mm 5 cm A. SINGLE CORDING 1. Set stitch pattern to No. 9. Insert the cord in the center groove of cording foot from the...
86 TWIN NEEDLE SEWING Interesting effects can be produced by sewingdecorative stitches using a twin needle. Try usingtwo different colors of thread for even more variety.Always make a test sample first to help youdetermine the best settings for the stitch you aresewing. All patterns except No. 101-1...
100 b c a MAINTENANCE DANGER: To reduce the risk ofelectric shock. Disconnect the power line plug from electric outletbefore carrying out any maintenance. CLEANING If lint and bits of thread accumulate in the hook,this will interfere with the smooth operation of themachine. Check regularly and clean...
102 1. Winding the bobbin. MESSAGES ON LCD 2. Lower the buttonhole lever. 1 2 3. After sewing buttonhole, raise the presser foot lifter and set the frame of buttonhole foot tostarting position. 4. Release the foot controller pedal. 5. Lower the presser foot. 6. Machine memory is full. 7. Select a pa...
104 PROBLEM Upper threadbreaks Lower threadbreaks Machine skipsstitches Fabric puckers Machine makesloose stitches orloops Stitch pattern isdistorted Threader doesnot threadneedle eye Machine doesnot feed properly Needle breaks Machine runswith difficulty Machine will notrun HELPFUL HINTS CORRECTION...
105 Anomalie Le fil d’aiguillecasse Le fil de canettecasse La machinesaute des points Le tissu grigne La machine faitdes points lâchesou des boucles Les points desmotifs sontdéformés L’enfile-aiguillen’enfile pas le fild’aiguille La machinen’entraîne pascorrectement L’aiguille casse La machineavance...
106 PROBLEMA El hilo superiorse rompe El hilo de lacanilla se rompe La máquinasalta puntadas El tejido searruga La máquinahace puntadasflojas o lazos La puntada estádeformado El enhebradorno enhebra elojo de la aguja La máquina notransportaapropiadamente La aguja serompe La máquinafunciona condificu...
Singer Manuals
-
Singer 14CG754
User Manual
-
Singer 7442
User Manual
-
Singer 14SH744
User Manual
-
Singer 9134
User Manual
-
Singer H74
User Manual
-
Singer 7442CL
User Manual
-
Singer 14SH754
User Manual
-
Singer 14CG744
User Manual
-
Singer 4572
User Manual
-
Singer CE-200
User Manual
-
Singer CE-100
User Manual
-
Singer 3820
User Manual
-
Singer 4228
User Manual
-
Singer 93234
User Manual
-
Singer 9940
User Manual
-
Singer 9940
Manual
-
Singer 9920
User Manual
-
Singer 9920
Manual
-
Singer 93220
User Manual
-
Singer 4220
User Manual