Page 2 - IMPORTANT SAFETY INSTRUCTIONS
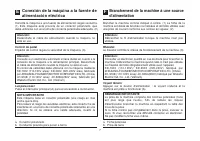
When using an electrical appliance, basic safety should always be followed, including the following: Read all instructions before using this sewing machine. 1. An appliance should never be left unattended when plugged in. 2. Always unplug this appliance from the electric outlet immediately after usi...
Page 3 - CONSERVAR ESTAS INSTRUCCIONES; IMPORTANTE INSTRUCCIONES DE SEGURIDAD
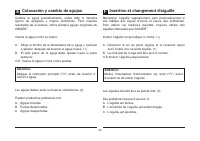
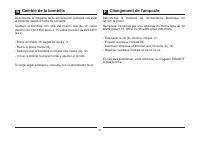
Cuando se utiliza un dispositivo eléctrico, debe seguirse siempre de seguridad básica, incluyendo las siguientes: Leer las instrucciones antes de utilizar está máquina de coser. 1. Un dispositivo eléctrico nunca debe dejarse desatendido cuando está conectado. 2. Desenchufar siempre la máquina de la ...
Page 4 - GARDER CE MODE D'EMPLOI; INSTRUCTIONS IMPORTANTES DE SÉCURITÉ
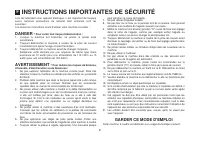
Lors de l'utilisation d'un appareil électrique, il est important de toujours suivre certaines précautions de sécurité dont certaines sont les suivantes : Lire toutes les instructions avant d'utiliser votre machine à coudre : 1. Lorsque la machine est branchée, ne jamais la laisser sans surveillance....
Page 6 - List of contents
List of contents Machine Basics Threading the Machine Sewing General Information Maintenance and Troubleshooting Principle Parts of the Machine ..................................................................................................................................................2/4 Connec...
Page 7 - Indice
Indice E Partes de la máquina Enhebrado de la máquina Cosiendo Información general Mantenimiento y solución de problemas ................................................................................................................................................................3/5 ..................
Page 8 - Table des matières
Table des matières F Les bases de la machine Enfilage de la machine Couture Informations générales Entretien et dépannage Composants principaux de la machine à coudre ......................................................................................................................3/5 Branchement...
Page 9 - Principal Parts of the Machine
1. Thread tension dial2. Thread take-up lever3. Thread cutter4. Presser foot5. Needle plate6. Removable accessory storage7. Reverse sewing lever8. Bobbin stopper9. Stitch width dial 10. Stitch length dial11. Pattern selector dial (Model 3229) 2 Principal Parts of the Machine 1 2 3 5 6 7 8 9 11 10 4 ...
Page 13 - Connecting Machine to Power Source
Connecting Machine to Power Source 6 Connect the machine to a power source as illustrated. (1) This appliance is equipped with a polarized plug which must be used with the appropriate polarized outlet. (2) Unplug power cord when machine is not in use. The foot control pedal regulates the sewing spee...
Page 16 - Accessories
9 Accessories EN 1 Standard accessories r s 006016008 006812008 2 Optional accessories m n p o 006804008 006803008 006800008 q 006810008 006917008 t u 006916008 006815008 v h g e f i j k a 006806008 b 006905008 d 006914008 Standard accessories (1) Optional accessories (2) a. All purpose foot b. Zipp...
Page 18 - Winding the Bobbin
Winding the Bobbin - corresponding . (1/2) - Snap thread into thread guide. (3) - Wind thread clockwise around bobbin winder tension discs. (4) - Thread bobbin as illustrated and place on spindle. (5) - Push bobbin spindle to right. (6) - Hold thread end. (7) - Step on foot control pedal. (8) - Cut ...
Page 20 - Inserting the Bobbin
Inserting the Bobbin When inserting or removing the bobbin, the needle must be fully raised. Attention: - Remove the extension table, then open the hinged cover. (1) - Pull the bobbin case tab (a) and remove the bobbin case. (2) - Hold the bobbin case with one hand. Insert the bobbin so that the thr...
Page 21 - Colocación de la bobina; Insertion de la canette
E F Colocación de la bobina La aguja tiene que estar siempre Atención: - Abrir la tapa con (1) - Abrir tapa de la caja de bobina (a) y quitar la caja de bobina. (2) - Sujetar con una mano. de manera que el hilo en el sentido de las agujas del reloj (flecha). (3) - Pasar el hilo por la ranura y por d...
Page 22 - Thread Tension
Thread Tension Upper thread tension Lower thread tension Please note: Basic thread tension setting: "4" To increase the tension, turn the dial to the next number up. To reduce the tension, turn the dial to the next number down. A. Normal thread tension for straight stitch sewing. B. Thread t...
Page 23 - Tensión del hilo; Tension du fil
E F Tensión del hilo superior No olvide que: Adjuste de la tensión del hilo básica: "4"Para aumentar la tensión, girar el disco al siguiente número más alto. Para reducir la tensión, girar el disco al siguiente número más bajo.A. Tensión normal del hilo para cosido de puntos rectos.B. Tensió...
Page 24 - Threading the Upper Thread
Threading the Upper Thread This is a simple operation but it is important to carry out correctly as by not doing so . - Start by raising the needle to its highest point (1), and continue turning the handwheel counterclockwise until the needle just slightly begins to descend. Raise the presser foot t...
Page 26 - Raising the Bobbin Thread
Raising the Bobbin Thread Hold the upper thread with the left hand. Turn the handwheel (1) towards you (counterclockwise) lowering, then raising needle. If it is difficult to raise the bobbin thread, check to make sure the thread is not trapped by the hinged cover or the . Gently pull on the upper t...
Page 28 - How to Choose Your Pattern
How to Choose Your Pattern 21 EN c d a b To select a stitch, simply turn the pattern selector dial. The pattern selector dial may be turned in either direction. For , select pattern " " or " " with the pattern selector dial. Adjust the stitch length with the stitch length dial. For ,...
Page 30 - Stitch Width Dial & Stitch Length Dial
1 3 Function of stitch width dial (Model 3229) Function of stitch length dial while zig-zag stitching Function of stitch length dial for when straight stitching The maximum zigzag stitch width for zigzag stitching is 5mm; however, the width can be reduced on any patterns. The width increases as you ...
Page 31 - Selector de ancho de puntada y
Función del selector de ancho de puntada (Modelo 3229) Función de largo de puntada mientras se realiza el zigzag Función de largo de puntada para costura recta El ancho máximo del zigzag es de 5 mm. Sin embargo, el ancho se puede modificar en cualquier puntada. El ancho aumenta cuando se mueve el se...
Page 32 - Sewing Straight Stitch
To begin sewing, set the machine for straight stitch. (1) Place the fabric under the presser foot with the fabric edge lined up with the desired seam guide line on the needle plate. (2) Lower the presser foot lifter, and then step on the foot controller to start sewing. (3) Sewing Straight Stitch 25...
Page 36 - Choosing Stretch Stitch Patterns
1 2 The stretch stitch patterns are indicated with a blue color on the p titch ength dial to the indicator marked "S1". Though there are several stretch patterns, here are two examples: The machine sews two stitches forward and one stitch backwards. Adjust the stitch width dial to between ...
Page 37 - Selección de Puntadas elásticas
Les motifs de point extensible sont indiqués en bleu sur le cadran de sélection de motifs. Pour sélectionner ces points, tourner le cadran de sélection de motifs sur le motif souhaité. Puis, tourner le cadran de longueur de point sur l'indicateur marqué par "S1". Il existe plusieurs motifs e...
Page 38 - Blind Hem
For hems on curtains, trousers, skirts, etc. Blind hem for stretch fabrics. Blind hem for firm fabrics. Set the stitch width dial at a setting appropriate for the weight/type of fabric being sewn, within the range shown in the diagram on the right of the page. Generally, a narrower stitch is used fo...
Page 40 - Sew 4-Step Buttonhole
Prepare Note: Tips: 1. Take off the all purpose foot and attach the buttonhole foot. 2. Measure diameter and thickness of button and add 0.3cm (1/8") for bar tacks; mark buttonhole size on fabric. 3. Place fabric under the foot, so that marking on the buttonhole foot aligns with starting marking...
Page 46 - Installing the Removable Accessory Storage
Hold the removable accessory storage horizontally, and push it in the direction of the arrow. (1) To remove the accessory storage, pull it toward the left. The standard accessories are contained inside the removable accessory storage compartment. To open, flip cover down as shown. (2) Installing the...
Page 48 - Attaching the Presser Foot Shank
41 Attaching the Presser Foot Shank 1 3 2 Raise the presser bar (a) with the presser foot lifter. Attach the presser foot shank (b) as illustrated. (1) Install the pin (d) of the presser foot (e) into the cut-out (c) of the presser foot lifer. Push the pin (d) of the presser foot forward to separate...
Page 50 - NEEDLE SIZE; Chart
Heavy woolen, overcoat fabrics, upholstery fabrics, some leathers and vinyls. EXPLANATION Standard sharp needles. Sizes range thin to large. 9 (70) to 18 (110). Semi-ball point needle, scarfed. 9 (70) to 18 (110). Leather needles. 12 (80) to 18 (110). SINGER ® 2020 SINGER ® 2045 SINGER ® 2032 9-11 (...
Page 51 - GUÍA DE SELECCIÓN DE AGUJAS/ TELAS/ HILOS; Guía de selección de agujas/ telas/ hilos
GUÍA DE SELECCIÓN DE AGUJAS/ TELAS/ HILOS CALIBRE DE LA AGUJA TELA HILO 9-11 (70-80) 11-14 (80-90) Telas de poco peso - algodones delgados, Voile, sarga, seda, muselina, interlocks (puntadas entrelazadas), tejidos de algodón, tricots, jerseys, crepés, poliester tejido, telas para camisas y blusas.Te...
Page 52 - Table de correspondance de l'aiguille, du tissu et du fil
Table de correspondance de l'aiguille, du tissu et du fil GUIDE DE SÉLECTION DE L'AIGUILLE, DU TISSU ET DU FIL 9-11 (70-80) 11-14 (80-90) 14 (90) 16 (100) 18 (110) Tissus légers, cotons légers, voile, serge, soie, mousseline, Qiana, tissu interlock, tricots de coton, tricots, jerseys, crêpes, polyes...
Page 53 - Darning Plate
For certain types of work, (e.g. darning or free-hand embroidery), the darning plate must be used. Install the darning plate as illustrated. For normal sewing, remove the darning plate. For free-motion sewing it is recommended to use a darning/embroidery foot, available as an optional accessory from...
Page 55 - Inserting & Changing Needles
A C B A B C D 1 2 Change the needle regularly, especially if it is showing signs of wear and causing problems. For best sewing results always use SINGER brand needles. Insert the needle A. Loosen the needle clamp screw and tighten again after inserting the new needle. (1) B. The flat side of the sha...
Page 57 - electrical; Changing the Bulb
Disconnect the machine from the power supply by removing the plug from the socket! Replace bulb with same type rated 10 watts (110-120V area) or 15 watts (220-240V area). - Loosen screw (A) as illustrated. (1)- Remove the face plate (B).- Unscrew the bulb and install a new one (C). (2)- Replace the ...
Page 58 - Cambio de la bombilla
Débrancher la machine de l'alimentation électrique en retirant la prise!Remplacer l'ampoule par une ampoule du même type de 10 Watts (pour 110-120V) ou 15 watts (pour 220-240V). - Desserrer la vis (A) comme indiqué. (1)- Enlever la plaque frontale (B).- Dévisser l'ampoule et installer une nouvelle (...
Page 59 - Troubleshooting Guide
52 Troubleshooting Guide EN Problem Cause Correction Upper thread breaks Lower thread breaks Skipped stitches Needle breaks Loose stitches Seams gather or pucker Uneven stitches, uneven feed The machine is noisy The machine jams 1. The machine is not threaded correctly. 2. The thread tension is too ...
Page 60 - Problemas y soluciones
53 E Problemas y soluciones Problema El hilo superior se rompe La aguja se rompe La costura se encoge, la tela se fruncePuntadas arraste no uniforme La máquina hace ruido Máquina obstruida Salto de puntadas Puntadas sueltas desiguales, Causa 1. La máquina está mal enhebrada. 2. La tensión del hilo e...
Page 61 - Guide de dépannage
54 F Guide de dépannage Problème Cause Solution Le fil supérieur casse Le fil inférieur casse Points manqués L'aiguille casse Points lâches Entraînement irrégulier La machine se bloque enfilée. du porte bobine. 1. Le boîtier n'est pas bien inséré. 2. Le boîtier n'est pas bien enfilé. 3. La tension i...