Page 3 - Contents
SE T U P EL EC TR IC A L M A INTEN A N CE SE RV IC E PA RT S O PE R ATIONS SA FE T Y IN TR O DUCT IO N USE THE QUICK GUIDE PAGE LABELS TO SEARCH OUT INFORMATION FAST! Contents INTRODUCTION ..................................... 2 Woodstock Technical Support .................. 2 Specifications ..........
Page 4 - Woodstock Technical Support; INTRODUCTION; Specifications
-2- Model W1706 (Mfg. Since 8/10) IN TR O DU CT IO N Woodstock Technical Support This machine has been specially designed to provide many years of trouble-free service. Close attention to detail, ruggedly built parts and a rigid quality control program assure safe and reliable operation. Woodstock I...
Page 5 - Controls and Features
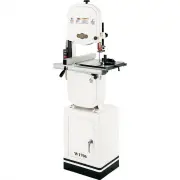
-3- Model W1706 (Mfg. Since 8/10) IN TR O DUCT IO N Controls and Features Figure 1. Bandsaw rear view. A B C D E F G Figure 2. Bandsaw front view. H J I L M K Refer to Figures 1–2 and the descriptions below to better understand the controls and features of the Model W1706. A. Blade Quick-Release Lev...
Page 6 - NOTICE; Standard Machinery Safety Instructions; Standard Machinery Safety Instructions
-4- Model W1706 (Mfg. Since 8/10) SA FE T Y Indicates a potentially hazardous situation which, if not avoided, MAY result in minor or moderate injury. Indicates an imminently hazardous situation which, if not avoided, WILL result in death or serious injury. Indicates a potentially hazardous situatio...
Page 8 - Additional Safety for Bandsaws
-6- Model W1706 (Mfg. Since 8/10) SA FE T Y Additional Safety for Bandsaws READ and understand this entire manual before using this machine. Serious per- sonal injury may occur if safety and operational information is not under- stood and followed. DO NOT risk your safety by not reading! BLADE CONDI...
Page 9 - POWER SUPPLY; Circuit Requirements
-7- Model W1706 (Mfg. Since 8/10) EL EC TR IC A L POWER SUPPLY The machine must be properly set up before it is safe to operate. DO NOT connect this machine to the power source until instructed to do so in the "Test Run" portion of this manual. DO NOT work on your electrical system if you ar...
Page 10 - Grounding Requirements
-8- Model W1706 (Mfg. Since 8/10) EL EC TR IC A L Grounding Requirements Extension Cords In the event of certain types of malfunctions or breakdowns, grounding provides a path of least resistance for electric current to travel— in order to reduce the risk of electric shock. Improper connection of th...
Page 11 - Unpacking; SETUP; Inventory
-9- Model W1706 (Mfg. Since 8/10) SE TU P This machine has been carefully packaged for safe transportation. If you notice the machine has been damaged during shipping, please contact your authorized Shop Fox dealer immediately. Unpacking SETUP The following is a description of the main components sh...
Page 12 - Cleaning Machine
-10- Model W1706 (Mfg. Since 8/10) SE TU P • Floor Load: This machine distributes a heavy load in a small footprint. Some residential floors may require additional bracing to support both machine and operator. • Working Clearances: Consider existing and anticipated needs, size of material to be proc...
Page 13 - Assembly
-11- Model W1706 (Mfg. Since 8/10) SE TU P The assembly procedure consists of attaching the bandsaw body to the cabinet stand, installing the trunnion base and table, and attaching the fence rails to the table. To assemble the bandsaw, do these steps: 1. Place the cabinet stand in the working locati...
Page 15 - Dust Collection
-13- Model W1706 (Mfg. Since 8/10) SE TU P 12. Place the fence assembly onto the front rail and position it to the left of the table insert, then secure it in place by pressing down on the lock lever (see Figure 12 ). Figure 12. Fence secured in place. Lock Lever DO NOT operate this machine without ...
Page 16 - Blade Tracking
-14- Model W1706 (Mfg. Since 8/10) SE TU P Blade Tracking Blade tracking is affected by the tilt of the upper wheel (known as center tracking) and the alignment of both wheels (known as coplanar tracking). The wheels on this bandsaw were aligned at the factory, so center tracking is the only adjustm...
Page 17 - Power Connection
-15- Model W1706 (Mfg. Since 8/10) SE TU P 6. Rotate the upper wheel by hand several times (at least three) and watch how the blade rides on the wheel crown. See Figure 15 for an illustration of this concept. — If the blade rides in the center of the upper wheel and is centered on the peak of the wh...
Page 18 - Test Run
-16- Model W1706 (Mfg. Since 8/10) SE TU P Once the assembly is complete, test run your machine to make sure it runs properly. If, during the test run, you cannot easily locate the source of an unusual noise or vibration, stop using the machine immediately, then review the Troubleshooting on Page 52...
Page 19 - Tensioning Blade
-17- Model W1706 (Mfg. Since 8/10) SE TU P Tensioning Blade A properly tensioned blade is essential for making accurate cuts, extending the life of the blade, and making many other bandsaw adjustments. For instance, every time you replace the blade, you must perform this procedure because all blades...
Page 20 - Adjusting Positive Stop
-18- Model W1706 (Mfg. Since 8/10) SE TU P Adjusting Positive Stop After using the table at a tilt of other than 0°, the positive stop allows the table to be quickly and accurately returned to the horizontal position in relation to the blade. This is important for accurate cutting results. Note: The...
Page 21 - Aligning Table
-19- Model W1706 (Mfg. Since 8/10) SE TU P Aligning Table To ensure cutting accuracy when the table is first installed, the table should be aligned so the miter slot is parallel to the bandsaw blade. This procedure works best with a 3 ⁄ 4 " blade. Tools Needed Qty Wrench or Socket 10mm ............
Page 22 - Aligning Miter Gauge
-20- Model W1706 (Mfg. Since 8/10) SE TU P Aligning Miter Gauge Body To ensure accurate cutting results when using the miter gauge, the miter gauge body must be aligned with the blade. Tools Needed Qty Machinist's Square ..............................................1 Phillips Screwdriver..............
Page 23 - Adjusting Fence
-21- Model W1706 (Mfg. Since 8/10) SE TU P Adjusting Fence The fence must be aligned with the blade to ensure accurate cutting results. This is best done by aligning the fence with the miter slot after the table is properly aligned. Tools Needed Qty Hex Wrench 5mm ......................................
Page 24 - Adjusting Blade Support
-22- Model W1706 (Mfg. Since 8/10) SE TU P Adjusting Blade Support Bearings The support bearings are positioned behind the blade and support the back of the blade during cutting operations. Proper adjustment of the support bearings is an important part of making accurate cuts and also keeps the blad...
Page 26 - Adjusting Blade Guide
-24- Model W1706 (Mfg. Since 8/10) SE TU P Adjusting Blade Guide Bearings The blade guides provide side-to-side support to keep the blade straight while cutting. The blade guides are designed to be adjusted in two ways—forward/backward and side-to-side. Properly adjusted blade guides are essential t...
Page 28 - OPERATIONS; General
-26- Model W1706 (Mfg. Since 8/10) O PE R ATIO NS OPERATIONS General This machine will perform many types of operations that are beyond the scope of this manual. Many of these operations can be dangerous or deadly if performed incorrectly. The instructions in this section are written with the unders...
Page 29 - Operation Overview
-27- Model W1706 (Mfg. Since 8/10) O PE R ATIONS Operation Overview The purpose of this overview is to provide the novice machine operator with a basic understanding of how the machine is used during operation, so the machine controls/components discussed later in this manual are easier to understan...
Page 30 - Basic Controls
-28- Model W1706 (Mfg. Since 8/10) O PE R ATIO NS Basic Controls Refer to Figures 35–37 and the descriptions below to better understand the basic controls and components of this bandsaw. A. ON/OFF Buttons: Turns the motor ON and OFF . B. Upper Wheel Cover Knob: Enables access to the upper wheel comp...
Page 31 - Cutting Overview
-29- Model W1706 (Mfg. Since 8/10) O PE R ATIONS Cutting Overview The Model W1706 is capable of performing the following cuts: • Miters • Compound Angles • Angles • Simple/Complex Curves • Resawing • Duplicate Parts • Ripping • Circles • Crosscutting • Beveled Curves Workpiece Inspection Some wood w...
Page 32 - Basic Cutting Tips
-30- Model W1706 (Mfg. Since 8/10) O PE R ATIO NS • Wet or "Green" Stock: Cutting wood with a moisture content over 20% causes unnecessary wear on the blade and yields poor results. • Excessive Warping: Workpieces with excessive cupping, bowing, or twisting are dangerous to cut because they ...
Page 33 - Table Tilt; Adjusting Guide Post
-31- Model W1706 (Mfg. Since 8/10) O PE R ATIONS Table Tilt The table tilts 45° to the right and 10° to the left for a wide range of cutting options. To tilt the table, do these steps: 1. DISCONNECT BANDSAW FROM POWER! 2. Loosen the two trunnion lock knobs underneath the table (see Figure 40 ), then...
Page 34 - Ripping
-32- Model W1706 (Mfg. Since 8/10) O PE R ATIO NS Ripping Ripping is the process of cutting with the grain of the wood stock. For plywood and other processed wood, ripping simply means cutting down the length of the workpiece. For ripping, a wider blade is better. In most ripping applications, a sta...
Page 35 - Crosscutting
-33- Model W1706 (Mfg. Since 8/10) O PE R ATIONS Crosscutting Crosscutting is the process of cutting across the grain of wood. For plywood and other processed wood, crosscutting simply means cutting across the width of the material. To make a 90˚ crosscut, do these steps: 1. Mark the workpiece on th...
Page 36 - Resawing
-34- Model W1706 (Mfg. Since 8/10) O PE R ATIO NS Resawing Resawing (see Figure 44 for an example) is the process of cutting a board into two or more thinner boards. The maximum board width that can be resawn is limited by the maximum cutting height of the bandsaw. Maximum cutting height for this ba...
Page 37 - Cutting Curves; Stacked Cuts
-35- Model W1706 (Mfg. Since 8/10) O PE R ATIONS When cutting curves, simultaneously feed and turn the stock carefully so that the blade follows the layout line without twisting. Use either a narrower blade or a blade with more TPI (teeth per inch), or make more relief cuts, to avoid having to back ...
Page 38 - Blade Speed
-36- Model W1706 (Mfg. Since 8/10) O PE R ATIO NS The Model W1706 offers blade speeds of 1500 & 3200 FPM (Feet Per Minute). For general woodworking and most cutting operations, we recommend using the 3200 FPM speed. Keep in mind, the results from different speeds are related to the type of blade...
Page 39 - Blade Information
-37- Model W1706 (Mfg. Since 8/10) O PE R ATIONS Blade Information Selecting the right blade requires a knowledge of the various blade characteristics to match the blade with the particular cutting operation. Blade Length Measured by the circumference, blade lengths are usually unique to the brand o...
Page 41 - Blade Changes
-39- Model W1706 (Mfg. Since 8/10) O PE R ATIONS Blade Changes If the bandsaw should unexpectedly start up when the wheel covers are open or when changing the blade, entanglement or amputation injuries could result. ALWAYS disconnect the bandsaw from power before opening the wheel covers. To change ...
Page 42 - ACCESSORIES; Bandsaw Accessories
-40- Model W1706 (Mfg. Since 8/10) O PE R ATIO NS ACCESSORIES Bandsaw Accessories The following Bandsaw accessories may be available through your local Woodstock International Inc. Dealer. If you do not have a dealer in your area, these products are also available through online dealers. Please call...
Page 43 - MAINTENANCE; Lubrication
-41- Model W1706 (Mfg. Since 8/10) M A INTEN A N CE MAINTENANCE Lubrication The table can be kept rust-free with regular applications of products like SLIPIT ® . For long term storage you may want to consider products like Boeshield T-9™. Protecting Table Frequently blow-off sawdust with compressed ...
Page 44 - SERVICE; Redressing Rubber Tires
-42- Model W1706 (Mfg. Since 8/10) SE RV IC E SERVICE This section covers the most common service adjustments or procedures that may need to be made during the life of your machine. If you require additional machine service not included in this section, please contact Woodstock International Technic...
Page 45 - Belt Service
-43- Model W1706 (Mfg. Since 8/10) SE RV IC E Belt Service To ensure optimum power transmission from the motor to the blade, the belt must be in good condition and operate under proper tension. The belt should be checked for cracks, fraying, and wear. Belt tension should be checked at least every 3 ...
Page 47 - Shimming Table
-45- Model W1706 (Mfg. Since 8/10) SE RV IC E Shimming Table To ensure accuracy when cutting stacked workpieces or circles, the table should be 90° to the back of the blade, as illustrated in Figure 56 . If the table is not perpendicular to the back of the blade, the table will need to be shimmed. I...
Page 48 - Blade Lead
-46- Model W1706 (Mfg. Since 8/10) SE RV IC E Blade Lead Bandsaw blades may wander off the cut line when sawing, as shown in Figure 58 —this is called blade lead. Blade lead is usually caused by too fast of a feed rate, a dull or damaged blade, or improper blade tension. If your blade is sharp/undam...
Page 52 - Electrical Safety Instructions
-50- Model W1706 (Mfg. Since 8/10) SE RV IC E These pages are current at the time of printing. However, in the spirit of improvement, we may make changes to the electrical systems of future machines. Study this diagram carefully. If you notice differences between your machine and these wiring diagra...
Page 53 - STOP
-51- Model W1706 (Mfg. Since 8/10) SE RV IC E STOP Read Page 50 Before Wiring W1706 Wiring Diagram
Page 54 - Troubleshooting
-52- Model W1706 (Mfg. Since 8/10) SE RV IC E Troubleshooting This section covers the most common problems and corrections with this type of machine. WARNING! DO NOT make any adjustments until power is disconnected and moving parts have come to a complete stop! PROBLEM POSSIBLE CAUSE CORRECTIVE ACTI...
Page 55 - PARTS; Cabinet Stand
-53- Model W1706 (Mfg. Since 8/10) PA RT S 1 1-1 1-2 1-3 1-4 1-5 8 11 11-1 11-2 11-3 11-4 11-5 12 13 25V2 26V2 73 97 98 98-1 99 100 101 102 103 104 104-1 105 106 108 109 110 111 112 113 174V2 175 176 177 178 179 180 181 182 184 104 PARTS Cabinet Stand
Page 56 - Cabinet Stand Parts List; Body Parts List
-54- Model W1706 (Mfg. Since 8/10) PA RT S Cabinet Stand Parts List REF PART # DESCRIPTION REF PART # DESCRIPTION 1 X1706001 CABINET STAND ASSEMBLY 101 X1706101 TRUNNION 1-1 X1706001-1 CABINET STAND 102 X1706102 TILT SCALE 1-2 X1706001-2 CABINET DOOR 103 X1706103 TRUNNION CLAMP SHOE 1-3 X1706001-3 B...
Page 57 - Body
-55- Model W1706 (Mfg. Since 8/10) PA RT S Body 2 3 4 5 6 7 8 9 10 14V2 15 16 17 19 20V2 21 22 23 24V2 28 29 29-1 30 31 33 34 35 35-1 35-2 38 39 40 41 42 43 44 45 45-1 46 47 48 51 55 56 57 59 60 61 63 64 65 67 68 69 70 71 72 73 74 75 76 79 80 81 82 83 84 85 86 88 89 92 93 94 95 113 115 116 117 118 1...
Page 60 - Fence & Miter Gauge Parts List
-58- Model W1706 (Mfg. Since 8/10) PA RT S Fence & Miter Gauge Parts List REF PART # DESCRIPTION REF PART # DESCRIPTION 23 XPS22 PHLP HD SCR 10-24 X 5/8 114-4 X1706114-4 STOP DOWEL 27 XPCAP44 CAP SCREW 1/4-20 X 2-1/2 114-5 X1706114-5 HANDLE 1/4-20 32 XPS49 PHLP HD SCR 8-32 X 1-1/4 114-6 X1706114...
Page 63 - WARRANTY
WARRANTY Woodstock International, Inc. warrants all Shop Fox machinery to be free of defects from workmanship and materials for a period of two years from the date of original purchase by the original owner. This warranty does not apply to defects due directly or indirectly to misuse, abuse, neglige...
Page 64 - High Quality Machines and Tools
High Quality Machines and Tools Woodstock International, Inc. carries thousands of products designed to meet the needs of today's woodworkers and metalworkers. Ask your dealer about these fine products: