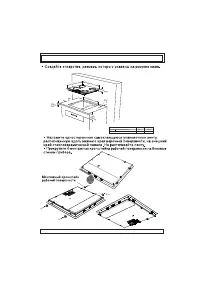
Page 10 - выполнением
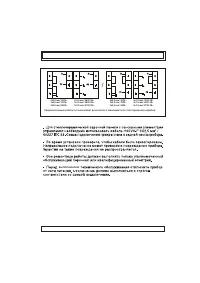
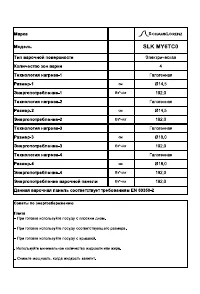
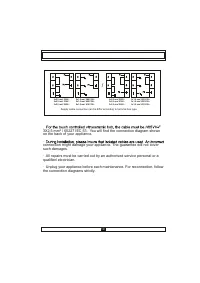
3x2,5 mm² 220V~3x2,5 mm² 230V~3x2,5 mm² 240V~ 3x2,5 mm² 220V~3x2,5 mm² 230V~3x2,5 mm² 240V~ 5x1.5 mm² 380V 3N~5x1.5 mm² 400V 3N~5x1.5 mm² 415V 3N~ 5x1.5 mm² 380V 3N~5x1.5 mm² 400V 3N~5x1.5 mm² 415V 3N~ / выполнением Соединительный кабель питания может различатся в зависимости от типа терминала короб...
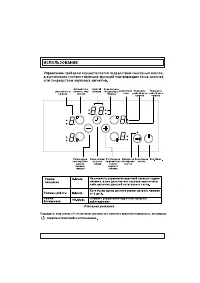
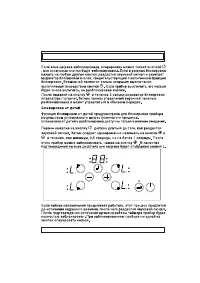
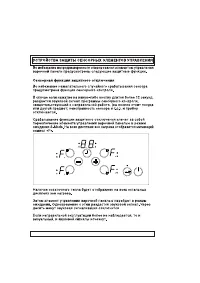
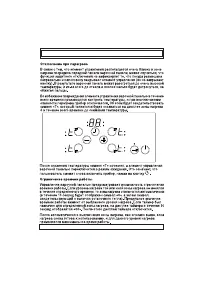
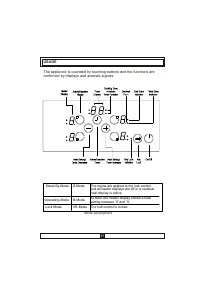
Page 17 - кнопок
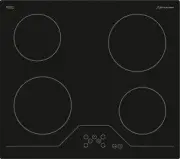
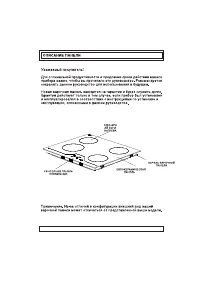
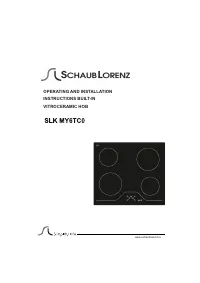
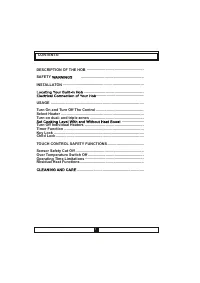
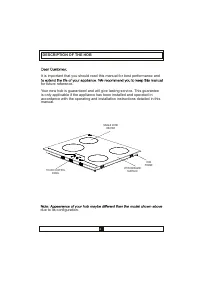
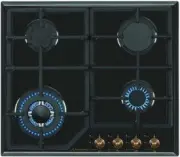
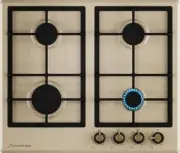
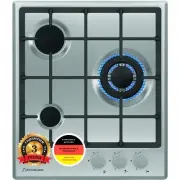
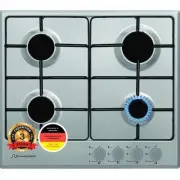
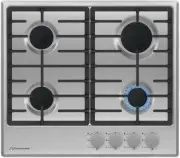
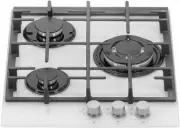
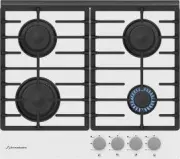
Page 29 - DESCRIPTION OF THE HOB; for future reference.
2 DESCRIPTION OF THE HOB It is important that you should read this manual for best performance and for future reference. Your new hob is guaranteed and will give lasting service. This guaranteeis only applicable if the appliance has been installed and operated inaccordance with the operating and ins...
Page 30 - YOUR APPLIANCE, AND KEEP IT IN A CONVENIENT PLACE FOR REFERENCE
3 YOUR APPLIANCE, AND KEEP IT IN A CONVENIENT PLACE FOR REFERENCE THIS MANUAL IS PREPARED FOR MORE THAN ONE MODEL IN COMMON. YOURAPPLIANCE MAY NOT HAVE SOME OF THE FEATURES THAT ARE EXPLAINEDIN THIS MANUAL. PAY ATTENTION TO THE EXPRESSIONS THAT HAVE FIGURES,WHILE YOU ARE READING THE OPERATING MANUAL...
Page 31 - - Do not use steam cleaners for cleaning the appliance.
4 - WARNING: If the surface is cracked, switch off theappliance to avoid the possibility of electric shock. - For hobs incorporating a lid, any spillage should beremoved from the lid before opening. And also the hobsurface should be allowed to cool before closing the lid. - The appliance is not inte...
Page 33 - - Do not remove the control knobs to clean the control panel.
6 During usage - Do not put flammable or combustible materials, in or near the appliance when it isoperating. - Do not leave the cooker while cooking with solid or liquid oils. They may catch fireon condition of extreme heating. Never pour water on to flames that are caused by oil.Cover the saucepan...
Page 34 - Locating your built-in hob; · This built-in hob is to be inserted into a cut out of a worktop.; INSTALLATION
7 The electrical connection of this hob should be carried out by anauthorised service personal or a qualified electrician, according to theinstructions in this guide and in compliance with the current regulations. · Before connecting your appliance to the mains at home, make sure tocheck the conform...
Page 35 - · Screw the 4 worktop mounting brackets on the side walls of product.; worktop mounting bracket
8 · Screw the 4 worktop mounting brackets on the side walls of product. · Apply the one-sided self-adhesive sealing tape supplied all the way roundthe lower edge of the cooking surface along the outer edge of the glassceramic panel. Do not stretch it. worktop mounting bracket 520mm 590mm 41mm 560mm ...
Page 36 - Electrical connection of your hob; · Do not use adaptors, multiple sockets and/or extension leads.
9 Electrical connection of your hob . Before proceeding with the electrical connection, verify that the currentcarrying capacity of the system and the socket is adequate for the maximumpower rating of the hob. · Electrical installation of the residence and the electrical current plug inuse must be e...
Page 38 - Mode Descriptions; USAGE; Lock Mode
Mode Descriptions USAGE The appliance is operated by touching buttons and the functions areconfirmed by displays and acoustic signals. Stand-By-Mode S-Mode The mains are applied to the hob controland all heater displays are off or a residualheat display is active. Operating-Mode B-Mode At least one ...
Page 39 - Select Heater
12 If the appliance is in Stand-By-Mode, it is put in Operating-Mode by pressing successful operation acoustically. On all heaters a ´0` appears and all Decimal Point of the heater flashes (1 sec on, 1 sec off). If there is no operation within 10 sec, the display of all heaters will turn off. If the...
Page 40 - All heaters are equipped with heat boost functionality.
All heaters are equipped with heat boost functionality. If the heat boost is active, than the heater will be operated with maximumpower for the period of the heat boost time, that is dependent from theselected heat setting. This is indicated through a flashing ´A`, alternatingwith the heat setting v...
Page 41 - Turn Off Individual Heaters
14 The heat boost can be turned off by pressing until heat setting ´0`appears.If the heat boost should be used, it can always be activated by actuatingagain if the heat setting is set to level 9. In the heat display ´A/9` flashes. Turn Off Individual Heaters . Simultaneous operation of and buttons· ...
Page 42 - Timer Function (available only in some models)
15 Use of timer turn off function for corresponding heater (available only insome models) After reaching a remaining time of 0 minutes, the timer stops the linked Display . In the Timer Display is shown ´00`. The related timer Cooking Zone Indicator disappears. An assigned Dual/Triple Zone Selection...
Page 44 - Key Lock
17 10 sec after the last operation, the timer display changes to the timer thatwill run out next.The assignment of that timer is displayed always by a flashing Cooking Zone Indicator . How many timer are running you can identify by the number of Cooking Zone Indicator that are statically on. By togg...
Page 45 - Child Lock; Child locking and unlocking is only available in the
18 If the heater is locked, only can be operated, all other buttons are blocked.If there is any other button operated in the blocked mode, the buzzer signalsounds and the Key Lock Indicator flashes as indication for the activated key lock functionality. Only the switch off by operation of is possibl...
Page 46 - pressing until the beep, then the and have to be pressed
19 pressing until the beep, then the and have to be pressed a confirmation for successful unlocking, ´L` symbol in the displays will beerased immediately.
Page 47 - The safety turn off causes that the hob control is turned off to the
20 TOUCH CONTROL SAFETY FUNCTIONS The following safety functions are available to avoid unintended operationsof the hob control. Sensor Safety Cut Off To prevent the appliance from unwanted, random sensor operation, a sensormonitoring is included. In case of one or more buttons are pressed longer th...
Page 49 - Residual Heat Functions
22 Residual Heat Functions After all cooking processes there is some heat stored in the vitroceramicglass called residual heat. The control can calculate roughly how hot theglass is in the worst case. If the calculated temperature is higher than + 60° C, then this will be indicated in the correspond...
Page 50 - CORRECT
23 Cookware with rough bottoms should not be used since these can scratchthe glass ceramic surface. The bottom of the good cookwares should be asthick and flat as possible. Before use, make sure that cookware bottomsare clean and dry. Always place the cookware on the cooking zone before it is switch...