Page 2 - Index
Page 2 Index 1. Welcome ......................................................................................................................................... 3 2. Your Safety — General Warnings .................................................................................................... 4...
Page 3 - ATTENTION
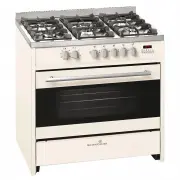
Page 3 1. Welcome Welcome Thank you for purchasing this Scandium appliance. To get the optimal performance from your appliance, and to avoid the risk of accidents or damage, it is essential to read this manual before installation and first time use. This guide contains important information on the u...
Page 4 - Your Safety — General Warnings
Page 4 2. Your Safety — General Warnings Please read the following carefully, as these warnings are provided in the interest of safety. You MUST read them carefully before installing or using the appliance. • It is important that this instruction book be retained with the appliance for future refere...
Page 6 - Cooker Installation
Page 6 3. Installer’s Guide Cooker Installation This appliance should only be installed by authorised persons and in accordance with the manufacturer’s installation instructions, local gas fitting regulations, municipal building codes, electrical wiring regulations, local water supply regulations, A...
Page 8 - Gas Connection
Page 8 3. Installer’s Guide Gas Connection The cooker is provided with a rating plate placed on the rear panel near the gas inlet, showing the type of gas and pressure for which the appliance has been originally adjusted. Before connecting this appliance, check if it is prepared for the type of gas ...
Page 11 - To Fit The Stabilising Chains
Page 11 3. Installer’s Guide To Fit The Stabilising Chains In order to prevent tipping of the appliance it is equipped with 2 chains for stabilising means and must be installed and is required for safety reasons. After the connection to gas and electrical supply is completed and oven is located in i...
Page 12 - Conversion to Other Type of Gas
Page 12 3. Installer’s Guide Conversion to Other Type of Gas This operation must be executed by qualified and authorised personnel. This appliance has been designed to function with ULPG or Natural gas. This appliance is provided with a label on the rear panel, near the gas inlet, indicating the typ...
Page 15 - How to Use Burners of The Cooking Top; Description of the main parts of the appliance; WARNING; Ignition and Operation of the Burners
Page 15 4. User’s Guide How to Use Burners of The Cooking Top Description of the main parts of the appliance WARNING • Do not spray aerosols in the vicinity of this appliance while it is in operation. • The appliance shall not be used as a space heater.• Do not store flammable materials in the stora...
Page 16 - Advice on the use of gas burners
Page 16 4. User’s Guide In the models with triple burner pay attention to these points: Make sure the cover spreader is in the correct position, to guarantee good burning. To ignite the burners proceed as follows: • Push down the dial of a selected burner until you feel resistance and turn anti-cloc...
Page 17 - The oven door must be closed for all cooking methods
Page 17 4. User’s Guide Oven light In this position only the oven light is in operation. The light stays on when switching to different heating elements. Fan forced The circular heating element and fan come into operation and the heat is spread evenly to all shelf positions. Various types of food ca...
Page 18 - Oven Light Use; Electronic Programmer
Page 18 Defrosting The defrosting takes place in the same way as at room temperature, but with the advantage that it is much more rapid. In this position only the fan is in operation. Fan assisted The outside ring of the top element and the bottom element and fan come into operation and the heat is ...
Page 22 - General Remarks
Page 22 4. User’s Guide General Remarks • Between 10pm and 6am the display intensity dims automatically. • If not deactivated as per the following instructions, the acoustic signal is cut off after 2 minutes. • Any programming described hereunder is activated after approx. 4 seconds from its setting...
Page 23 - Recommendations for Using the Oven and the Grill
Page 23 4. User’s Guide Minute Minder When this device is used as a simple minute minder, press button (1) and programme the required time by pressing buttons (-) and (+) within the next 4 seconds: the actual time reappears and the symbol (B) is activated. Press one of the buttons from 1 to 4 to dis...
Page 25 - Instructions for Maintenance and Cleaning; General Cleaning
Page 25 5. Instructions for Maintenance and Cleaning General Cleaning • Adequate maintenance and cleaning will prolong the life of the appliance, as well as ensure trouble-free service. • The cooker must be washed with warm water, using a damp sponge and ordinary detergent. • Never use scouring powd...
Page 26 - Oven Cleaning
Page 26 5. Instructions for Maintenance and Cleaning Oven Cleaning The oven should be washed with warm water and a nylon pad soaked in ordinary detergent. The oven is “Easy to Clean“ enamel, no need for abrasive detergent or cleaning cloths for cleaning. How to remove the interior glass on the oven’...
Page 27 - Replacing The Oven Bulb
Page 27 5. Instructions for Maintenance and Cleaning • Insert the interior tops B . Replacing The Oven Bulb Once the appliance has been electrically disconnected, unscrew the glass protection cap and the bulb, replacing it with another one suitable for high temperatures (300ºC) having the following ...
Page 28 - Removing the Side Racks of the Oven
Page 28 5. Instructions for Maintenance and Cleaning Removing the Side Racks of the Oven • To facilitate cleaning, the chrome side racks can be removed.• Follow the instructions (1) to (3) for removal.• To re-install follow the instructions in reverse from (3) to (1). 1. Raise the side rack vertical...
Page 29 - Remove the Oven Door for Cleaning
Page 29 Remove the Oven Door for Cleaning For complete cleaning, we advise removing the door as follows: • Set the door wide open. • Turn the brackets of the lower hinges upwards until hooking the upper hinges. • Set the door ajar, then lift lightly to remove the lower hinges from the slots. • Remov...
Page 30 - Control of The Product
Page 30 6. Control of The Product The producer certifies that this appliance has undergone the following verifications: • Electric unit operation • Dielectric rigidity • Earthing continuity • Operation with one type of gas • Leak control • Operation of the safety valves • Aesthetic control
Page 32 - Technical Characteristics
Page 32 8. Technical Characteristics Burners Electric Auxiliary - 1 Semi-rapid - 2 Rapid - 1 Wok - 1 Oven 4000 E Grill 2800 E Circular Resistance 4600 E Oven volume (L) 121 EE table (%) 65 Maximum electric power (W) 4707 Electric supply (V) 230-240V Maximum Intensity (A) 19.6 Electric cable (HO5 PR ...
Page 33 - Gas Burners; In Case of Emergency
Page 33 9. Troubleshooting Some minor faults can be fixed by referring to the instructions in the table below. Before calling the customer service centre, check the following points. Problem Reason Action 1. The appliance does not work Break in power supply Check the household fuse box; if there is ...
Page 34 - Service; Faulty Installation
Page 34 9. Troubleshooting Service In the event that the failure is not due to the faults mentioned in Troubleshooting, contact the customer service centre. In Australia, Customer Service 1300 829 066 In New Zealand, Customer Service 0800 200 510 Lodging an Online Service Request In the event that f...