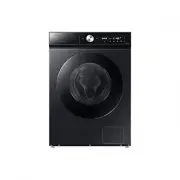
Page 2 - Safety information; Important safety symbols; WARNING; CAUTION; NOTE; Important safety precautions; WARNING; This appliance is not to be used by persons (including children)
English 2 NOTE • Spanner: For removing the shipping bolts and levelling the washing machine.• Bolt caps: For covering the holes after removing the shipping bolts. The provided number of bolt caps (3 to 6) depends on the model. • Hose guide: For hanging the drain hose in the drainpipe or wash-basin...
Page 3 - For use in Europe
English 3 2. For use in Europe : This appliance can be used by children aged from 8 years and above and persons with reduced physical, sensory or mental capabilities or lack of experience and knowledge if they have been given supervision or instruction concerning use of the appliance in a safe way...
Page 4 - Critical installation warnings
English 4 ‐ by clients in hotels, motels and other residential type environments; ‐ bed and breakfast type environments; areas for communal use in blocks of flats or in launderettes. Critical installation warnings WARNING The installation of this appliance must be performed by a qualified technici...
Page 5 - Installation cautions; Critical usage warnings
English 5 Do not pull or excessively bend the power cord.Do not twist or tie the power cord.Do not hook the power cord over a metal object, place a heavy object on the power cord, insert the power cord between objects, or push the power cord into the space behind the appliance.• This may result in...
Page 6 - Usage cautions
English 6 Do not open the washing machine door by force while it is operating (high-temperature washing/drying/spinning).• Water flowing out of the washing machine may result in burns or cause the floor to be slippery. This may result in injury. • Opening the door by force may result in damage to ...
Page 9 - Critical cleaning warnings; Declaration of conformity (for network models only); Product disposal in France
English 9 Critical cleaning warnings WARNING Do not clean the appliance by spraying water directly onto it.Do not use a strong acidic cleaning agent.Do not use benzene, thinner or alcohol to clean the appliance.• This may result in discolouration, deformation, damage, electric shock or fire.Before...
Page 10 - Declaration of conformity
English 10 Declaration of conformity Hereby, Samsung declares that this radio equipment is in compliance with Directive 2014/53/EU and with the relevant statutory requirements in the UK. The full text of the EU declaration of conformity and the UK declaration of conformity is available at the foll...
Page 11 - Installation; Installation requirements; Electrical supply and grounding; Water supply; Drain
English 11 Installation Follow these instructions carefully to ensure proper installation of the washing machine and prevent accidents when doing laundry. Installation requirements Electrical supply and grounding Use an individual branch circuit specific to the washing machine. To ensure proper gr...
Page 12 - Flooring; Water temperature; STEP 1
English 12 Flooring For best performance, the washing machine must be installed on a solid floor. Wood floors may need to be reinforced to minimise vibration and/or unbalanced loads. Carpeting and soft tile surfaces do not resist vibrations well and may cause the washing machine to move slightly d...
Page 13 - STEP 2; STEP 3
English 13 STEP 2 Remove the shipping bolts A B 1. Unpack the product from the package and remove all shipping bolts. 2. Insert the bolt caps (B) into the holes (marked with circles in the figure). NOTE The number of shipping bolts may differ depending on the model. WARNING • To avoid injury, c...
Page 14 - STEP 4; STEP 5
English 14 STEP 4 Connect the water hose NOTE These instructions are for the threaded water tap. For more detailed instructions or instructions for connecting the water hose to a non-threaded water tap, please visit the website on the cover of this manual and check the web manual. 1. Connect ...
Page 15 - STEP 6; Run Calibration
English 15 STEP 6 Power on Plug the power cord into a wall socket protected by a fuse or circuit breaker. Then, tap and hold for 3 seconds to turn on the washing machine. NOTE • Before doing your laundry for the first time, you must run a complete wash cycle without any items in the drum.• If the...
Page 16 - Setting the amount of detergent/softener input; Dose per Wash; Setting the water hardness/softener concentration level; Water Hardness
English 16 • Keep the door open so that inside the drum and detergent drawer can be well ventilated.• Always keep the detergent drawer and the auto dispenser covers closed except when adding detergent and/or softener. Air can enter all the way inside and can dry out the detergent and/or softener. ...
Page 18 - Operations; Cycle and Option list; Cycle; Options
English 18 Operations For detailed information on using the washing machine, see the provided one-sheet manual. (Washing machine operation guide) NOTE The cycle and function names that appeared in this manual may differ from your product. Cycle and Option list Cycle Eco 40-60 AI Wash Cotton 15’ Qu...
Page 19 - Settings
English 19 Auto dispenser (WW**D***9***, WW**D***8***, WW**D***7***, WW**D***6***, WW**D***5***, WW**D***4*** models only) Quick Drive Prewash Intensive Bubble Soak Delay End Dispenser Dispenser Pump Clean My Cycles Child lock • Child Lock : Tap O to lock all the buttons except the button. • Delay...
Page 20 - SmartThings; Download; Log in; To register your appliance to SmartThings; Smart Control
English 20 SmartThings Wi-Fi connection On your smartphone or tablet, go to Settings and turn on the wireless connection and select an AP (Access Point). • This appliance supports the Wi-Fi 2.4 GHz protocols. Download On an app market (Google Play Store, Apple App Store, Samsung Galaxy Apps), find...
Page 21 - Maintenance; Cleaning; Emergency drain
English 21 Maintenance For instructions on cleaning the washing machine, please visit the website on the cover of this manual and check the web manual. Cleaning Detergent drawer (WW**D***9***, WW**D***8***, WW**D***7***, WW**D***6***, WW**D***5***, WW**D***4*** model only) 1. While holding down th...
Page 22 - Debris filter
English 22 Debris filter 1. Turn off the washing machine, and unplug the power cord. 2. Drain the remaining water inside the drum. (For details, refer to the Emergency drain section.) 3. Open the filter cover . ‐ TYPE 1: Gently press the top area of the filter cover to open. ‐ TYPE 2: Push dow...
Page 23 - Troubleshooting; Checkpoints
English 23 Troubleshooting If there is any problem, check the information message on the LCD screen and follow the on-screen instructions.If the problem persists, please contact the service center. Checkpoints If you encounter a problem with the washing machine, first check the table below and try...
Page 27 - Specifications; Protecting the environment; Specification sheet
English 27 Specifications Protecting the environment • This appliance is manufactured from recyclable materials. If you decide to dispose of this appliance, please observe local waste disposal regulations. Cut off the power cord so that the appliance cannot be connected to a power source. Remove t...
Page 28 - Auto dispenser; Manual dispenser
English 28 Auto dispenser Type Front loading washing machine Model name WW1*DB****** WW9*DB****** Dimensions A (Width) 600 mm B (Height) 850 mm C (Depth) 600 mm D (Depth+Door frame thickness) 640 mm 630 mm E 1090 mm 1080 mm Water pressure 50-1000 kPa Net weight 75.0 kg (WW**DB****G*) 74.0 kg (WW**...
Page 31 - Memo
Memo DC68-04508B-02_IB_B-PJT-B11_WASHER_SimpleUX_EN.indd 31 2024-03-15 5:42:38