Page 2 - Contents
English 2 Contents Safety information 3 Caution/Warning symbols used 3 Other symbols used 3 General 4Installation 5Power 5Before use 5 Cleaning and maintenance 8 Battery usage 9 Preparation 11 Accessories 11Parts overview 11 Installation 14 Installing the Clean Station 14 Operation 16 Removing the...
Page 3 - Safety information; and retain it for your reference.; CAUTION
English 3 Safety information • Before operating the appliance, please read this manual thoroughly and retain it for your reference. • Because the following operating instructions cover various models, the characteristics of your vacuum cleaner may differ slightly from those described in this manua...
Page 4 - Safety information; General; Do not use the vacuum cleaner on a wet rug or floor.
Safety information English 4 General 1. This appliance can be used by children aged from 8 years and above and persons with reduced physical, sensory or mental capabilities or lack of experience and knowledge if they have been given supervision or instruction concerning use of the appliance in a s...
Page 5 - Installation; Power; Before use
English 5 Installation WARNING When installing the Clean Station , make sure the cord does not get damaged in any way. • There is a risk of fire or electric shock. CAUTION When installing the Clean Station , do not leave the cord carelessly on the floor since the Jet Bot Combo may get caught by it...
Page 8 - Cleaning and maintenance
Safety information English 8 The Jet Bot Combo cannot vacuum clumps of dust, so some may remain on the floor after cleaning. • Please use another cleaning tool to clean. During periods where temperature and humidity are high, it is recommended to replace the Dust Bag every 1 ~ 2 months. If the Cle...
Page 9 - Battery usage
English 9 Battery usage If the battery overheats during charging, it may take longer to charge. When auto charging is not working, do the following. • Unplug the Clean Station ’s power plug and then plug it back on. • Check whether there is any foreign matter on the charging pins and clean chargin...
Page 11 - Preparation; Accessories; Parts overview; Jet Bot Combo
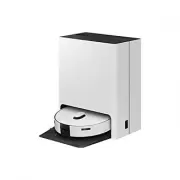
English 11 Preparation Accessories Base Plate Washing Plate Clean Station Power Cord Cleaning Tool NOTE Accessories may differ depending on the models. Parts overview Jet Bot Combo Top (Front) 01 02 03 05 06 04 01 07 (Model VR7MD96**** ) (Model VR7MD97**** ) 01 Microphone 02 Microphone Indicator 0...
Page 12 - Bottom
Preparation English 12 Top (Back) "0"1 05 04 01 02 03 06 07 08 01 Dustbin 02 Top Cover 03 Charging Pin 04 Reset button 05 Start/Stop button 06 Docking (Recharging) button 07 LiDAR Sensor 08 Obstacle Sensor Bottom 06 11 07 01 02 03 04 04 05 08 09 10 01 Mop Spin Board 02 Mop 03 Driving Wheel...
Page 13 - Clean Station; Front
English 13 Clean Station Front 05 07 02 03 04 06 01 08 01 Waste Water Tank 02 Clean Water Tank 03 Dustbin 04 Status Indicator 05 Washing Space 06 Base Plate 07 Charging Signal Transmitter 08 Washing Plate Back 01 03 04 06 02 05 01 Filter Cover 02 Fine Dust Filter 03 Power Cord Port 04 Lifting Hand...
Page 14 - Installing the Clean Station
English 14 Installation Scan the QR code to see a video on how to use the product. Installing the Clean Station Refer to the figure and clear enough space around the Clean Station . A A B A : Approximately 0.5 m B : Approximately 1.0 m 1. Connect the provided power cord to the Power Cord Port of t...
Page 16 - Operation; Removing the protective covers on the Jet Bot Combo
English 16 Operation Removing the protective covers on the Jet Bot Combo Remove all protective coverings before using the Jet Bot Combo for the first time. 1. Lift the Spin Brush ’s protective cover in the direction of the arrow as shown in the figure. 2. Detach the Spin Brush ’s protective cover....
Page 17 - Preparing the Clean Water Tank
English 17 Preparing the Clean Water Tank 1. Detach the Clean Water Tank from the Clean Station by pulling the handle on the top. 2. Pull the latch on the lid to unlock it and then open the lid. 3. Fill the Clean Water Tank with clean water up to the MAX line. NOTE Do not use detergent. • Product ...
Page 18 - Charging the Jet Bot Combo
Operation English 18 Charging the Jet Bot Combo Before using the Jet Bot Combo for the first time, charge it completely. (For the charging time and usage time, refer to the Product Specification section.) 1. Place the Jet Bot Combo on the Clean Station manually to start charging. - Make sure the C...
Page 19 - Auto charging; Cases require to check the Clean Station
English 19 Auto charging The Jet Bot Combo automatically returns to the Clean Station to recharge when it completes cleaning or when the battery is low. Docking (Recharging) You can return the Jet Bot Combo to the Clean Station while cleaning to recharge. • Press the button on the Jet Bot Combo or...
Page 20 - Using the Jet Bot Combo; Using the control panel
Operation English 20 Using the Jet Bot Combo You must connect the Jet Bot Combo with the SmartThings app to use its full features. • For downloading and installing the SmartThings app, refer to the SmartThings app section. Using the control panel Start cleaning Press the button on the Jet Bot Comb...
Page 21 - Operation status on the Status Indicator
English 21 Operation status on the Status Indicator Jet Bot Combo Classification Color Meaning While operating Red Blinking without moving An error occurs Blinking while moving Automatically returning to the Clean Station because of the low battery level On The operation stopped because of the low...
Page 22 - Energy-Saving mode; How to reset to the factory default
Operation English 22 Energy-Saving mode When charging is complete, the Jet Bot Combo automatically enters the Energy-Saving mode. While the Jet Bot Combo is docked on the Clean Station , press and hold the button for 7 seconds to set it to the Energy-Saving mode, and to cancel the Energy-Saving mo...
Page 23 - SmartThings app; Before using SmartThings; Setting up the wireless router
English 23 SmartThings app Before using SmartThings • The SmartThings app is only compatible with models that have a Wi-Fi function. • If you do not have a Wi-Fi router, you cannot use the SmartThings app. Setting up the wireless router • Please refer to the user manual of your wireless router for...
Page 24 - Downloading the SmartThings app; Setting up a SAMSUNG account
SmartThings app English 24 Downloading the SmartThings app Download and install the SmartThings app from the markets (Google Play Store, Apple App Store, or SAMSUNG Galaxy Store). NOTE • SmartThings is incompatible with some tablets and some mobile devices. • Visit Play Store or App Store to see i...
Page 25 - Software update
English 25 NOTE • When the Jet Bot Combo cannot be registered to the SmartThings app: - Refer to the SmartThings app guide or pop-up messages. - Confirm that the UPnP option of your wireless router is active, and then try the registration procedure again. - Confirm that your wireless router is ope...
Page 26 - Using the SmartThings app
SmartThings app English 26 Using the SmartThings app Functions Explanation Cleaning mode • You can choose between the Vacuum + Mop , Vacuum , or Mop mode. - When using the Vacuum + Mop or Mop mode, be sure to attach the Mops . If you do not attach the Mops , water will spill on the floor. Suction ...
Page 29 - Open Source Announcement
English 29 Open Source Announcement The software included in this product contains open source software. To obtain the source code covered under licenses which have the obligation of publishing source code (e.g. GPL, LGPL… etc), please visit http://opensource.samsung.com/ and search by model name....
Page 30 - Maintenance; Cleaning and maintaining the Clean Station; Cleaning the Waste Water Tank
English 30 Maintenance Cleaning and maintaining the Clean Station • Be sure that the power cord of the Clean Station is unplugged before handling with the Clean Station . • When cleaning the exterior, wipe with water only. - Do not use detergent. Cleaning the Waste Water Tank 1. Detach the Waste W...
Page 31 - Replacing the Dust Bag
English 31 Replacing the Dust Bag 1. Detach the lid by pulling the handle on the top. 2. Hold the Dust Bag guide handle and pull it as shown in the figure. 3. Detach the Dust Bag from the product by pulling it upward. - Dispose of the used Dust Bag in the trash. 4. Insert the new Dust Bag . - Alig...
Page 32 - Cleaning the Fine Dust Filter
Maintenance English 32 Cleaning the Fine Dust Filter 1. Pull the handle on the Filter Cover at the back of the Clean Station to detach it. 2. Detach the Fine Dust Filter and shake out the dust. 3. Assemble the Fine Dust Filter and the Filter Cover until you hear them click. Cleaning the Washing Pl...
Page 33 - Cleaning the bottom cover
English 33 Cleaning the bottom cover CAUTION • You must disassemble the Clean Water Tank and the Waste Water Tank before lying the Clean Station on its side. • You must detach the Base Plate and the Washing Plate . - There is a risk of personal injury or material damage. • After detaching the Wash...
Page 34 - Descaling the Steamer; Descaling; Emptying and cleaning the Dustbin
Maintenance English 34 Descaling the Steamer Descaling 1. Press the and buttons on the Jet Bot Combo simultaneously for 7 seconds. 2. Dilute 100 g of citric acid into water (1 L) in the Clean Water Tank and insert it into the Clean Station . Then, empty the Waste Water Tank . 3. Press the and butt...
Page 36 - Cleaning the Brush
Maintenance English 36 Cleaning the Brush 1. Push the Brush Cover Lock to the right to unlock. 2. Detach the Brush Cover and use the Cleaning Tool to clean the cover. 3. Detach the Brush and use the Cleaning Tool to clean the Brush . - Lift up the left side of the Brush first, then pull the Brush ...
Page 37 - Cleaning the Roller
English 37 Cleaning the Roller 1. Use a flat-head screwdriver to lift the Roller ’s Release Lever as shown in the figure. 2. Detach the Roller by lifting it. 3. Use the Cleaning Tool to clean the Roller . 4. Assemble the Roller . 5. Press the Release Lever until you hear a click to secure the Roll...
Page 38 - Cleaning the Spin Brush
Maintenance English 38 Cleaning the Spin Brush Wrap the Spin Brush with a warm, damp towel for about 10 seconds, and then wipe the Spin Brush . When hair, threads, or other debris are tangled in the Spin Brush , use a screwdriver to detach the Spin Brush and remove the tangled items. Cleaning the ...
Page 39 - Cleaning the Mops
English 39 Cleaning the Mops 1. Detach the Mops attached to the bottom of the Jet Bot Combo . 2. Detach the Mop Spin Boards . 3. Clean the Mops and the Mop Spin Boards . 4. Attach the Mop Spin Boards . 5. Attach the Mops to the Mop Spin Boards . - Make sure each Mop is centered and does not overla...
Page 42 - Troubleshooting; Voice Guidance Checklist
English 42 Troubleshooting Voice Guidance Checklist 1. The Status Indicator turns red and blinks with a Voice guidance. 2. Press the Reset button and check the instructions below and take appropriate actions. 3. When pressing the Reset button of the Jet Bot Combo , the Status Indicator turns white...
Page 46 - Checklist before reporting a problem
Troubleshooting English 46 Checklist before reporting a problem If the product is not faulty, a service fee may be charged, therefore make sure to read the manual thoroughly. Symptom Checklist The Jet Bot Combo is not working at all. • Check if the Status Indicator is on. • Check if the Jet Bot Co...
Page 51 - Appendix; Product Specification
English 51 Appendix Product Specification A C B A C B Classification Items VR7MD97**** VR7MD96**** Mechanical specifications Weight Jet Bot Combo : 4.8 kg Clean Station : 14.0 kg Size Width (A) X Height (B) X Depth (C) Jet Bot Combo : 359 mm X 100 mm X 364 mm Clean Station : 444 mm X 547 mm X 510 ...
Page 52 - Usage Time
Appendix English 52 Classification Items VR7MD97**** VR7MD96**** Wi-Fi Frequency range 2412 - 2472 MHz Transmitter power (Max) 20 dBm Bluetooth (BLE) Frequency range 2402 - 2480 MHz Transmitter power (Max) 20 dBm NOTE Hereby, Samsung declares that this radio equipment is in compliance with Directi...
Page 53 - Memo
Memo Untitled-25 53 Untitled-25 53 2025-02-24 10:52:24 2025-02-24 10:52:24