Samsung SRF677CDBLS - Manuals
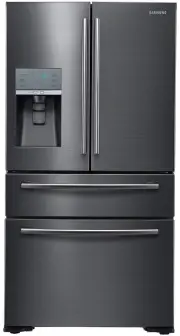
User Manual Samsung SRF677CDBLS


Summary
02_ Safety information SAFETY INFORMATION • Before operating the appliance, please read this manual thoroughly and retain it at a safe place near the appliance for your future reference. • Use this appliance only for its intended purpose as described in this instruction manual. This appliance is not...
Safety information _03 Important safety symbols and precautions : WARNING Hazards or unsafe practices that may result in severe personal injury or death. CAUTION Hazards or unsafe practices that may result in minor personal injury or property damage. Do NOT attempt.Do NOT disassemble.Do NOT touch.Fo...
Safety information _13 for an extended period of time below the cold end of the range of temperature for which the refrigerating appliance is designed. • Do not store food which spoils easily at low temperature, such as bananas, melons. • Your appliance is frost free, which means there is no need to...
Samsung Refrigerators Manuals
-
 Samsung RB37A5
User Manual
Samsung RB37A5
User Manual
-
 Samsung RB37A50N0WW
User Manual
Samsung RB37A50N0WW
User Manual
-
 Samsung RB37A5290EL
User Manual
Samsung RB37A5290EL
User Manual
-
 Samsung RB37A5290SA
User Manual
Samsung RB37A5290SA
User Manual
-
 Samsung RF18A5101SG
User Manual
Samsung RF18A5101SG
User Manual
-
 Samsung RF18A5101SG/AA
User Manual
Samsung RF18A5101SG/AA
User Manual
-
 Samsung RF18A5101SR
User Manual
Samsung RF18A5101SR
User Manual
-
Samsung RF18A5101SR/AA
User Manual
-
 Samsung RF20A5101SR/AA
User Manual
Samsung RF20A5101SR/AA
User Manual
-
 Samsung RF20A5101WW
User Manual
Samsung RF20A5101WW
User Manual
-
 Samsung RF22A4121SR
User Manual
Samsung RF22A4121SR
User Manual
-
 Samsung RF22A4121SR/AA
User Manual
Samsung RF22A4121SR/AA
User Manual
-
 Samsung RF22A4221SR
User Manual
Samsung RF22A4221SR
User Manual
-
 Samsung RF22A4221SR/AA
User Manual
Samsung RF22A4221SR/AA
User Manual
-
 Samsung RF23A9671SR/AA
User Manual
Samsung RF23A9671SR/AA
User Manual
-
 Samsung RF23A9675
User Manual
Samsung RF23A9675
User Manual
-
Samsung RF23A967512
User Manual
-
 Samsung RF23A9771SR
User Manual
Samsung RF23A9771SR
User Manual
-
 Samsung RF23BB8200QL
User Manual
Samsung RF23BB8200QL
User Manual
-
 Samsung RF23BB860012
User Manual
Samsung RF23BB860012
User Manual