Page 2 - Table of Contents; Getting started
2 Table of Contents Getting started 5 Device layout and functions9 Charging the battery12 Nano-SIM card and eSIM15 microSD card17 Turning the device on and off18 Initial setup19 Samsung account20 Transferring data from your previous device (Smart Switch) 23 Understanding the screen31 Notification pa...
Page 3 - Settings
Table of Contents 3 115 Security and privacy 116 Face recognition118 Fingerprint recognition121 Secure Folder124 Secure Wi-Fi125 Samsung Pass 128 Location128 Safety and emergency129 Accounts and backup 129 Samsung Cloud 130 Google131 Advanced features 132 Motions and gestures133 Video call effects13...
Page 4 - Usage notices; Appendix
Table of Contents 4 Usage notices 142 Precautions for using the device144 Notes on package contents and accessories 145 Maintaining water and dust resistance 146 Device overheating situations and solutions Appendix 150 Troubleshooting155 Removing the battery
Page 5 - Device layout and functions
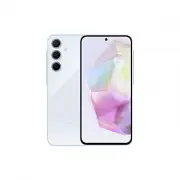
5 Getting started Device layout and functions Touch screen Headphone jack / Multipurpose jack (USB Type-C) SIM card / microSD card tray Light sensor Speaker Fingerprint recognition sensor Side button Volume button Front camera
Page 8 - Hard buttons; Setting the Side button; Soft buttons
Getting started 8 Hard buttons Button Function Side button • When the device is off, press and hold to turn it on. • Press to turn on or lock the screen. • Press and hold to start a conversation with Bixby. Refer to Using Bixby for more information. • Press twice or press and hold to open the app or...
Page 9 - Charging the battery; Wired charging
Getting started 9 Charging the battery Charge the battery before using it for the first time or when it has been unused for extended periods. Wired charging Connect the USB cable to the USB power adapter and plug the cable into the device’s multipurpose jack to charge the battery. After fully chargi...
Page 10 - Charging other devices
Getting started 10 Charging other devices Use the USB cable to charge another mobile device with your phone’s battery.Connect your phone and the other device using your phone’s USB cable. A USB connector may be needed depending on the other device.When charging starts, the battery charging icon will...
Page 11 - Battery charging tips and precautions
Getting started 11 Battery charging tips and precautions Use only Samsung-approved battery, charger, and cable specifically designed for your device. Incompatible battery, charger, and cable can cause serious injuries or damage to your device. • Connecting the charger improperly may cause serious da...
Page 12 - Nano-SIM card and eSIM; Inserting the SIM or USIM card
Getting started 12 Nano-SIM card and eSIM Insert the SIM or USIM card provided by your carrier.To have two phone numbers or carriers for a single device, activate the eSIM or insert two SIM cards. Differing from a physical nano-SIM card, an eSIM is an embedded digital SIM. Using both the nano-SIM ca...
Page 13 - Correct card insertion (dual SIM card tray)
Getting started 13 4 Insert the tray back into the tray slot. • Use only a nano-SIM card. • Use caution not to lose or let others use the SIM or USIM card. Samsung is not responsible for any damages or inconveniences caused by lost or stolen cards. • Ensure that the ejection pin is perpendicular to ...
Page 14 - Activating an eSIM
Getting started 14 Activating an eSIM Open Settings and tap Connections → SIM manager → Add eSIM . When a mobile plan is found, follow the on-screen instructions to activate the eSIM.If you have a QR code provided by your carrier, open Settings , tap Connections → SIM manager → Add eSIM → Scan QR co...
Page 15 - Inserting an SD card
Getting started 15 microSD card Inserting an SD card Your device’s SD card capacity may vary from other models and some SD cards may not be compatible with your device depending on the SD card manufacturer and type. To check out your device’s maximum SD card capacity, refer to the Samsung website. 1...
Page 17 - Removing the SD card; Turning the device on and off
Getting started 17 Removing the SD card Before removing the SD card, first unmount it for safe removal. 1 Open Settings and tap Device care → Storage . 2 Swipe to the left to access the SD card page. 3 Tap → Unmount . Do not remove external storage, such as an SD card or USB storage, while the devic...
Page 18 - Turning the device on; Initial setup
Getting started 18 Turning the device on Press and hold the Side button for a few seconds to turn on the device. Turning the device off 1 To turn off the device, press and hold the Side button and the Volume Down button simultaneously. Alternatively, open the notification panel, swipe downwards, and...
Page 19 - Samsung account; Finding your ID and resetting your password
Getting started 19 Samsung account Using the Samsung account, you can use a variety of Samsung services that are provided through mobile devices, TVs, and the Samsung website.To check the list of services that can be used with your Samsung account, visit account.samsung.com . 1 Open Settings and tap...
Page 20 - Transferring data from your previous device; Transferring data using a USB cable
Getting started 20 Transferring data from your previous device (Smart Switch) You can use Smart Switch to transfer data from your previous device to your new phone.Open Settings and tap Accounts and backup → Transfer data for device setup . • This feature may not be supported on some devices or comp...
Page 21 - Transferring data wirelessly
Getting started 21 Transferring data wirelessly Transfer data from your previous device to your new phone wirelessly through Wi-Fi Direct. 1 On the previous device, open Smart Switch . If you do not have the app, download it from Galaxy Store or Play Store . 2 On your new phone, open Settings and ta...
Page 22 - Transferring backup data from a computer
Getting started 22 Transferring backup data from a computer Back up data from your previous device to a computer and import the data to your new phone. 1 On the computer, visit www.samsung.com/smartswitch to download Smart Switch. 2 On the computer, open Smart Switch. If your previous device is not ...
Page 23 - Understanding the screen; Controlling the touch screen
Getting started 23 Understanding the screen Controlling the touch screen Tapping Tap the screen. Touching and holding Touch and hold the screen for approximately 2 seconds. Dragging Touch and hold an item and drag it to the target position. Double tapping Double tap the screen. Swiping Swipe upwards...
Page 24 - Hiding the navigation bar
Getting started 24 Navigation bar (soft buttons) When you turn on the screen, the soft buttons will appear on the navigation bar at the bottom of the screen. The soft buttons are set to the Recents button, Home button, and Back button by default. The functions of the buttons can change according to ...
Page 25 - Home screen and Apps screen; Switching between Home and Apps screens
Getting started 25 Home screen and Apps screen The Home screen is the starting point for accessing all of the device’s features. It displays widgets, shortcuts to apps, and more.The Apps screen displays icons for all apps, including newly installed apps. Switching between Home and Apps screens On th...
Page 26 - Editing the Home screen; Displaying all apps on the Home screen
Getting started 26 Editing the Home screen On the Home screen, touch and hold an empty area, or pinch your fingers together to access the editing options. You can set the wallpaper, add widgets, and more. You can also add, delete, or rearrange Home screen panels. • Adding panels: Swipe to the left, ...
Page 27 - Launching Finder; Moving items; Creating folders
Getting started 27 Launching Finder Search for content on the device. 1 On the Apps screen, tap Search . 2 Enter a keyword.Apps and content on your device will be searched.If you tap on the keyboard, you can search for more content. Moving items Drag an item to a new location. To move the item to an...
Page 28 - Edge panel
Getting started 28 • Moving apps from a folder Drag an app to a new location. • Deleting a folder Touch and hold a folder, and then tap Delete folder . Only the folder will be deleted. The folder’s apps will be relocated to the Apps screen. Edge panel You can access your favourite apps and features ...
Page 29 - Lock screen; Changing the screen lock method; Indicator icons
Getting started 29 Lock screen Pressing the Side button turns off the screen and locks it. Also, the screen turns off and automatically locks if the device is not used for a specified period.To unlock the screen, swipe in any direction when the screen turns on.If the screen is off, press the Side bu...
Page 31 - Notification panel; Using the quick settings panel
Getting started 31 Notification panel When you receive new notifications, indicator icons appear on the status bar. To check out more information about the icons, open the notification panel and check the details.To open the notification panel, drag the status bar downwards. To close the notificatio...
Page 32 - Controlling media playback; Controlling nearby devices
Getting started 32 Tap each button to turn the specific feature on or off. To access more detailed settings, tap the button’s text or touch and hold a button.To edit buttons, tap → Edit . Controlling media playback Control media on your phone and connected nearby devices on the notification panel. 1...
Page 33 - Screen capture and screen record; Screen capture; How to capture a screenshot
Getting started 33 Screen capture and screen record Screen capture Capture a screenshot while using the device and write on, draw on, crop, or share the captured screen. You can capture the current screen and scrollable area. How to capture a screenshot Use the following methods to capture a screens...
Page 34 - Screen record; Entering text; Keyboard layout; Changing the input language
Getting started 34 Screen record Record the screen while using your device. 1 Open the notification panel, swipe downwards, and then tap ( Screen recorder ). 2 Select a sound setting and tap Start recording . After a countdown, recording will start. • To write or draw on the screen, tap . • To recor...
Page 35 - Using the keyboard button
Getting started 35 Using the keyboard button You can change the text input method by tapping the keyboard button on the navigation bar.To change the keyboard button on the navigation bar, touch and hold the keyboard button and select an option you want. • : Enter text by voice. • : Change the keyboa...
Page 36 - Copying and pasting; Extracting text
Getting started 36 Copying and pasting 1 Touch and hold over text. 2 Drag or to select the desired text, or tap Select all to select all text. 3 Tap Copy or Cut . The selected text is copied to the clipboard. 4 Touch and hold where the text is to be inserted and tap Paste . To paste text that you ha...
Page 37 - Apps and features; Installing or uninstalling apps; Galaxy Store; Uninstalling or disabling apps
37 Apps and features Installing or uninstalling apps Galaxy Store Purchase and download apps. You can download apps that are specialised for Samsung Galaxy devices.Open the Store app. Browse apps by category or tap to search for a keyword. • This app may not be available depending on the carrier or ...
Page 38 - Setting app permissions; Phone; Introduction
Apps and features 38 Setting app permissions For some apps to operate properly, they may need permission to access or use information on your device.To access your app permission settings, open Settings and tap Apps . Select an app and tap Permissions . You can check the app’s permissions list and c...
Page 39 - Making calls from call logs or contacts list; Receiving calls; Answering a call
Apps and features 39 Making calls from call logs or contacts list Open the Phone app, tap Recents or Contacts , and then swipe to the right on a contact or a phone number to make a call.If this feature is turned off, tap → Settings → Other call settings , and then tap the Swipe to call or text switc...
Page 40 - Blocking phone numbers
Apps and features 40 Blocking phone numbers Block calls from specific numbers added to your block list.Open the Phone app, tap → Settings → Block numbers , and then select contacts or phone numbers to save in the blocked numbers list.When blocked numbers try to contact you, you will not receive noti...
Page 41 - Contacts; Creating a new contact; Searching for contacts
Apps and features 41 Contacts Introduction Create new contacts or manage contacts on the device. Adding contacts Creating a new contact 1 Open the Contacts app and tap . 2 Select a storage location. 3 Enter contact information and tap Save . Importing contacts Add contacts by importing them from oth...
Page 42 - Deleting contacts
Apps and features 42 Deleting contacts 1 Open the Contacts app and tap → Edit . 2 Select contacts and tap Delete . To delete contacts one by one, tap a contact from the contacts list and tap More → Delete . Sharing contacts You can share contacts with others by using various sharing options. 1 Open ...
Page 43 - Checking messages
Apps and features 43 Messages Introduction Send and check messages by conversation.You may incur additional charges for sending or receiving messages when you are roaming. Sending messages 1 Open the Messages app and tap . 2 Add recipients and enter a message.To record and send a voice message, touc...
Page 44 - Sorting messages; Changing message settings; Camera
Apps and features 44 Sorting messages You can sort messages by category.Open the Messages app and tap Conversations → . If the category option does not appear, tap → Settings and tap the Conversation categories switch to turn it on. Deleting messages Touch and hold a message to delete, then tap Dele...
Page 45 - Taking pictures
Apps and features 45 Taking pictures 1 Open the Camera app. You can also open the app by pressing the Side button twice or dragging to the left on the locked screen. • Some camera features are not available when you open the Camera app from the locked screen or when the screen is turned off while th...
Page 46 - Using zoom features
Apps and features 46 • The preview screen may vary depending on the shooting mode and which camera is being used. • The focus may not be clear if the subject is close. Take pictures or videos from a good distance. • If pictures you take appear blurry, clean the camera lens and try again. • Make sure...
Page 47 - Using the camera button; Options for current shooting mode
Apps and features 47 Locking the focus (AF) and exposure (AE) You can lock the focus or exposure on a selected area to prevent the camera from automatically adjusting based on changes to the subjects or light sources.Touch and hold the area to focus, the AF/AE frame will appear on the area and the f...
Page 48 - Photo mode; Changing the resolution
Apps and features 48 • : Select a metering method. This determines how light values are calculated. Centre-weighted metering uses the light in the centre portion of the shot to calculate the exposure of the shot. Matrix metering averages the entire scene. Spot metering uses the light in a concentrat...
Page 49 - Taking selfies
Apps and features 49 Shot suggestions The camera suggests the ideal composition for the picture by recognising the position and angle of your subject.On the preview screen, tap and tap the Shot suggestions switch to turn it on. 1 On the shooting modes list, tap PHOTO . A guide will appear on the pre...
Page 50 - Applying filter and beauty effects; Video mode; Using the auto framing feature
Apps and features 50 Applying filter and beauty effects You can select a filter effect and modify facial features, such as your skin tone or face shape, before taking a picture. 1 On the preview screen, tap . 2 Select effects and take a picture.If you tap , you can download filters from Galaxy Store...
Page 52 - Portrait mode; Fun mode
Apps and features 52 Portrait mode By using Portrait mode, you can take pictures where the background is blurred and the subject stands out clearly. 1 On the shooting modes list, tap PORTRAIT . 2 Tap and drag the background blur adjustment bar to adjust the blur level. 3 When Ready appears on the pr...
Page 53 - Pro mode / Pro video mode; Available options; Separating the focus area and the exposure area
Apps and features 53 Pro mode / Pro video mode Capture pictures or videos while manually adjusting various shooting options, such as exposure value and ISO value.On the shooting modes list, tap MORE → PRO or PRO VIDEO . Select options and customise the settings, and then tap to take a picture or tap...
Page 54 - Single take mode; Night mode
Apps and features 54 Single take mode Take various pictures and videos in one shot.Your device automatically selects the best shot and creates pictures with filters or videos with certain sections repeated. 1 On the shooting modes list, tap MORE → SINGLE TAKE . 2 Tap to capture the scene you want. 3...
Page 55 - Food mode
Apps and features 55 Food mode Take pictures of food with more vibrant colours. 1 On the shooting modes list, tap MORE → FOOD . A frame will appear on the screen and the area outside the frame will be blurred. 2 To resize the frame, drag a corner of the frame.Tap the area you want or drag the frame ...
Page 56 - Slow motion mode
Apps and features 56 Super Slow-mo mode Super slow motion is a feature that records a quickly passing moment slowly so that you can appreciate it later. 1 On the shooting modes list, tap MORE → SUPER SLOW-MO and tap to record a video.The device will capture the moment in super slow motion and save i...
Page 57 - Hyperlapse mode
Apps and features 57 Hyperlapse mode Record scenes, such as passing people or cars, and view them as fast-motion videos. 1 On the shooting modes list, tap MORE → HYPERLAPSE . 2 Tap AUTO and select a frame rate option. • If you set the frame rate to AUTO , the device will automatically adjust the fra...
Page 60 - Using Gallery
Apps and features 60 Gallery Introduction Access images and videos stored in your device. You can also manage images and videos by album or create stories. Using Gallery Open the Gallery app. Search for images and videos. Sync images and videos. More options
Page 61 - Viewing images; Remastering images
Apps and features 61 Viewing images Open the Gallery app and select an image. To view other files, swipe to the left or right on the screen. More options Delete the image. Share the image with others. Image and video thumbnail Modify the image. Check details and additional features. View the content...
Page 62 - Cropping enlarged images
Apps and features 62 Cropping enlarged images 1 Open the Gallery app and select an image. 2 Spread two fingers apart on the area you want to save and tap .The cropped area will be saved as a file. Saved image thumbnail
Page 63 - Viewing videos
Apps and features 63 Viewing videos Open the Gallery app and select a video to play. To view other files, swipe to the left or right on the screen.To use more options during playback, tap → Open in Video player . Lock the playback screen. Skip to the previous video. Touch and hold to rewind. Capture...
Page 64 - Stories; Using the recycle bin feature
Apps and features 64 Stories When you capture or save images and videos, the device will read their date and location tags, sort the images and videos, and then create stories.Open the Gallery app, tap Stories , and then select a story. If you tap , you can use various options, such as changing the ...
Page 65 - AR Zone; Creating an AR Emoji
Apps and features 65 AR Zone Introduction AR Zone provides you AR related features. Choose a feature and capture fun pictures or videos. Launching AR Zone Use the following methods to launch AR Zone: • Open the Camera app and tap MORE → AR ZONE . • If you added the app icon to the Apps screen, open ...
Page 66 - Selecting an AR emoji to use; Deleting AR emojis; Syncing AR emojis
Apps and features 66 3 Follow the on-screen instructions to create an emoji. Edit the emoji. My emojis list More options Selecting an AR emoji to use Open the AR Zone app, tap AR Emoji Studio → , and then select an emoji you want. Deleting AR emojis Open the AR Zone app, tap AR Emoji Studio → → , ti...
Page 67 - Creating your contact profile with an AR emoji
Apps and features 67 Creating an AR emoji short video and decorating your device with it You can create a short video with an emoji and use it as a wallpaper or call background image. 1 Open the AR Zone app and tap AR Emoji Studio . 2 Select Create video , Alarm background , Call screen , or Lock sc...
Page 68 - AR Emoji Camera; Creating your own stickers
Apps and features 68 AR Emoji Camera Create fun pictures or videos with emojis using various shooting modes. 1 Open the AR Zone app and tap AR Emoji Camera . 2 Select the emoji and the mode you want to use. The available modes may vary depending on the emoji you select. • SCENE : The emoji mimics yo...
Page 69 - Deleting AR emoji stickers
Apps and features 69 Deleting AR emoji stickers Open the AR Zone app and tap AR Emoji Stickers → → Edit . Select the emoji stickers to delete and tap Delete . Using your AR emoji stickers in chats You can use your emoji stickers during a conversation through messages or on a social network. The foll...
Page 71 - Bixby; Starting Bixby
Apps and features 71 Bixby Introduction Bixby is a user interface that helps you use your device more conveniently.You can talk to Bixby or type text. Bixby will launch a feature you request or show the information you want. Visit www.samsung.com/bixby for more information. Bixby is only available i...
Page 72 - Waking up Bixby using your voice; Communicating by typing text
Apps and features 72 Waking up Bixby using your voice You can start a conversation with Bixby by saying “Hi, Bixby” or “Bixby”. Register your voice so that Bixby will respond to your voice. 1 Open the Bixby app and tap → Voice wake-up . 2 Tap the switch to turn it on. 3 Select a wake-up phrase you w...
Page 73 - Bixby Vision
Apps and features 73 Bixby Vision Introduction Bixby Vision is a service that provides various features based on image recognition. You can use Bixby Vision to search for information by recognising objects. Use a variety of useful Bixby Vision features. • This feature may not be available or you mig...
Page 74 - Multi window
Apps and features 74 Multi window (Using multiple apps at once) Introduction Run two apps at the same time in split screen view. You can also run multiple apps at the same time in the pop-up view. Split screen view Pop-up view Some apps may not support this feature.
Page 75 - Launching Multi window by swiping the screen; Opening apps using the Recents button
Apps and features 75 Launching Multi window by swiping the screen You can launch Multi window by swiping the screen.Swipe with two fingers from the bottom of the screen towards the middle of the screen. The screen will change to the split screen view.To change to the pop-up view, swipe from the top ...
Page 76 - Using additional features; Using the multi window menus; Adjusting the window size; Moving pop-up windows
Apps and features 76 Using additional features Using the multi window menus When you tap the multi window handle, the available menus will appear. Split screen view Pop-up view Multi window handle Adjusting the window size Drag the circles between the app windows to adjust the size of the windows.Wh...
Page 77 - Samsung Internet; Using Secret mode
Apps and features 77 Samsung Internet Browse the internet to search for information and bookmark your favourite webpages to access them conveniently. 1 Open the Internet app. 2 Enter the web address or a keyword, and then tap Go . If the toolbar does not appear, swipe downwards slightly on the scree...
Page 78 - Samsung Wallet; Setting up Samsung Wallet; Using Samsung Pay; Registering cards
Apps and features 78 Samsung Wallet Introduction Use various convenient features in Samsung Wallet. You can make a payment, verify your identity through your biometric data, check tickets or boarding passes, and more.You can check out more information, such as cards that support this feature at www....
Page 79 - Making payments; Cancelling payments; Verifying identity; Using tickets
Apps and features 79 Making payments 1 Drag a card image at the bottom of the screen upwards. Alternatively, open the Wallet app. Then, on the cards list, swipe to the left or right and select a card to use. 2 Scan your fingerprint or enter the payment PIN you set. 3 Touch the back of your device to...
Page 80 - Samsung Health
Apps and features 80 Samsung Health Introduction Samsung Health helps you manage your wellness and fitness. Set fitness goals, check your progress, and keep track of your overall wellness and fitness. You can also compare your step count records with other Samsung Health users and check out health t...
Page 81 - Samsung Notes; Creating notes; Deleting notes
Apps and features 81 Samsung Notes Create notes by entering text from the keyboard or by handwriting or drawing on the screen. You can also insert images or voice recordings into your notes. Creating notes 1 Open the Notes app, tap , and then create a note. You can change the input method by tapping...
Page 82 - Samsung Members; Using parental controls features
Apps and features 82 Samsung Members Samsung Members offers support services to customers, such as device problem diagnosis, and lets users submit questions and error reports. You can also share information with others in the Galaxy users’ community or check the latest news and tips. Samsung Members...
Page 83 - Samsung Global Goals; Samsung Shop; Galaxy Shop
Apps and features 83 Samsung Global Goals The Global Goals, which were established by the United Nations General Assembly in 2015, consist of goals that aim to create a sustainable society. These goals have the power to end poverty, fight inequality, and stop climate change.With Samsung Global Goals...
Page 84 - Galaxy Wearable; Creating events
Apps and features 84 Galaxy Wearable Using the Galaxy Wearable app, you can manage your wearable devices. When you connect your phone to the wearable device, you can customise the wearable device’s settings and apps.Open the Wearable app. Tap More → Continue to connect your phone to the wearable dev...
Page 85 - Reminder; Starting Reminder
Apps and features 85 Reminder (Receiving notifications for to-do items) Register to-do items as reminders and receive notifications according to the condition you set. • To receive more accurate notifications, connect to a Wi-Fi or mobile network. • To use location reminders, the GPS feature must be...
Page 86 - Voice Recorder; Changing the recording mode (Galaxy A55 5G)
Apps and features 86 Voice Recorder Record or play voice recordings. 1 Open the Voice Recorder app. 2 Tap to start recording. Speak into the microphone. • Tap to pause recording. • While making a voice recording, tap BOOKMARK to insert a bookmark. 3 Tap to finish recording. 4 Enter a file name and t...
Page 87 - Calculator; Removing a game from Gaming Hub
Apps and features 87 Calculator Perform basic arithmetic or scientific calculations.Open the Calculator app. • : Check the calculation history. To clear the history, tap Clear history . To close the calculation history panel, tap . • : Use the unit conversion tool. You can convert various values, su...
Page 88 - Game Booster; Opening apps in pop-up windows while playing games
Apps and features 88 Game Booster (Configuring your gaming environment) You can play games in a better environment with Game Booster. You can use Game Booster while playing games.To open the Game Booster panel while playing games, tap on the navigation bar. If the navigation bar is hidden, drag upwa...
Page 89 - SmartThings; Quick Share; Sharing content with nearby devices
Apps and features 89 SmartThings Control and manage smart appliances and Internet of Things (IoT) products.To access more information, open the SmartThings app and tap Menu → How to use . 1 Open the SmartThings app. 2 Tap Devices → Add device or . 3 Select a device and connect to it by following the...
Page 90 - Sharing with contacts
Apps and features 90 3 Tap → Quick Share and select a device to transfer the image to. To share the link with a QR code, tap and scan the QR code. 4 Accept the file transfer request on the other device. This feature does not support sharing videos with TVs or SmartThings supported devices. To watch ...
Page 92 - Listening to music together with Galaxy Buds; Smart View
Apps and features 92 Listening to music together with Galaxy Buds You can listen to music on your phone together through your Buds and your friend’s Buds.This feature is supported only on the Galaxy Buds series. 1 Make sure that each phone and pair of Buds are connected.Refer to Pairing with other B...
Page 93 - Link to Windows; (Using the device through a computer connection); Connecting to a computer; Accessing data and notifications from your mobile device on the
Apps and features 93 Link to Windows (Using the device through a computer connection) Access and use the mobile device’s data, such as apps or pictures, on a Windows computer. • It is recommended to use the latest version of Windows and the Phone Link app to fully use this feature. • A Microsoft acc...
Page 94 - Google apps
Apps and features 94 Google apps Google provides entertainment, social network, and business apps. You may require a Google Account to access some apps.To check out more app information, access each app’s help menu. • Chrome : Search for information and browse webpages. • Gmail : Send or receive ema...
Page 95 - Options
95 Settings Introduction Customise device settings.On the Apps screen, tap Settings . Alternatively, open the notification panel and tap . To search for settings by entering keywords, tap . You can also search for settings by selecting a tag under Suggestions . Samsung account Sign in to your Samsun...
Page 97 - Connecting to a Wi-Fi network
Settings 97 Wi-Fi Turn on the Wi-Fi feature to connect to a Wi-Fi network and access the internet or other network devices. Connecting to a Wi-Fi network 1 On the Settings screen, tap Connections → Wi-Fi and tap the switch to turn it on. 2 Select a network from the Wi-Fi networks list.Networks with ...
Page 98 - Precautions for using Bluetooth
Settings 98 Wi-Fi Direct Wi-Fi Direct connects devices directly through a Wi-Fi network without requiring an access point. 1 On the Settings screen, tap Connections → Wi-Fi and tap the switch to turn it on. 2 Tap → Wi-Fi Direct . The detected devices are listed.If the device you want to connect to i...
Page 99 - Sending and receiving data
Settings 99 Pairing with other Bluetooth devices 1 On the Settings screen, tap Connections → Bluetooth and tap the switch to turn it on.The detected devices will be listed. 2 Select a device to pair with.If the device you want to pair with is not on the list, set the device to enter Bluetooth pairin...
Page 100 - NFC and contactless payments; Reading information from NFC tags
Settings 100 NFC and contactless payments You can use your phone to read near field communications tags (NFC) that contain information about products. You can also use this feature to make payments and buy tickets for transportation or events after downloading the required apps. The device contains ...
Page 101 - Data saver; Allowed networks for apps
Settings 101 Data saver Reduce your data usage by preventing some apps running in the background from sending or receiving data.On the Settings screen, tap Connections → Data usage → Data saver and tap the switch to turn it on.When the data saver feature is turned on, the icon will appear on the sta...
Page 102 - Mobile Hotspot
Settings 102 Mobile Hotspot Use your phone as a mobile hotspot to share your phone’s mobile data connection with other devices. 1 On the Settings screen, tap Connections → Mobile Hotspot and Tethering → Mobile Hotspot . 2 Tap the switch to turn it on.You can change the network name, password, and mo...
Page 103 - Adding printer plug-ins
Settings 103 Printing Configure settings for printer plug-ins installed on the device. You can connect the device to a printer through Wi-Fi or Wi-Fi Direct, and print images or documents. Some printers may not be compatible with the device. Adding printer plug-ins Add printer plug-ins for printers ...
Page 104 - Connected devices
Settings 104 Connected devices Change settings for device connections.On the Settings screen, tap Connected devices . • Quick Share : Change the Quick Share settings. Refer to Quick Share for more information. • Music Share : Change the Music Share settings. Refer to Music Share for more information...
Page 105 - Modes and Routines; Adding modes; Using routines; Adding routines
Settings 105 Modes and Routines Introduction Select a mode based on your current activity or location, or add your repeated usage patterns as routines and use your device more conveniently.On the Settings screen, tap Modes and Routines . Using modes Adding modes 1 On the Settings screen, tap Modes a...
Page 106 - Running routines; Sounds and vibration
Settings 106 Running routines Auto routines will run automatically when their conditions are detected. For routines which you set the running condition as Start manually , you can run them manually by tapping the button whenever you want.To run routines manually, tap next to the routine you want to ...
Page 107 - Sound quality and effects
Settings 107 • Separate app sound : Set the device to play media sound from a specific app separately on the other audio device. Refer to Separate app sound for more information. Some features may not be available depending on the model. Sound quality and effects Set the device’s sound quality and e...
Page 110 - Changing the screen mode
Settings 110 Motion smoothness The refresh rate is the number of times the screen is refreshed every second. Use a high refresh rate to prevent the screen from flickering when switching between screens. The screen will scroll more smoothly. When you select a standard refresh rate, you can use the ba...
Page 111 - Adjusting the screen tone by colour value
Settings 111 Adjusting the screen tone by colour value Increase or lower certain colour tones by adjusting the Red, Green, or Blue value individually. 1 On the Settings screen, tap Display → Screen mode → Vivid . 2 Tap Advanced settings . 3 Adjust the R (Red), G (Green), or B (Blue) colour bar to yo...
Page 112 - Themes
Settings 112 Wallpaper and style Change the wallpaper settings for the Home screen and the locked screen.On the Settings screen, tap Wallpaper and style . Themes Apply various themes to the device to change the visual elements of the Home screen, locked screen, and icons.On the Settings screen, tap ...
Page 113 - Lock screen and AOD; Extend Unlock
Settings 113 Lock screen and AOD Options Change the settings for the locked screen.On the Settings screen, tap Lock screen and AOD . • Screen lock type : Change the screen lock method. • Extend Unlock : Set the device to unlock itself when trusted locations or devices are detected. Refer to Extend U...
Page 114 - Always On Display; (Displaying information when the screen is turned off); Opening notifications on the Always On Display
Settings 114 Always On Display (Displaying information when the screen is turned off) You can check out information, such as the clock or calendar, or control music playback on the screen when it is turned off.You can also check notifications for new messages or missed calls.The Always On Display is...
Page 115 - Security and privacy
Settings 115 Security and privacy Options Check the device’s security and privacy status and change the settings.On the Settings screen, tap Security and privacy . • Lock screen : Change the settings for the locked screen. • Account security : Change the settings for your accounts. • Lost device pro...
Page 116 - Precautions for using face recognition
Settings 116 Face recognition You can set the device to unlock the screen by recognising your face. • If you use your face as a screen lock method, your face cannot be used to unlock the screen for the first time after turning on the device. To use the device, you must unlock the screen using the pa...
Page 117 - Registering your face
Settings 117 Registering your face For better face registration, register your face indoors and out of direct sunlight. 1 On the Settings screen, tap Security and privacy → Biometrics → Face recognition . 2 Read the on-screen instructions and tap Continue . 3 Set a screen lock method. 4 Position you...
Page 118 - Fingerprint recognition
Settings 118 Fingerprint recognition In order for fingerprint recognition to function, your fingerprint information needs to be registered and stored in your device. • This feature may not be available depending on the carrier or model. • Fingerprint recognition uses the unique characteristics of ea...
Page 119 - For better fingerprint recognition
Settings 119 For better fingerprint recognition When you scan your fingerprints on the device, be aware of the following conditions that may affect the feature’s performance: • The device may not recognise fingerprints that are affected by wrinkles or scars. • The device may not recognise fingerprin...
Page 120 - Unlocking the screen with your fingerprints
Settings 120 Unlocking the screen with your fingerprints You can unlock the screen with your fingerprint instead of using a pattern, PIN, or password. 1 On the Settings screen, tap Security and privacy → Biometrics → Fingerprints . 2 Unlock the screen using the preset screen lock method. 3 Tap the F...
Page 121 - Secure Folder; Setting up Secure Folder
Settings 121 Secure Folder Secure Folder protects your private content and apps, such as pictures and contacts, from being accessed by others. You can keep your private content and apps secure even when the device is unlocked. Secure Folder is a separate, secured storage area. The data in Secure Fol...
Page 122 - Moving content to Secure Folder; Removing apps from Secure Folder
Settings 122 Moving content to Secure Folder Move content, such as pictures and videos, to Secure Folder. The following actions are an example of moving an image from the default storage to Secure Folder. 1 Open the Secure Folder app and tap → Add files . 2 Tap Images , tick images to move, and then...
Page 123 - Adding accounts
Settings 123 Adding accounts Add your Samsung and Google accounts, or other accounts, to sync with the apps in Secure Folder. 1 Open the Secure Folder app and tap → Settings → Manage accounts → Add account . 2 Select an account service. 3 Follow the on-screen instructions to complete the account set...
Page 124 - Selecting apps to protect using Secure Wi-Fi
Settings 124 Secure Wi-Fi Secure Wi-Fi is a service that secures your Wi-Fi network connection. It encrypts data using Wi-Fi networks and disables tracking apps and websites so that you can use Wi-Fi networks safely. For example, when using an unsecure Wi-Fi network in public places, such as cafes o...
Page 125 - Registering Samsung Pass
Settings 125 Samsung Pass Register your biometric data to Samsung Pass and verify your identity when using services which require your login or personal information. • The website sign-in feature is only available for websites that you access through the Samsung Internet app. Some websites may not s...
Page 126 - Using Samsung Pass to sign in to apps; Signing in using passkeys; Managing sign-in information
Settings 126 Using Samsung Pass to sign in to apps You can use Samsung Pass to sign in to apps that support ID and password autofill. 1 On the sign-in page of the app, enter your ID and password, and then tap the app’s sign-in button. 2 When a pop-up window asking whether you want to save the sign-i...
Page 127 - Using Samsung Pass with websites and apps
Settings 127 Using Samsung Pass with websites and apps When using websites or apps that support Samsung Pass, you can sign in with Samsung Pass.To check out the list of websites and apps that support Samsung Pass, on the Samsung Pass main screen, tap → Settings → Partners . If there are no websites ...
Page 128 - Location
Settings 128 Location Change settings for location information permissions.On the Settings screen, tap Location . • App permissions : Check the list of apps that have permission to access the device’s location and edit the permission settings. • Location services : Set the device to use the Wi-Fi or...
Page 129 - Accounts and backup; Samsung Cloud; Backing up data
Settings 129 Accounts and backup Options Sync, back up, or restore your device’s data using Samsung Cloud. You can also sign in to accounts, such as your Samsung account or Google Account, or transfer data to or from other devices through Smart Switch.On the Settings screen, tap Accounts and backup ...
Page 130 - Restoring data; Google
Settings 130 3 Tap Done . • Some data will not be backed up. To check which data will be backed up, on the Settings screen, tap Accounts and backup and tap Back up data under Samsung Cloud . • To check the backup data for other devices in your Samsung Cloud, on the Settings screen, tap Accounts and ...
Page 131 - Advanced features
Settings 131 Advanced features Options Turn on advanced features and change the settings that control them.On the Settings screen, tap Advanced features . • Bixby : Bixby is a user interface that helps you use your device more conveniently. Refer to Bixby for more information. • Smart suggestions : ...
Page 132 - Motions and gestures
Settings 132 Motions and gestures Turn on the motion feature and configure settings.On the Settings screen, tap Advanced features → Motions and gestures . • Lift to wake : Set the device to turn on the screen when you pick it up. • Double tap to turn on screen : Set the device to turn on the screen ...
Page 134 - Dual Messenger; Uninstalling a second app
Settings 134 Dual Messenger Install the second app and use two separate accounts for the same messenger app. 1 On the Settings screen, tap Advanced features → Dual Messenger . Supported apps will appear. 2 Tap the switch of an app to install the second app.The second app will be installed. The secon...
Page 135 - Digital Wellbeing and parental controls
Settings 135 Digital Wellbeing and parental controls Check the history of your device usage and use features to prevent your device from interfering with your life. You can also set up parental controls for your children and manage their digital use.On the Settings screen, tap Digital Wellbeing and ...
Page 136 - Storage
Settings 136 Battery Check the remaining battery power and time to use the device. For devices with low battery levels, conserve battery power by turning on power saving features.On the Settings screen, tap Device care → Battery . Refer to Battery for more information. Storage Check the status of th...
Page 137 - Ultra data saving
Settings 137 Ultra data saving Monitor and reduce your mobile data usage by preventing background apps from using the mobile data connection. You can also use the data compression feature to compress internet data, such as images, videos, and webpages, accessed through the mobile network.On the Sett...
Page 138 - Apps
Settings 138 Apps Manage the device’s apps and change their settings. You can check the apps’ usage information, change their notification or permission settings, or uninstall or disable unnecessary apps.On the Settings screen, tap Apps . General management Customise your device’s system settings or...
Page 139 - Accessibility
Settings 139 Adding device languages You can add languages to use on your device. 1 On the Settings screen, tap General management → Language → Add language . To check out all the languages that can be added, tap → All languages . 2 Select a language to add. 3 To set the selected language as the def...
Page 140 - Security updates information; Remote support
Settings 140 Software update Update your device’s software through the firmware over-the-air (FOTA) service. You can also schedule software updates.On the Settings screen, tap Software update . • Download and install : Check for and install updates manually. • Auto download over Wi-Fi : Set the devi...
Page 141 - About phone
Settings 141 About phone Access your device’s information.On the Settings screen, tap About phone . To change your device’s name, tap Edit . • Status information : Check out various device information, such as the SIM card status, Wi-Fi MAC address, and serial number. • Legal information : Access le...
Page 142 - Precautions for using the device
142 Usage notices Precautions for using the device Please read this guide when using the device to ensure safe and proper use. • Descriptions are based on the device’s default settings. • Some content may differ from your device depending on the region, service provider, model specifications, or dev...
Page 144 - Instructional icons; Notes on package contents and accessories
Usage notices 144 Instructional icons Warning : situations that could cause injury to yourself or others Caution : situations that could cause damage to your device or other equipment Notice : notes, usage tips, or additional information Notes on package contents and accessories Refer to the quick s...
Page 145 - Maintaining water and dust resistance
Usage notices 145 Maintaining water and dust resistance Your device is water- and dust-resistant and meets the following international standards. • IP67 water resistance rating certification: According to the requirements of the IEC 60529 standard, it was tested in 15-35 °C, 86-106 kPa, 1 m fresh wa...
Page 146 - Device overheating situations and solutions; When the device heats up while charging the battery; Do the following when the device heats up:; When the device heats up during use
Usage notices 146 Device overheating situations and solutions When the device heats up while charging the battery While charging, the device and the charger may become hot. During wireless charging or fast charging, the device may feel hotter to the touch. This does not affect the device’s lifespan ...
Page 148 - Precautions for device overheating
Usage notices 148 Precautions for device overheating If you begin to feel uncomfortable because of the device overheating, stop using the device.When the device heats up, the features and performance may be limited or the device may turn off to cool down. The feature is only available on supported m...
Page 149 - Precautions for operating environment
Usage notices 149 Precautions for operating environment Your device may heat up because of the environment in the following conditions. Use caution to avoid shortening the battery’s lifespan, damaging the device, or causing a fire. • Do not store your device in very cold or very hot temperatures. • ...
Page 150 - Troubleshooting; When you turn on your device or while you are using the device, it; Your device displays network or service error messages
150 Appendix Troubleshooting Before contacting a Samsung Service Centre or an authorised service centre, please attempt the following solutions. Some situations may not apply to your device.You can also use Samsung Members to solve any problems you might encounter while using your device. When you t...
Page 151 - Your device does not turn on; Restarting the device
Appendix 151 Your device does not turn on When the battery is completely discharged, your device will not turn on. Fully charge the battery before turning on the device. The touch screen responds slowly or improperly • If you attach a screen protector or optional accessories to the touch screen, the...
Page 153 - The battery depletes faster than when first purchased; Error messages appear when opening the camera; Error messages appear when opening multimedia files
Appendix 153 The battery depletes faster than when first purchased • When you expose the device or the battery to very cold or very hot temperatures, the useful charge may be reduced. • Battery consumption will increase when you use certain features or apps, such as GPS, games, or the internet. • Th...
Page 154 - Bluetooth is not working well
Appendix 154 • Your device supports pictures and videos captured with the device. Pictures and videos captured by other devices may not work properly. • Your device supports multimedia files that are authorised by your carrier or providers of additional services. Some content circulated on the inter...
Page 155 - Data stored in the device has been lost; A small gap appears around the outside of the device case; The Home button does not appear; Removing the battery
Appendix 155 Data stored in the device has been lost Always make backup copies of all important data stored in the device. Otherwise, you cannot restore data if it is damaged or lost. Samsung is not responsible for the loss of data stored in the device. A small gap appears around the outside of the ...
Page 156 - Copyright; Trademarks
Copyright Copyright © 2024 Samsung Electronics Co., Ltd.This guide is protected under international copyright laws.No part of this guide may be reproduced, distributed, translated, or transmitted in any form or by any means, electronic or mechanical, including photocopying, recording, or storing in ...


 Samsung RF23HCEDTSR/AA-02
User Manual
Samsung RF23HCEDTSR/AA-02
User Manual
 Samsung UN24H4000AFXZA-IP01
User Manual
Samsung UN24H4000AFXZA-IP01
User Manual
 Samsung RF263BEAESP/AA-04
User Manual
Samsung RF263BEAESP/AA-04
User Manual
 Samsung LN32D403E4DXZA-AO02
User Manual
Samsung LN32D403E4DXZA-AO02
User Manual
 Samsung DVG52M7750W/A3-00
User Manual
Samsung DVG52M7750W/A3-00
User Manual
 Samsung DV50F9A7GVW/A2-00
User Manual
Samsung DV50F9A7GVW/A2-00
User Manual
 Samsung RF25HMEDBSR/AA-10
User Manual
Samsung RF25HMEDBSR/AA-10
User Manual
 Samsung RS267TDBP/XAA-00
User Manual
Samsung RS267TDBP/XAA-00
User Manual
 Samsung RF323TEDBWW/AA-04
User Manual
Samsung RF323TEDBWW/AA-04
User Manual
 Samsung NX58K7850SG/AA-00
User Manual
Samsung NX58K7850SG/AA-00
User Manual
 Samsung UN65JS9000FXZA-TS01
User Manual
Samsung UN65JS9000FXZA-TS01
User Manual
 Samsung UN32J525DAFXZA-LS02
User Manual
Samsung UN32J525DAFXZA-LS02
User Manual
 Samsung RF31FMEDBSR/AA-01
User Manual
Samsung RF31FMEDBSR/AA-01
User Manual
 Samsung DV42H5400GW/A3-00
User Manual
Samsung DV42H5400GW/A3-00
User Manual
 Samsung DV395ETPAWR/A1-00
User Manual
Samsung DV395ETPAWR/A1-00
User Manual
 Samsung WA45H7000AW/AA-11
User Manual
Samsung WA45H7000AW/AA-11
User Manual
 Samsung RF32FMQDBSR/AA-11
User Manual
Samsung RF32FMQDBSR/AA-11
User Manual
 Samsung HW-H500/ZA-ZZ01
User Manual
Samsung HW-H500/ZA-ZZ01
User Manual
 Samsung RF24FSEDBSR/AA-00
User Manual
Samsung RF24FSEDBSR/AA-00
User Manual