Samsung RS53K4400SA - Manuals
Samsung RS53K4400SA Refrigerator – User Manual, Quick Guide in PDF format online.
Manuals:
User Manual Samsung RS53K4400SA


Summary
English 2 Contents Contents Safety information 3 Important safety symbols and precautions: 5 CE Notice 5 Severe warning signs for transportation and site 6 Critical installation warnings 6 Installation cautions 10 Critical usage warnings 10 Usage cautions 15 Cleaning cautions 18 Critical disposal wa...
Safety information English 4 Safety information • In order to avoid the creation of a flammable gas-air mixture if a leak in the refrigerating circuit occurs, the size of the room in which the appliance may be sited depends on the amount of refrigerant used. • Never start up an appliance showing any...
English 5 Safety information Important safety symbols and precautions: Please follow all safety instructions in this manual. This manual uses the following safety symbols. WARNING Hazards or unsafe practices that may result in severe personal injury, property damage, and/or death . CAUTION Hazards o...
Quick Guide Samsung RS53K4400SA


Summary
• Do not disassemble or repair the refrigerator by yourself. • You run risk of causing a fire, malfunction and/or personal injury. In case of malfunction, please contact your service agents. • If the appliance generates a strange noise, a burning or smell or smoke, unplug the power plug immediately ...
ADDITIONAL TIPS FOR PROPER USAGE - In the event of a power failure, call the local office of your Electricity Company and ask how long it is going to last. - Most power failures that are corrected within an hour or two will not affect your refrigerator temperatures. However, you should minimize the ...
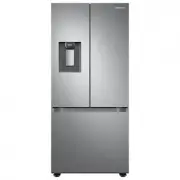
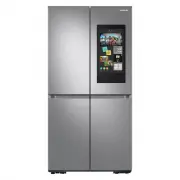
2. The Installation Space Selecting the best location for the Refrigerator • Select a location with easy access to the water supply. • Select a location without direct exposure to sunlight. • Select a location with level (or nearly level) flooring. • Select a location with enough space for the refri...
Samsung Refrigerators Manuals
-
 Samsung RB37A5
User Manual
Samsung RB37A5
User Manual
-
 Samsung RB37A50N0WW
User Manual
Samsung RB37A50N0WW
User Manual
-
 Samsung RB37A5290EL
User Manual
Samsung RB37A5290EL
User Manual
-
 Samsung RB37A5290SA
User Manual
Samsung RB37A5290SA
User Manual
-
 Samsung RF18A5101SG
User Manual
Samsung RF18A5101SG
User Manual
-
 Samsung RF18A5101SG/AA
User Manual
Samsung RF18A5101SG/AA
User Manual
-
 Samsung RF18A5101SR
User Manual
Samsung RF18A5101SR
User Manual
-
Samsung RF18A5101SR/AA
User Manual
-
 Samsung RF20A5101SR/AA
User Manual
Samsung RF20A5101SR/AA
User Manual
-
 Samsung RF20A5101WW
User Manual
Samsung RF20A5101WW
User Manual
-
 Samsung RF22A4121SR
User Manual
Samsung RF22A4121SR
User Manual
-
 Samsung RF22A4121SR/AA
User Manual
Samsung RF22A4121SR/AA
User Manual
-
 Samsung RF22A4221SR
User Manual
Samsung RF22A4221SR
User Manual
-
 Samsung RF22A4221SR/AA
User Manual
Samsung RF22A4221SR/AA
User Manual
-
 Samsung RF23A9671SR/AA
User Manual
Samsung RF23A9671SR/AA
User Manual
-
 Samsung RF23A9675
User Manual
Samsung RF23A9675
User Manual
-
Samsung RF23A967512
User Manual
-
 Samsung RF23A9771SR
User Manual
Samsung RF23A9771SR
User Manual
-
 Samsung RF23BB8200QL
User Manual
Samsung RF23BB8200QL
User Manual
-
 Samsung RF23BB860012
User Manual
Samsung RF23BB860012
User Manual