Samsung NZ64R3525CK - Manuals
Samsung NZ64R3525CK Oven – User Manual in PDF format online.
Manuals:
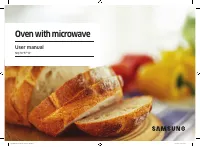
User Manual Samsung NZ64R3525CK


Summary
English 3 C ontents Contents Using this manual 4 The following symbols are used in this User Manual: 4 Safety instructions 5 Important safety precautions 5 Installation 11 Safety instructions for the installer 11 Power connection 11 Cabinet mount 13 Parts and Features (Continued) 17 Cooking zones an...
4 English Using this manual Using this manual Thank you for choosing SAMSUNG Built-In Cooktop. This User Manual contains important information on safety and instructions intended to assist you in the operation and maintenance of your appliance. Please take the time to read this User Manual before us...
English 5 Safety ins truc tions Safety instructions The safety aspects of this appliance comply with all accepted technical and safety standards. However, as manufacturers we also believe it is our responsibility to familiarize you with the following safety instructions. Important safety precautions...
Samsung Ovens Manuals
-
 Samsung NE63T8951SS
User Manual
Samsung NE63T8951SS
User Manual
-
 Samsung NQ50J5530BS
User Manual
Samsung NQ50J5530BS
User Manual
-
 Samsung NQ50J9530BS
User Manual
Samsung NQ50J9530BS
User Manual
-
 Samsung NQ70CB700D12
User Manual
Samsung NQ70CB700D12
User Manual
-
 Samsung NQ70CG600DMT
User Manual
Samsung NQ70CG600DMT
User Manual
-
 Samsung NQ70CG600DSR
User Manual
Samsung NQ70CG600DSR
User Manual
-
 Samsung NQ70CG700DMT
User Manual
Samsung NQ70CG700DMT
User Manual
-
 Samsung NQ70CG700DSR
User Manual
Samsung NQ70CG700DSR
User Manual
-
 Samsung NQ70T5511DG/AA
User Manual
Samsung NQ70T5511DG/AA
User Manual
-
Samsung NQ70T5511DS/AA
User Manual
-
 Samsung NV51CB700D12
User Manual
Samsung NV51CB700D12
User Manual
-
 Samsung NV51CB700S12
User Manual
Samsung NV51CB700S12
User Manual
-
 Samsung NV51CG600DMT
User Manual
Samsung NV51CG600DMT
User Manual
-
 Samsung NV51CG600DSR
User Manual
Samsung NV51CG600DSR
User Manual
-
 Samsung NV51CG600SMT
User Manual
Samsung NV51CG600SMT
User Manual
-
 Samsung NV51CG600SSR
User Manual
Samsung NV51CG600SSR
User Manual
-
 Samsung NV51CG700DMT
User Manual
Samsung NV51CG700DMT
User Manual
-
 Samsung NV51CG700DSR
User Manual
Samsung NV51CG700DSR
User Manual
-
 Samsung NV51CG700SMT
User Manual
Samsung NV51CG700SMT
User Manual
-
 Samsung NV51CG700SSR
User Manual
Samsung NV51CG700SSR
User Manual