Samsung NV70H5587CB/EU - Manuals
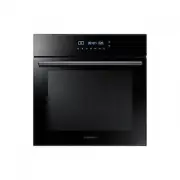
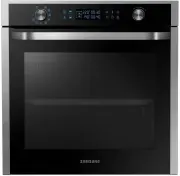
User Manual Samsung NV70H5587CB/EU


Summary
English - 2 contents USING THIS MANUAL 3 03 Using this manual SAFETY INSTRUCTIONS 3 6 Bulb exchange 8 Door removal 8 Door glass removal 9 Auto energy saving function 9 Correct disposal of this product (Waste electrical & Electronic equipment) INSTALLATION 10 10 Installation OVEN CONTROLS 11 11 O...
English - 3 using this manual Thank you for choosing SAMSUNG Built - In Oven.This user Manual contains important information on safety and instructions intended to assist you in the operation and maintenance of your appliance.Please take the time to read this Owner’s Manual before using your oven an...
English - 5 The temperature of accessible surfaces may be high when the appliance is operating.The door or the outer surface may get hot when the appliance is operating.Keep the appliance and its cord out of reach of children less than 8 years.Appliances are not intended to be operated by means of a...
Samsung Ovens Manuals
-
 Samsung NE63T8951SS
User Manual
Samsung NE63T8951SS
User Manual
-
 Samsung NQ50J5530BS
User Manual
Samsung NQ50J5530BS
User Manual
-
 Samsung NQ50J9530BS
User Manual
Samsung NQ50J9530BS
User Manual
-
 Samsung NQ70CB700D12
User Manual
Samsung NQ70CB700D12
User Manual
-
 Samsung NQ70CG600DSR
User Manual
Samsung NQ70CG600DSR
User Manual
-
 Samsung NQ70CG700DMT
User Manual
Samsung NQ70CG700DMT
User Manual
-
 Samsung NV51CB700S12
User Manual
Samsung NV51CB700S12
User Manual
-
 Samsung NV51CG600SMT
User Manual
Samsung NV51CG600SMT
User Manual
-
 Samsung NV51CG600SSR
User Manual
Samsung NV51CG600SSR
User Manual
-
 Samsung NV51CG700SMT
User Manual
Samsung NV51CG700SMT
User Manual
-
 Samsung NV51CG700SSR
User Manual
Samsung NV51CG700SSR
User Manual
-
 Samsung NV51K6650DS
User Manual
Samsung NV51K6650DS
User Manual
-
 Samsung NV51K7770DS
User Manual
Samsung NV51K7770DS
User Manual
-
 Samsung NV51T5511DS
User Manual
Samsung NV51T5511DS
User Manual
-
 Samsung NV75J5540RS
User Manual
Samsung NV75J5540RS
User Manual
-
 Samsung NX58M6850SG
User Manual
Samsung NX58M6850SG
User Manual
-
 Samsung NX58M6850SS
User Manual
Samsung NX58M6850SS
User Manual
-
 Samsung NX60A6751SG
User Manual
Samsung NX60A6751SG
User Manual
-
 Samsung NX60A6751SS
User Manual
Samsung NX60A6751SS
User Manual
-
 Samsung NX60T8751SG
User Manual
Samsung NX60T8751SG
User Manual