Samsung NV51T5511SS - Manuals
Samsung NV51T5511SS Oven – User Manual in PDF format online.
Manuals:
User Manual Samsung NV51T5511SS


Summary
2 English C ontents Contents Contents Important safety instructions 3 What you need to know about safety instructions 3 California Proposition 65 Warning 4 For your safety 4 Electrical Safety 6 Child safety 6 Oven 7Self-cleaning ovens 8 Critical installation warnings 9 Critical usage warning 10 Usag...
English 3 Impor tant saf ety ins truc tions SAVE THESE INSTRUCTIONS SAVE THESE INSTRUCTIONS CAUTION To reduce the risk of fire, explosion, electric shock, or personal injury when using your oven, follow these basic safety precautions. Do NOT attempt.Do NOT disassemble.Do NOT touch.Follow directions ...
4 English Impor tant saf ety ins truc tions Important safety instructions SAVE THESE INSTRUCTIONS SAVE THESE INSTRUCTIONS CALIFORNIA PROPOSITION 65 WARNING WARNING Cancer and Reproductive Harm - www.P65Warnings.ca.gov FOR YOUR SAFETYWhen using electrical appliances, you should follow basic safety pr...
Samsung Ovens Manuals
-
 Samsung NE63T8951SS
User Manual
Samsung NE63T8951SS
User Manual
-
 Samsung NQ50J5530BS
User Manual
Samsung NQ50J5530BS
User Manual
-
 Samsung NQ50J9530BS
User Manual
Samsung NQ50J9530BS
User Manual
-
 Samsung NQ70CB700D12
User Manual
Samsung NQ70CB700D12
User Manual
-
 Samsung NQ70CG600DSR
User Manual
Samsung NQ70CG600DSR
User Manual
-
 Samsung NQ70CG700DMT
User Manual
Samsung NQ70CG700DMT
User Manual
-
 Samsung NV51CB700S12
User Manual
Samsung NV51CB700S12
User Manual
-
 Samsung NV51CG600SMT
User Manual
Samsung NV51CG600SMT
User Manual
-
 Samsung NV51CG600SSR
User Manual
Samsung NV51CG600SSR
User Manual
-
 Samsung NV51CG700SMT
User Manual
Samsung NV51CG700SMT
User Manual
-
 Samsung NV51CG700SSR
User Manual
Samsung NV51CG700SSR
User Manual
-
 Samsung NV51K6650DS
User Manual
Samsung NV51K6650DS
User Manual
-
 Samsung NV51K7770DS
User Manual
Samsung NV51K7770DS
User Manual
-
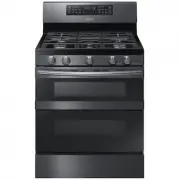
 Samsung NV51T5511DS
User Manual
Samsung NV51T5511DS
User Manual
-
 Samsung NV75J5540RS
User Manual
Samsung NV75J5540RS
User Manual
-
 Samsung NX58M6850SG
User Manual
Samsung NX58M6850SG
User Manual
-
 Samsung NX58M6850SS
User Manual
Samsung NX58M6850SS
User Manual
-
 Samsung NX60A6751SG
User Manual
Samsung NX60A6751SG
User Manual
-
 Samsung NX60A6751SS
User Manual
Samsung NX60A6751SS
User Manual
-
 Samsung NX60T8751SG
User Manual
Samsung NX60T8751SG
User Manual