Page 2 - English; Regulatory Notice; WARNING
2 English Regulatory Notice • Connect the equipment into an outlet on a circuit different from that to which the receiver is connected. • Consult the dealer or an experienced radio/TV technician for help. To satisfy FCC RF exposure requirements, a separation distance of 20 cm or more should be maint...
Page 3 - English 3; IC RADIATION EXPOSURE STATEMENT:
English 3 IC RADIATION EXPOSURE STATEMENT: This equipment complies with IC RSS-102 radiation exposure limits set forth for an uncontrolled environment. This equipment should be installed and operated so there is at least 8 inches (20 cm) between the radiator and your body. This device and its antenn...
Page 4 - English; Contents
4 English C ontents Contents Important safety instructions 5 What you need to know about safety instructions 5 California Proposition 65 Warning 6 For your safety 6 Electrical safety 8 Child safety 8 Oven 9Self-cleaning ovens 10 Ventilating hood 11 Critical installation warnings 11 Critical usage wa...
Page 5 - READ AND SAVE THESE INSTRUCTIONS; Important safety instructions; This guide does not cover all; Important safety symbols and precautions; What the icons and signs in this user manual mean:
English 5 Impor tant saf ety ins truc tions READ AND SAVE THESE INSTRUCTIONS CAUTION To reduce the risk of fire, explosion, electric shock, or personal injury when using your oven, follow these basic safety precautions. Do NOT attempt.Do NOT disassemble.Do NOT touch.Follow directions explicitly.Unpl...
Page 6 - Never leave children alone or
6 English Impor tant saf ety ins truc tions READ AND SAVE THESE INSTRUCTIONS Important safety instructions Always disconnect the power to the appliance before servicing by removing the fuse or switching off the circuit breaker. • Do not enter the oven. • Do not leave children alone. Never leave chil...
Page 7 - Use only dry potholders.
English 7 Impor tant saf ety ins truc tions READ AND SAVE THESE INSTRUCTIONS • Use only dry potholders. Placing moist or damp potholders on hot surfaces may result in burns from steam. Do not let the potholder touch hot heating elements. Do not use a towel or other bulky cloth instead of a potholder...
Page 10 - Do not clean the door gasket.
10 English Impor tant saf ety ins truc tions READ AND SAVE THESE INSTRUCTIONS Important safety instructions SELF-CLEANING OVENS Do not clean the door gasket. The door gasket is essential for a good seal. Care should be taken not to rub, damage, or move the gasket. • Never keep pet birds in the kitch...
Page 11 - CRITICAL INSTALLATION WARNINGS
English 11 Impor tant saf ety ins truc tions READ AND SAVE THESE INSTRUCTIONS CRITICAL INSTALLATION WARNINGS WARNING • This appliance must be installed by a qualified technician or service company. - Failing to have a qualified technician install the oven may result in an electric shock, fire, explo...
Page 12 - CRITICAL USAGE WARNING
12 English Impor tant saf ety ins truc tions READ AND SAVE THESE INSTRUCTIONS Important safety instructions If the power cord is damaged, contact your nearest Samsung service center. CRITICAL USAGE WARNING CAUTION • If the appliance is flooded by any liquid, please contact your nearest Samsung servi...
Page 15 - USAGE CAUTIONS
English 15 Impor tant saf ety ins truc tions READ AND SAVE THESE INSTRUCTIONS USAGE CAUTIONS CAUTION • If the surface is cracked, turn the appliance off. - Failing to do so may result in electric shock. • Dishes and containers can become hot. Handle with care. • Hot foods and steam can cause burns. ...
Page 17 - CRITICAL CLEANING WARNINGS
English 17 Impor tant saf ety ins truc tions READ AND SAVE THESE INSTRUCTIONS CRITICAL CLEANING WARNINGS CAUTION • Do not clean the appliance by spraying water directly on to it. • Do not use benzene, thinner, or alcohol to clean the appliance. - This may result in discoloration, deformation, damage...
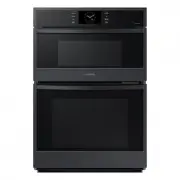
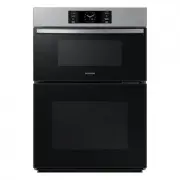
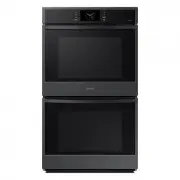
Page 18 - What’s included with your oven; NOTE; Introducing your new oven; Overview
18 English Intr oducing y our ne w ov en What’s included with your oven Wire racks (4)* Gliding rack (1)* Temp probe (1)* Air Fry tray (1)* NOTE If you need an accessory marked with a *, you can purchase by calling the Samsung Contact Center (1-800-726-7864 or www.samsung.com/us/support). Introducin...
Page 19 - Before you begin; Energy saving tips; Whenever possible, cook more than one item at a time.; Water reservoir; on
English 19 Befor e you begin Before you begin Clean the oven thoroughly before using it for the first time. Then, remove the accessories, set the oven to Bake, and then run the oven at 400 °F for 1 hour. There will be a distinctive odor. This is normal.Ensure your kitchen is well ventilated during t...
Page 20 - Operating the oven; Control panel
20 English Oper ating the o v en 3. Replace the cap or the clear plastic top, and then slide the water reservoir back into the reservoir slot. 4. Push the reservoir in. There will be soft click when it is in place correctly. Touch Open/Close Reservoir The oven retracts the water reservoir. 5. Close ...
Page 21 - Control lockout; Display; Convection Bake; No Preheat; Cook Time; Temp Probe; None; Start; Convection Bake; None; Start
English 21 Oper ating the o v en Control lockout Control lockout lets you lock the buttons on the touchpad so they cannot be activated accidently. Control lockout also locks both oven doors so they cannot be opened. You can only activate Control lockout when the oven is in standby mode. How to activ...
Page 22 - Kitchen Timer; How to set the timer; High; Broil; Settings; Timer; OK
22 English Oper ating the o v en Operating the oven Kitchen Timer The kitchen timer serves as an extra timer that will beep when the set time has elapsed. It does not start or stop cooking functions. You can use the kitchen timer with any of the other oven functions. How to set the timer Broil Direc...
Page 23 - Timed cooking; How to change timer name
English 23 Oper ating the o v en Timed cooking In timed cooking mode, the oven turns on immediately and cooks for the length of time you select.At the end of the cooking time, the oven turns off automatically. • You can use the timed cooking feature only with another cooking operation. (Bake, Convec...
Page 24 - CAUTION; Delay start; How to set the oven for delay timed cooking
24 English Oper ating the o v en Operating the oven Upper Start OVEN MODE TIP Cook Time 1 hr 45 min Delay Start None No Preheat Off 4:35 PM Convection Bake Faster, more even baking 325 °F Convection Bake Faster, more even baking Cook Time Delay Start No Preheat Start Upper TIP 1 hr 45 min None Off •...
Page 25 - Using the Temp probe; Tap
English 25 Oper ating the o v en Using the Temp probe For many foods, especially roasts and poultry (beef, chicken, turkey, pork, lamb, etc), measuring the internal temperature is the best way to determine if the food is properly cooked. The Temp probe lets you cook meat to the exact internal temper...
Page 26 - Type of Food
26 English Oper ating the o v en Operating the oven 6. If you want to use the Cook time or Delay start, select the desired function. 7. Tap Start . 8. When the desired internal temperature is reached, the function automatically stops and an alarm sounds. CAUTION To protect the Temp probe’s tip, be c...
Page 27 - Oven functions; No
English 27 Oper ating the o v en Oven functions Premium Oven Oven Functions Single Lower Single Upper Single oven Upper Bake, Broil, Convection Bake, Convection Roast, Convection Vegetable, Steam Bake, Steam Roast, Air-Fry, Air Sous Vide, Keep Warm, Steam Proof, Proof, Dehydrate, Smart Control, Clea...
Page 30 - Broiling recommendation guide
30 English Oper ating the o v en Operating the oven Mode Instruction Steam Proof • For bread dough (yeast dough and sour dough), added steam shortens fermentation time and keeps the surface of the dough from drying out. • Place the dough on rack position 2 or 3. There is no need to cover it with clo...
Page 31 - Air Fry; Tray or Baking sheet; Wet or thicken coating will not crisp or set to use with the Air Fry.
English 31 Oper ating the o v en Air Fry Tray or Baking sheet Tray or Baking sheet Air Fry tray Air Fry tray Air Fry Tray recommended placement NOTE • Place a baking sheet or tray on the rack below the Air Fry Tray for getting any drippings. This will help to reduce splatter and smoke for high fat f...
Page 33 - Setting the temperature; Basic baking and broiling instructions; Setting the mode
English 33 Oper ating the o v en Setting the temperature Upper Start 4:35 PM Convection Bake Faster, more even baking 325 °F View Summary OVEN MODE TIP Temp Probe 100 ° No Preheat Off Delay Start None Convection Bake Faster, more even baking Temp Probe Delay Start No Preheat Start Upper TIP Off None...
Page 34 - Type; Low; Low; Low; Low
34 English Oper ating the o v en Operating the oven Upper Start Cook Time None Delay Start None No Preheat Off 4:35 PM Convection Bake Faster, more even baking 325 °F View Summary OVEN MODE TIP Convection Bake Faster, more even baking Start Upper TIP Cook Time Delay Start No Preheat Off None None 3....
Page 36 - Air Sous Vide; Air Sous Vide recommendation guide
36 English Oper ating the o v en Operating the oven Food Doneness Temperature( °F ) Time(hrs.) Poultry Chicken, breast Tender 145 °F 2.5 - 4 Chicken, breast Firm 160 °F 3 - 4 Duck, breast Tender 145 °F 3 - 4 Fish Salmon steak Tender 130 °F 2 - 3 Salmon steak Well done 145 °F 1.5 - 3 Cod fillet Tende...
Page 37 - Convection Vegetable; Convection Vegetable recommendation guide
English 37 Oper ating the o v en Convection Vegetable Convection Vegetable recommendation guide • Preheating is not necessary. • For best results, use this mode on a single oven rack and place the dish on the rack position 3. • The temperature can be set between 350 °F - 450 °F. The default temperat...
Page 38 - Using the special function feature; Mode
38 English Oper ating the o v en Operating the oven Using the special function feature Special function provides 4 different specialized cooking options. Mode Temperature range Keep Warm **None Proof 95 °F (35 °C) / 105 °F (40 °C) Steam Proof 95 °F (35 °C) / 105 °F (40 °C) Dehydrate 100 °F (40 °C) -...
Page 40 - Using the smart control feature; To start the oven remotely
40 English Oper ating the o v en Operating the oven Using the smart control feature To use the oven’s Smart Control, you must download the SmartThings app to a mobile device. Functions that can be operated using the SmartThings app may not work smoothly if communication conditions are poor or the ov...
Page 41 - Using the oven racks; Upper and lower oven rack positions (single mode); Bixby; Setup supported devices on SmartThings
English 41 Oper ating the o v en Using the oven racks Upper and lower oven rack positions (single mode) 01 03 05 02 04 06 Recommended rack positions for cooking TYPE OF FOOD RACK POSITION Broiling hamburgers 6 Broiling meats or small cuts of poultry, fish 3 - 5 Bundt cakes, pound cakes, frozen pies,...
Page 42 - Before using the racks
42 English Oper ating the o v en Operating the oven Before using the racks Each rack has stops that need to be placed correctly on the supports. These stops will keep the rack from coming completely out. Removing the racks 1. Pull the rack straight out until it stops. 2. Lift up the front of the rac...
Page 43 - Using the gliding rack; Installing the Gliding rack; Rack
English 43 Oper ating the o v en Removing the Gliding rack With the Gliding rack in the Closed position and the oven off and cool, grasp the rack and frame and pull both forward to remove. CAUTION Do not install the Gliding rack directly above the Wire rack.You will not be able to install it properl...
Page 44 - Using the clean feature; leave small children unattended near the appliance.; Don’t hand
44 English Oper ating the o v en Operating the oven Using the clean feature The Clean feature has four selections: Self-Clean, Steam-Clean, Descale, and Draining. Self Clean This self-cleaning oven uses high temperatures (well above cooking temperatures) to burn off leftover grease and residue compl...
Page 46 - If the oven is not clean after one cycle, repeat the cycle.; Swipe the screen to
46 English Oper ating the o v en Operating the oven Upper End at 07:48 AM Self clean Cleaning in progress... Time Left 3 hr 00 min 4:35 PM OVEN MODE Self clean Cleaning in progress... End at 07:48 AM Upper Time Left 3 hr 00 min 10. If you need to stop or interrupt a self cleaning cycle, tap Off . NO...
Page 47 - Important; Wear gloves during cleaning.
English 47 Oper ating the o v en Steam clean OK Pour 10oz (300ml) of water in oven. 4:35 PM Steam clean OK Pour 10oz (300ml) of water in oven. 4. Pour approximately 10 oz. (300 ml) of water onto the bottom of the empty oven and then close the oven door. Use normal water only, not distilled water. Ta...
Page 48 - To avoid accidents, keep children away from the oven.
48 English Oper ating the o v en Operating the oven Cleaning is complete. Wipe oven interior. Clean Water Reservoir and Drip Tray. OK Cleaning is complete. Wipe oven interior. Clean Water Reservoir and Drip Tray. OK 8. When rinsing is complete, use oven gloves to empty and clean the water reservoir....
Page 52 - Using the sabbath feature
52 English Oper ating the o v en Operating the oven How to use the Sabbath feature Bake Thermal heat baking Cook Time None Delay Start None Upper Start 350 °F 4:35 PM Bake Thermal heat baking Start Upper Cook Time Delay Start None None 1. Swipe the screen to Bake mode. Upper Start Bake Thermal heat ...
Page 53 - Maintaining your appliance; Care and cleaning of the oven; Dry and buff with a clean, dry paper towel or soft cloth.
English 53 Maint aining y our applianc e Maintaining your appliance Care and cleaning of the oven Cleaning painted parts and decorative trim • For general cleaning, use a cloth with hot, soapy water. • For more difficult residue and built-up grease, apply a liquid detergent directly onto the area an...
Page 54 - Oven racks
54 English Maint aining y our applianc e Maintaining your appliance Oven racks • If the racks are left in the oven during a self-cleaning cycle, their color will turn slightly blue and the finish will be dull. After the self-cleaning cycle is complete and the oven has cooled, rub the sides of the ra...
Page 55 - DO NOT spray or allow; Removing the oven doors
English 55 Maint aining y our applianc e 5. Repeat for the right (front and back) slide mechanism of the rack. 6. Open and close the rack several times to distribute the lubricant. 7. Replace the cap on the lubricant and shake it again. Turn the rack over and repeat steps 3, 4, 5, and 6. 8. Close th...
Page 56 - Replacing the oven doors
56 English Maint aining y our applianc e Maintaining your appliance Replacing the oven doors CAUTION The door is very heavy. You may need help lifting the door high enough to slide it into the hinge slots. Do not lift the door by the handle. A A. Slot in the oven cavity for the door hinge lock 1. Us...
Page 57 - Changing the oven light; to turn the light on
English 57 Maint aining y our applianc e Changing the oven light The oven light is a standard 40-watt appliance halogen bulb. It comes on when the oven door is open. When the oven door is closed, touch Light to turn the light on or off. It will not work during a self-cleaning or Steam cleaning cycle...
Page 58 - Troubleshooting; CONTROL DISPLAY
58 English Tr ouble shoo ting 2. While holding the glass cover with one hand, insert a flat-sharp tool such as a table knife between the glass and the frame to remove the glass cover. 3. Turn the bulb cap counterclockwise to remove. NOTE If necessary, remove the metal rings and clean the bulb cap. 4...
Page 61 - Information codes
English 61 Tr ouble shoo ting Problem Possible cause Solution Steam is coming out of the vent. When using the convection feature, it is normal to see steam coming out of the oven vent. This is normal operation and not a system failure.Use the oven as usual. As the number of racks or amount of food b...
Page 65 - Appendix; Open Source Announcement; Samsung Electronics Canada Inc.
English 65 Appendix Appendix Open Source Announcement The software included in this product contains open source software. You may obtain the complete corresponding source code for a period of three years after the last shipment of this product by contacting our support team via http://opensource.sa...
Page 66 - * Requires reader to be installed on your
Please be advised that the Samsung warranty does NOT cover service calls to explain product operation, correct improper installation, or perform normal cleaning or maintenance.QUESTIONS OR COMMENTS? COUNTRY CALL OR VISIT US ONLINE AT U.S.A Consumer Electronics 1-800-SAMSUNG (726-7864) www.samsung.co...


 Samsung NE63T8951SS
User Manual
Samsung NE63T8951SS
User Manual
 Samsung NQ50J5530BS
User Manual
Samsung NQ50J5530BS
User Manual
 Samsung NQ50J9530BS
User Manual
Samsung NQ50J9530BS
User Manual
 Samsung NQ70CB700D12
User Manual
Samsung NQ70CB700D12
User Manual
 Samsung NQ70CG600DMT
User Manual
Samsung NQ70CG600DMT
User Manual
 Samsung NQ70CG600DSR
User Manual
Samsung NQ70CG600DSR
User Manual
 Samsung NQ70CG700DMT
User Manual
Samsung NQ70CG700DMT
User Manual
 Samsung NQ70CG700DSR
User Manual
Samsung NQ70CG700DSR
User Manual
 Samsung NQ70T5511DG/AA
User Manual
Samsung NQ70T5511DG/AA
User Manual
 Samsung NV51CB700D12
User Manual
Samsung NV51CB700D12
User Manual
 Samsung NV51CB700S12
User Manual
Samsung NV51CB700S12
User Manual
 Samsung NV51CG600DMT
User Manual
Samsung NV51CG600DMT
User Manual
 Samsung NV51CG600DSR
User Manual
Samsung NV51CG600DSR
User Manual
 Samsung NV51CG600SMT
User Manual
Samsung NV51CG600SMT
User Manual
 Samsung NV51CG600SSR
User Manual
Samsung NV51CG600SSR
User Manual
 Samsung NV51CG700DMT
User Manual
Samsung NV51CG700DMT
User Manual
 Samsung NV51CG700DSR
User Manual
Samsung NV51CG700DSR
User Manual
 Samsung NV51CG700SMT
User Manual
Samsung NV51CG700SMT
User Manual
 Samsung NV51CG700SSR
User Manual
Samsung NV51CG700SSR
User Manual