Samsung NQF700 - Manuals
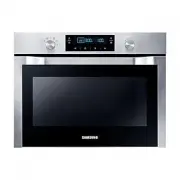
User Manual Samsung NQF700


Summary
English - 2 contents SAFETY INFORMATION 3 3 Safety information BEFORE YOU BEGIN 20 20 Setting the clock 21 Setting the energy save mode OVEN USE 22 22 Types of heating 23 How a microwave oven works 24 Using the microwave mode 34 Using the auto menu mode CLEANING AND CARE 38 38 Using the steam clean ...
01 SAFET Y INFORMA TION safety information USING THIS INSTRUCTION BOOKLET You have just purchased a SAMSUNG microwave oven. Your Owner’s Instructions contain valuable information on cooking with your microwave oven: • Safety precautions• Suitable accessories and cookware• Useful cooking tips• Cookin...
01 SAFET Y INFORMA TION WARNING: The contents of feeding bottles and baby food jars shall be stirred or shaken and the temperature checked before consumption, in order to avoid burns.Eggs in their shell and whole hard-boiled eggs should not be heated in microwave ovens since they may explode, even a...
Samsung Ovens Manuals
-
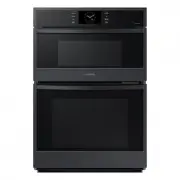
 Samsung NE63T8951SS
User Manual
Samsung NE63T8951SS
User Manual
-
 Samsung NQ50J5530BS
User Manual
Samsung NQ50J5530BS
User Manual
-
 Samsung NQ50J9530BS
User Manual
Samsung NQ50J9530BS
User Manual
-
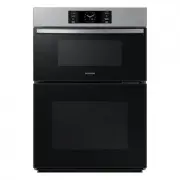
 Samsung NQ70CB700D12
User Manual
Samsung NQ70CB700D12
User Manual
-
 Samsung NQ70CG600DMT
User Manual
Samsung NQ70CG600DMT
User Manual
-
 Samsung NQ70CG600DSR
User Manual
Samsung NQ70CG600DSR
User Manual
-
 Samsung NQ70CG700DMT
User Manual
Samsung NQ70CG700DMT
User Manual
-
 Samsung NQ70CG700DSR
User Manual
Samsung NQ70CG700DSR
User Manual
-
 Samsung NQ70T5511DG/AA
User Manual
Samsung NQ70T5511DG/AA
User Manual
-
Samsung NQ70T5511DS/AA
User Manual
-
 Samsung NV51CB700D12
User Manual
Samsung NV51CB700D12
User Manual
-
 Samsung NV51CB700S12
User Manual
Samsung NV51CB700S12
User Manual
-
 Samsung NV51CG600DMT
User Manual
Samsung NV51CG600DMT
User Manual
-
 Samsung NV51CG600DSR
User Manual
Samsung NV51CG600DSR
User Manual
-
 Samsung NV51CG600SMT
User Manual
Samsung NV51CG600SMT
User Manual
-
 Samsung NV51CG600SSR
User Manual
Samsung NV51CG600SSR
User Manual
-
 Samsung NV51CG700DMT
User Manual
Samsung NV51CG700DMT
User Manual
-
 Samsung NV51CG700DSR
User Manual
Samsung NV51CG700DSR
User Manual
-
 Samsung NV51CG700SMT
User Manual
Samsung NV51CG700SMT
User Manual
-
 Samsung NV51CG700SSR
User Manual
Samsung NV51CG700SSR
User Manual