Samsung NL20T8100WK - Manuals

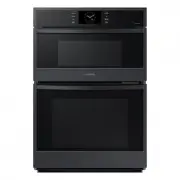
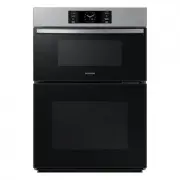
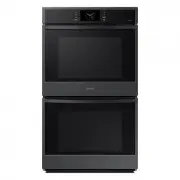
User Manual Samsung NL20T8100WK
1

2

3

4

5

6

7

8

9

10

11

12

13

14

15

16

17

18

19

20

21

22

23

24

25

26

27

28

29

30

31

32

33

34

35

36

37

38

39

40

41

42

43

44

45

46

47

48

Summary
Page 2 - Warming Drawer - Instruction Manual; FR; Wärmeschublade - Bedienungsanleitung; DE
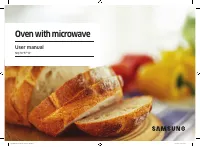
Warming Drawer - Instruction Manual EN - Manuel d'instructions FR Wärmeschublade - Bedienungsanleitung DE IT
Page 3 - EN; Contents
3 EN Contents Safety Information .............................................................................................................................. 2 Appliance Description .......................................................................................................................
Page 4 - Safety Information
2 EN Safety Information Carefully read the instructions before installing and using the equipment. The manufacturer is not liable for improper installation and use of the equipment that may cause injuries and damage. Always keep the instructions at hand, so they can be easily referred to during use....
Samsung Ovens Manuals
-
 Samsung NE63T8951SS
User Manual
Samsung NE63T8951SS
User Manual
-
 Samsung NQ50J5530BS
User Manual
Samsung NQ50J5530BS
User Manual
-
 Samsung NQ50J9530BS
User Manual
Samsung NQ50J9530BS
User Manual
-
 Samsung NQ70CB700D12
User Manual
Samsung NQ70CB700D12
User Manual
-
 Samsung NQ70CG600DMT
User Manual
Samsung NQ70CG600DMT
User Manual
-
 Samsung NQ70CG600DSR
User Manual
Samsung NQ70CG600DSR
User Manual
-
 Samsung NQ70CG700DMT
User Manual
Samsung NQ70CG700DMT
User Manual
-
 Samsung NQ70CG700DSR
User Manual
Samsung NQ70CG700DSR
User Manual
-
 Samsung NQ70T5511DG/AA
User Manual
Samsung NQ70T5511DG/AA
User Manual
-
Samsung NQ70T5511DS/AA
User Manual
-
 Samsung NV51CB700D12
User Manual
Samsung NV51CB700D12
User Manual
-
 Samsung NV51CB700S12
User Manual
Samsung NV51CB700S12
User Manual
-
 Samsung NV51CG600DMT
User Manual
Samsung NV51CG600DMT
User Manual
-
 Samsung NV51CG600DSR
User Manual
Samsung NV51CG600DSR
User Manual
-
 Samsung NV51CG600SMT
User Manual
Samsung NV51CG600SMT
User Manual
-
 Samsung NV51CG600SSR
User Manual
Samsung NV51CG600SSR
User Manual
-
 Samsung NV51CG700DMT
User Manual
Samsung NV51CG700DMT
User Manual
-
 Samsung NV51CG700DSR
User Manual
Samsung NV51CG700DSR
User Manual
-
 Samsung NV51CG700SMT
User Manual
Samsung NV51CG700SMT
User Manual
-
 Samsung NV51CG700SSR
User Manual
Samsung NV51CG700SSR
User Manual