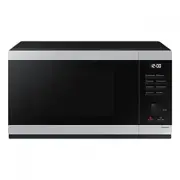
Page 2 - Contents
2 English C ontents Contents Safety instructions 3 Important safety instructions 3 General safety 5 Microwave operation precautions 6 Limited warranty 7 Product group definition 7 Correct Disposal of This Product (Waste Electrical & Electronic Equipment) 7 Cooking Instructions on Food Packaging ...
Page 3 - Safety instructions; IMPORTANT SAFETY INSTRUCTIONS
English 3 Safety ins truc tions • by clients in hotels, motels and other residential environments; • bed and breakfast type environments. Only use utensils that are suitable for use in microwave ovens.When heating food in plastic or paper containers, keep an eye on the oven due to the possibility of...
Page 5 - General safety
English 5 Safety ins truc tions Children shall not play with the appliance. Cleaning and user maintenance shall not be made by children without supervision.If the supply cord is damaged, it must be replaced by the manufacturer, its service agent or similarly qualified persons in order to avoid a haz...
Page 6 - Microwave operation precautions; Microwave warning
6 English Safety ins truc tions Safety instructions Do not operate the oven when it is empty. The oven will automatically shut down for 30 minutes for safety purposes. We recommend placing a glass of water inside the oven at all times to absorb microwave energy in case the oven is started accidental...
Page 7 - Limited warranty
English 7 Safety ins truc tions Correct Disposal of This Product (Waste Electrical & Electronic Equipment) (Applicable in countries with separate collection systems) This marking on the product, accessories or literature indicates that the product and its electronic accessories (e.g. charger, he...
Page 8 - Cooking Instructions on Food Packaging; Cooking Instructions; IMPORTANT
8 English Safety ins truc tions Safety instructions Cooking Instructions on Food Packaging Microwave Symbols This symbol has been introduced for your benefit when cooking or reheating packaged food.Packaged food is also, increasingly, using a microwave symbol similar to the one below. When you see t...
Page 9 - Installation site; Turntable; Installation; Accessories; 1 Roller ring; DO NOT
English 9 Installation Installation site A B C D A. 20 cm above B. 10 cm behind C. 10 cm on the side D. 85 cm of the floor • Select a flat, level surface approx. 85 cm above the floor. The surface must support the weight of the oven. • Secure room for ventilation, at least 10 cm from the rear wall a...
Page 10 - Maintenance; Cleaning; Care against an extended period of disuse
10 English Maint enanc e Maintenance Cleaning Clean the oven regularly to prevent impurities from building up on or inside the oven. Also pay special attention to the door, door sealing, and turntable and roller ring (applicable models only).If the door won’t open or close smoothly, first check if t...
Page 11 - Oven features; Oven
English 11 O v en f eatur es Oven features Oven 01 03 08 09 06 05 02 07 04 01 Door 02 Ventilation holes 03 Light 04 Door latches 05 Turntable 06 Coupler 07 Roller ring 08 Safety interlock holes 09 Control panel Control panel 01 03 05 07 09 11 02 04 06 08 10 12 01 Home Dessert 02 Microwave 03 Auto Co...
Page 12 - Checking that your oven is operating correctly; Oven use; How a microwave oven works
12 English O v en use Checking that your oven is operating correctly The following simple procedure enables you to check that your oven is working correctly at all times. If you are in doubt, refer to the section entitled "Troubleshooting" on page 24 to 26 . NOTE The oven must be plugged int...
Page 13 - Setting the time; Dial Knob; Microwave
English 13 O v en use Setting the time When power is supplied, 88:88 and then 12:00 is automatically displayed on the display.Please set the current time. The time can be displayed in either the 24-hour or 12-hour notation. You must set the clock: • When you first install your microwave oven • After...
Page 14 - Power levels and time variations
14 English O v en use Oven use Power levels and time variations The power level function enables you to adapt the amount of energy dissipated and thus the time required to cook or reheat your food, according to its type and quantity. You can choose between seven power levels. Power level Percentage ...
Page 15 - Stopping the cooking; Setting the energy save mode; Using the Home Dessert features; Home Dessert
English 15 O v en use Stopping the cooking You can stop cooking at any time so that you can: • Check the food • Turn the food over or stir it • Leave it to stand To stop the cooking... Then... Temporarily Open the door or press the Stop/Eco button once. Cooking stops.To resume cooking, close the doo...
Page 18 - Using the Auto Cook features; Auto Cook
18 English O v en use Oven use Using the Auto Cook features The Auto Cook features has 18 pre-programmed cooking times. You do not need to set either the cooking times or the power level.You can adjust the type of the serving by turning the Dial Knob . NOTE Use only recipients that are microwave-saf...
Page 20 - Using the Power Defrost features; Power Defrost
20 English O v en use Oven use Using the Power Defrost features The Power Defrost features enable you to defrost meat, poultry, fish, bread and cake. The defrost time and power level are set automatically. You simply select the programme and the weight. NOTE Use only containers that are microwave-sa...
Page 21 - Using the Keep Warm features; Keep Warm
English 21 O v en use Using the Keep Warm features The Keep Warm feature keeps food hot until it’s served. Use this function to keep food warm until ready to serve. NOTE The maximum Keep Warm time is 99 minutes. 1 1. Press the Keep Warm button. 2 2. Press the Start/+30s button. Result: The 99 minute...
Page 22 - Using the Favorite features; Using the Deodorization features
22 English O v en use Oven use Using the Favorite features If you often cook or reheat the same types of dishes, you can store the cookingtimes and power levels in the oven’s memory, so that you do not have to reset them each order.You can store two different setting. 2 1. Set your cooking programme...
Page 23 - Using the Favorite setting; Favorite; Switching the beeper off; Cookware guide
English 23 C ookw ar e guide Using the Favorite setting First, place the food in the centre of the turntable and close the door. 1 1. Press Favorite button 2 2. Select the program by turning the Dial Knob . P1 : First setting P2 : Second setting. 3 3. Press the Start/+30s button. Result: The food is...
Page 24 - Troubleshooting and information code; Troubleshooting
24 English Tr ouble shoo ting and inf ormation c ode Cookware Microwave- safe Comments • Glass jars ✓ Must remove the lid. Suitable for warming only. Metal • Dishes ✗ May cause arcing or fire. • Freezer bag twist ties ✗ Paper • Plates, cups, napkins and kitchen paper ✓ For short cooking times and wa...
Page 26 - Information code
26 English Tr ouble shoo ting and inf ormation c ode Troubleshooting and information code Problem Cause Action When power is connected, the oven immediately starts to work. The door is not properly closed. Close the door and check again. There is electricity coming from the oven. The power or power ...
Page 27 - Memo
English 27 Technic al specific ations Memo Technical specifications Samsung strives to improve its products at all times. Both the design specifications and these user instructions are thus subject to change without notice. Model MS32DG4504A*** Power source 230 V ~ 50 Hz AC Power consumption Microwa...