Page 2 - CONTENTS
English - 2 CONTENTS 01 Checking the Components 3 02 Product Overview 4 Top Panel of the Soundbar. . . . . . . . . . . . . . . . . . . . . . . . . . . . . . . . . . 4 Bottom Panel of the Soundbar . . . . . . . . . . . . . . . . . . . . . . . . . . . . . . 5 03 Using the Soundbar Remote Control 6 Ins...
Page 3 - 1 CHECKING THE COMPONENTS
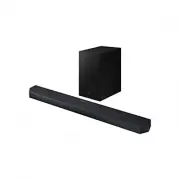
English - 3 01 CHECKING THE COMPONENTS SOUNDBAR Soundbar Main Unit Soundbar Remote Control / Batteries Subwoofer POWER x 2 x 4 Surround Speaker (optional) (Left / Right) Power Cord (Soundbar, Subwoofer, Surround speaker) Wall Mount Guide x 2 x 2 (M4 x L10) x 2 Holder-Screw Screw Bracket-Wall Mount x...
Page 4 - 2 PRODUCT OVERVIEW; Top Panel of the Soundbar
English - 4 02 PRODUCT OVERVIEW Top Panel of the Soundbar 2 1 3 4 2 1 3 4 HW-Q930D / HW-Q800D HW-Q700D 1 (Multi Function) Button (HW-Q930D / HW-Q800D models) • In standby mode, press the (Multi Function) button to turn on the Soundbar. • Press the (Multi Function) button to change the input source. ...
Page 5 - Bottom Panel of the Soundbar
English - 5 Bottom Panel of the Soundbar HDMI IN 1 HDMI IN 2 SERVICE DIGITAL AUDIO IN (OPTICAL) HDMI TO TV (eARC/ARC) HDMI SERVICE DIGITAL AUDIO IN (OPTICAL) HDMI TO TV (eARC/ARC) HDMI HDMI IN 1 HDMI IN 2 SERVICE DIGITAL AUDIO IN (OPTICAL) HDMI TO TV (eARC/ARC) HDMI SERVICE DIGITAL AUDIO IN (OPTICAL...
Page 6 - 3 USING THE SOUNDBAR REMOTE CONTROL; How to Use the Remote Control
English - 6 03 USING THE SOUNDBAR REMOTE CONTROL Inserting Batteries before using the Remote Control (AAA batteries X 2) Slide the back cover in the direction of the arrow until it is completely removed. Insert 2 AAA batteries (1.5V) oriented so that their polarity is correct. Slide the battery cove...
Page 10 - Adjusting the Soundbar volume with a TV remote control
English - 10 Adjusting the Soundbar volume with a TV remote control Adjust the Soundbar volume using the TV’s remote control. • This function can be used with IR remote controls only. Bluetooth remote controls (remote controls that require pairing) are not supported. • Set the TV speaker to External...
Page 11 - 4 CONNECTING THE SOUNDBAR; Connecting the power and units; NOTE
English - 11 04 CONNECTING THE SOUNDBAR Connecting the power and units Use the Power cord to connect the Subwoofer, Surround Speakers, and Soundbar to an electrical outlet in the following order: • For more information about the required electrical power and power consumption, refer to the label att...
Page 12 - Recommended Speaker Layout; CAUTION
English - 12 Recommended Speaker Layout 150° 150° 135° 135° 0° Subwoofer Soundbar Surround Speaker L Surround Speaker R CAUTION • Wireless receiving antennas are built into the Subwoofer and surround speakers. Keep the units away from water and moisture. • For optimal listening performance, make sur...
Page 13 - Manually connecting the Subwoofer or Surround Speakers; ID SET
English - 13 Manually connecting the Subwoofer or Surround Speakers Before performing the manual connection procedure below: • Check whether the power cables for the Soundbar and Subwoofer or Surround Speakers are connected properly. • Make sure that the Soundbar is turned off. 1. Turn off the Sound...
Page 15 - 5 CONNECTING TO A TV; Connecting the TV that supports HDMI ARC (Audio Return Channel); TV ARC
English - 15 05 CONNECTING TO A TV Connecting the TV that supports HDMI ARC (Audio Return Channel) CAUTION • When both the HDMI cable and optical cable are connected, the HDMI signal is received first. • To connect the HDMI cable between the TV and Soundbar, be sure to connect the terminals marked A...
Page 16 - Connecting using an Optical Cable
English - 16 Connecting using an Optical Cable Pre-connection Checklist • When both the HDMI cable and optical cable are connected, the HDMI signal is received first. • When you use an optical cable and the terminals have covers, be sure to remove the covers. OPTICAL OUT DIGITAL AUDIO IN (OPTICAL) O...
Page 17 - Connecting via Bluetooth; The initial connection; BT READY; Disconnecting the Soundbar from the Samsung TV
English - 17 Connecting via Bluetooth When a Samsung TV is connected using Bluetooth, you can hear stereo sound without the hassle of cabling.• Only one Samsung TV can be connected at a time.• Samsung TV that supports Bluetooth can be connected. Check the specifications of your TV. The initial conne...
Page 18 - What is the difference between BT READY and BT PAIRING?; Notes on Bluetooth connection
English - 18 What is the difference between BT READY and BT PAIRING? • BT READY : In this mode, you can reconnect any Samsung TV or mobile device that was connected before. • BT PAIRING : In this mode, you can connect a new device to the Soundbar. (Press the PAIR button on the Soundbar remote contro...
Page 20 - Using the Q-Symphony Function
English - 20 Using the Q-Symphony Function • When the Soundbar connects to a Samsung TV that supports the Q-Symphony function you can play the sound simultaneously through the Soundbar and the TV. If you use the Q-Symphony function, the surround sound played on the TV allows you to enjoy a richer, m...
Page 21 - Using the SpaceFit Sound; Method 1. Connecting via Soundbar
English - 21 Using the SpaceFit Sound This function analyzes the user’s listening space with the Soundbar’s microphone and provide optimal sound for the space. Sound optimization proceeds automatically. Method 1. Connecting via Soundbar To enable this function, turn on the SpaceFit Sound mode with t...
Page 22 - 6 CONNECTING AN EXTERNAL DEVICE
English - 22 06 CONNECTING AN EXTERNAL DEVICE Method 1. Connecting using an HDMI Cable (Capable of Dolby Atmos / DTS:X decoding and playback) Pre-connection Checklist • If the Audio Output options include Secondary Audio, make sure Secondary Audio is set to Off.• Make sure that the content supports ...
Page 23 - Method 2. Connecting using an Optical Cable
English - 23 Method 2. Connecting using an Optical Cable DIGITAL AUDIO IN (OPTICAL) OPTICAL OUT BD / DVD player / Set- top box / Game console Top of the Soundbar D.IN Optical Cable (not supplied) Bottom of the Soundbar <HW-Q930D / HW-Q800D> Top of the Soundbar D.IN <HW-Q700D> 1. Use an o...
Page 24 - 7 CONNECTING A MOBILE DEVICE; Method 1. Connecting via Bluetooth
English - 24 07 CONNECTING A MOBILE DEVICE Method 1. Connecting via Bluetooth When a mobile device is connected using Bluetooth, you can hear stereo sound without the hassle of cabling.• When you connect a paired Bluetooth device with the Soundbar off, the Soundbar automatically turns on. The initia...
Page 25 - Disconnecting the Soundbar from the Bluetooth device
English - 25 Notes on Bluetooth connection • Locate a new device within 1 m to connect via Bluetooth communication.• If asked for a PIN code when connecting a Bluetooth device, enter <0000>.• The Soundbar automatically turns off after 18 minutes in the Ready state.• The Soundbar may not perfor...
Page 26 - Using Group Play; Configuring Group Play
English - 26 Method 2. Connecting via Wi-Fi (Wireless Network) To connect a Soundbar to a mobile device via a wireless network (Wi-Fi), the SmartThings app is required. The initial connection 1. Install and launch the SmartThings app from your mobile device (smartphone or tablet). 2. On the app, fol...
Page 27 - Setting the Tap Sound function
English - 27 Connecting via Apple AirPlay • This feature may not be available in some countries.• This Samsung Soundbar supports AirPlay® and recommends that the user use the latest version of iOS, iPadOS, or macOS.• To enable AirPlay in your Soundbar, you must first register the device with the Sam...
Page 28 - Installation Precautions; Wallmount Components
English - 28 08 INSTALLING THE WALL MOUNT Installation Precautions • Install on a vertical wall only.• Do not install in a place with high temperature or humidity.• Verify whether the wall is strong enough to support the product’s weight. If not, reinforce the wall or choose another installation poi...
Page 29 - Notes for Wall Mounting the Surround Speakers; 9 INSTALLING THE; Component
English - 29 7. Install the Soundbar with the attached Bracket-Wall Mounts by hanging the Bracket-Wall Mounts on the Holder-Screws on the wall. 8. Slide the Soundbar down as shown below so that the Bracket-Wall Mounts rest securely on the Holder-Screws . • Insert the Holder-Screws into the wide (bot...
Page 30 - 0 SOFTWARE UPDATE; Auto Update; Security updates information
English - 30 As illustrated in the image, align the center of the Soundbar with the center of the TV, carefully place the Soundbar onto the TV stand. At this time, place the microphones (applicable models only) at the front of the stand not to interfere with voice recognition. Right end of Soundbar ...
Page 31 - Initialization; INIT; 1 TROUBLESHOOTING
English - 31 Initialization Top of the Soundbar INIT With the Soundbar on, press the (Volume) buttons on the body at the same time for at least 5 seconds. “ INIT ” appears on the display and then the Soundbar is initialized. CAUTION • All the settings of the Soundbar are initialized. Be sure to perf...
Page 33 - 2 LICENCES & OTHER
English - 33 After connecting the TV to the Soundbar, I switched the Soundbar mode. Then no sound is output from the TV. • If you connect your Soundbar to a mobile device while the Soundbar is connected to the TV, the Soundbar outputs sound from the mobile device while keeping the TV connection. So ...