Page 2 - IMPORTANT SAFETY NOTICE; WARNING; interior racks and plastic peripherals such as baskets and lids.
IMPORTANT SAFETY NOTICE Following the repair by a non-authorized service provider self-repair or non-professional repair of the product Samsung is not liable for any damage to the product any injury or any other product safety issue caused by any attempt to repair the product which does not carefull...
Page 3 - Disassembly and Reassembly _ 3; TOOLS FOR REMOVAL AND REASSEMBLY; Tool image; Preparation for parts replacement; Pull out the unit from the sink and lay it on the floor.
Disassembly and Reassembly _ 3 1. TOOLS FOR REMOVAL AND REASSEMBLY Tool image No. Tool Type Remarks ① Adjustable Wrench ② Open-end Wrench 1-7/16” ③ Vice Pliers ④ Others (screwdriver, nipper, long nose pliers) Common tools for servicing Screwdriver – Phillip, Flat, Torx T15 ⑤ Ear clamping tool In rea...
Page 4 - _ Disassembly and Reassembly; STANDARD DISASSEMBLY DRAWINGS; Caution; - Make sure to remove all items include baskets inside dishwasher.
4 _ Disassembly and Reassembly 2. STANDARD DISASSEMBLY DRAWINGS 2-1. PRECAUTION Caution Before servicing, - Make sure to remove all items include baskets inside dishwasher. - Drain the water in the dishwasher and disconnect the power supply. - Lock the water faucet that is connected with inlet hose....
Page 5 - Disassembly and Reassembly _ 5; Part; CAP CASE; Be sure to remove the power plug before; CAUTION; Empty the water container before lay down set.
Disassembly and Reassembly _ 5 2-2. FRESH TANK / CAP CASE BRAKE / GASKET BRAKE (DW60A8070*/ DW60A8060* MODELS) - FRESH TANK : DD82-01910A / SVC ASSY-FRESH TANK - CAP CASE BRAKE : DD81-02725A / SVC CAP CASE BRAKE - GASKET BRAKE : DD81-02726A / SVC GASKET BRAKE Part Figure Description CAP CASE BRAKE/ ...
Page 6 - _ Disassembly and Reassembly; Do not this work without safety gloves.; It can be brake easily when you use the iron part; Remove 1 screw from the FRESH TANK assembly.; Remove the GASKET BRAKE from the FRESH
6 _ Disassembly and Reassembly Part Figure Description CAP CASE BRAKE/ GASKET BRAKE/ (DW60A8070*/ DW60A8060* models) 4. Take off the left SIDE PANEL. WARNING Do not this work without safety gloves. It may cause injury from sharp edges. 5. Take off the CAP CASE BRAKE by rotating in a counter-clockwis...
Page 7 - Disassembly and Reassembly _ 7; Fit the GASKET BRAKE on the FRESH TANK, and; fasten the CAP CASE BRAKE by rotating in a; Assemble the left SIDE PANEL with the screws.
Disassembly and Reassembly _ 7 Part Figure Description CAP CASE BRAKE/ GASKET BRAKE/ (DW60A8070*/ DW60A8060* models) [ASSEMBLY] 1. Fit the GASKET BRAKE on the FRESH TANK, and attach the FRESH TANK with screws. - Screw : DD81-02694A / 1pc CAUTION Pay attention to assemble the seal correctly. It can c...
Page 8 - _ Disassembly and Reassembly; RECYCLE; RECYCLE TANK replacement: Empty the
8 _ Disassembly and Reassembly 2-3. RECYCLE TANK / DUCT DRY NUT / GASKET BRAKE (DW60A8070*/ DW60A8060* MODELS) - RECYCLE TANK : DD82-01909A / SVC ASSY-RECYCLE TANK - DUCT DRY NUT : DD81-02705A / SVC-DUCT DRY NUT Part Figure Description RECYCLE TANK/ DUCT DRY NUT/ GASKET BRAKE (DW60A8070*/ DW60A8060*...
Page 9 - Disassembly and Reassembly _ 9; Do not this work without safety gloves. It can; Remove 1 screw from the RECYCLE TANK; Remove the GASKET BRAKE from the RECYCLE
Disassembly and Reassembly _ 9 Part Figure Description RECYCLE TANK/ DUCT DRY NUT/ GASKET BRAKE (DW60A8070*/ DW60A8060* models) 4. Remove the right SIDE PANEL. WARNING Do not this work without safety gloves. It can cause injury from sharp edge. 5. Remove the DUCT DRY NUT by rotating in a counter-clo...
Page 10 - 0 _ Disassembly and Reassembly; Fit the GASKET BRAKE on the RECYCLE TANK,; fasten the DUCT DRY NUT by rotating in a; Wear gloves with friction and tighten firmly.
10 _ Disassembly and Reassembly Part Figure Description RECYCLE TANK/ DUCT DRY NUT/ GASKET BRAKE (DW60A8070*/ DW60A8060* models) Gasket brake [ASSEMBLY] 1. Fit the GASKET BRAKE on the RECYCLE TANK, and attach the FRESH TANK with screws. - Screw : DD81-02694A / 1pc CAUTION Pay attention to assemble t...
Page 11 - Disassembly and Reassembly _ 11
Disassembly and Reassembly _ 11 2-4. CASE BRAKE / CAP CASE BRAKE / GASKET BRAKE (DW60A8050*/ DW60A8040* MODELS) - CASE BRAKE : DD82-01446A / SVC ASSY-CASE BRAKE - CAP CASE BRAKE : DD81-02725A / SVC CAP CASE BRAKE - GASKET BRAKE : DD81-02726A / SVC GASKET BRAKE Part Figure Description CASE BRAKE/ CAP...
Page 12 - 2 _ Disassembly and Reassembly
12 _ Disassembly and Reassembly Part Figure Description CASE BRAKE/ CAP CASE BRAKE/ GASKET BRAKE (DW60A8050*/ DW60A8040* models) 4. Take off the left SIDE PANEL. WARNING Do not this work without safety gloves. It can cause injury from sharp edge. 5. Take off the CAP CASE BRAKE by rotating to counter...
Page 13 - Disassembly and Reassembly _ 13; CONTROL; Make sure to Remove the power plug before; Remove the wire harness that connect MAIN PBA
Disassembly and Reassembly _ 13 2-5. CONTROL PANEL - CONTROL PANEL : DD82-01903B, DD82-01903D / SVC ASSY-CONTROL PANEL Part Figure Description CONTROL PANEL (DW60A80**U*/ DW60A80**F*) [DISASSEMBLY] 1. Open the dishwasher’s DOOR. WARNING Be sure to remove the power plug before servicing. CAUTION Make...
Page 14 - 4 _ Disassembly and Reassembly; Connect wire terminal to connect MAIN PBA to; Make sure the Wire harness are not getting stuck
14 _ Disassembly and Reassembly Part Figure Description CONTROL PANEL (DW60A80**U*/ DW60A80**F*) SUB TOUCH PBA DW60A8070*/ DW60A8060*/ DW60A8050* models DW60A8040* models LAN PBA (WIFI) [ASSEMBLY] 1. Connect wire terminal to connect MAIN PBA to SUB TOUCH PBA. 2. In the case of DW60A8070*/DW60A8060*/...
Page 15 - Disassembly and Reassembly _ 15
Disassembly and Reassembly _ 15 - CONTROL PANEL : DD82-01903A, DD82-01903C, DD82-01903E, DD82-01903F / SVC ASSY-CONTROL PANEL Part Figure Description CONTROL PANEL/ (DW60A80*0BB/ DW60A80*0IB) [DISASSEMBLY] 1. Open the dishwasher’s DOOR. It doesn’t need to uninstall the dishwasher from the furniture ...
Page 16 - 6 _ Disassembly and Reassembly; Connect the Wire harness that connect MAIN PBA
16 _ Disassembly and Reassembly Part Figure Description CONTROL PANEL/ (DW60A80*0BB/ DW60A80*0IB) SUB PBA DW60A8070*/ DW60A8060*/ DW60A8050* models DW60A8040* models LAN PBA (WIFI) [ASSEMBLY] 1. Connect the Wire harness that connect MAIN PBA to SUB PBA. In case of DW60A8070*B/DW60A8060*B/ DW60A8050*...
Page 17 - Disassembly and Reassembly _ 17; Open the dishwasher’s DOOR, and remove 8
Disassembly and Reassembly _ 17 2-6. DOOR OUTER - DOOR OUTER : DD81-02455B (*BB models), DD81-02455D (*IB models), DD81-02521A (*FS models), DD81-02521B (*FW models) / SVC DOOR OUTER Part Figure Description DOOR OUTER A B DW60A80**F*/ DW60A80**U* models A B DW60A80**BB/ DW60A80**IB models [DISASSEMB...
Page 18 - 8 _ Disassembly and Reassembly; Assemble the holes of DOOR OUTER to hooks of; Fasten 8 screws to fix the DOOR OUTER.
18 _ Disassembly and Reassembly Part Figure Description DOOR OUTER 1 2 DW60A80**F*/ DW60A80**U* models DW60A80**BB/ DW60A80**IB models [ASSEMBLY] 1. Assemble the holes of DOOR OUTER to hooks of CONTROL PANEL WARNING Do not this work without safety gloves. It can cause injury from sharp edge. Holes o...
Page 19 - Disassembly and Reassembly _ 19; Remove HOLDER ROPE DOOR from the DOOR; Pay attention to DOOR drop after remove the; Be careful to avoid injury from the DOOR drop
Disassembly and Reassembly _ 19 2-7. HOLDER HINGE - HOLDER HINGE : DD81-02763A / SVC HOLDER HINGE Part Figure Description HOLDER HINGE (DW60A80**BB/ DW60A80**F*/ DW60A80**U* models) [DISASSEMBLY] * PREPARATION: Disassemble SIDE PANEL left & right. 1. Remove HOLDER ROPE DOOR from the DOOR HINGE l...
Page 20 - 0 _ Disassembly and Reassembly; Pay attention to hook of terminals.
20 _ Disassembly and Reassembly 2-8. DOOR HINGE / GUIDE HINGE - DOOR HINGE LEFT : DD82-01676A / SVC ASSY-HINGE LEFT - DOOR HINGE RIGHT : DD82-01675A / SVC ASSY-HINGE RIGHT Part Figure Description DOOR HINGE/ GUIDE HINGE (DW60A80**BB/ DW60A80**F*/ DW60A80**U* models) Hook Hook [DISASSEMBLY] * PREPARA...
Page 21 - Disassembly and Reassembly _ 21; DOOR INNER assembly to the direction of about 15 ̊.
Disassembly and Reassembly _ 21 Part Figure Description DOOR HINGE/ GUIDE HINGE (DW60A80**BB/ DW60A80**F*/ DW60A80**U* models) About 15˚ 4. Do same work at the opposite side, and pull out the DOOR INNER assembly to the direction of about 15˚. WARNING Do not this work without safety gloves. It can ca...
Page 22 - 2 _ Disassembly and Reassembly
22 _ Disassembly and Reassembly Part Figure Description DOOR HINGE/ GUIDE HINGE (DW60A80**BB/ DW60A80**F*/ DW60A80**U* models) [ASSEMBLY] 1. Assemble the DOOR HINGE assembly and BRACKET DOOR FRAME with machine screws. - Screws for DOOR HINGE assembly: DD81-02764A / 4 pcs - Screws for BRACKET DOOR FR...
Page 23 - Disassembly and Reassembly _ 23; Remove the all fixing screws of the SIDE PANEL
Disassembly and Reassembly _ 23 Part Figure Description ASSY-HINGE RIGHT/ ASSY- HINGE LEFT (DW60A80**IB models) B A [DISASSEMBLY] 1. Remove 8 screws that connect the ASSY CONTROL PANEL to the dishwasher’s DOOR with Torx® T15 screwdriver. Separate the ASSY CONTROL PANEL. - Type A: DD81-02756A / 2 pcs...
Page 24 - 4 _ Disassembly and Reassembly; Open the door to apply tension to the DOOR
24 _ Disassembly and Reassembly Part Figure Description ASSY-HINGE RIGHT/ ASSY- HINGE LEFT (DW60A80**IB models) 5. Open the door to apply tension to the DOOR SPRING and fix the DOOR SPRING with a PIN. 6. Remove the 2 screws which is fixed to INNER DOOR. 7. Remove the stopper by pulling it by hand. W...
Page 25 - Disassembly and Reassembly _ 25; Remove the ASSY HINGE RIGHT hanging from
Disassembly and Reassembly _ 25 Part Figure Description ASSY-HINGE RIGHT/ ASSY- HINGE LEFT (DW60A80**IB models) ASSY HINGE RIGHT 8. Remove the ASSY HINGE RIGHT hanging from DOOR SPRING. - ASSY-HINGE-RIGHT : DD82-01908A - ASSY-HINGE-LEFT : DD82-01907A [ASSEMBLY] 1. Pull the ASSY HINGE RIGHT to apply ...
Page 26 - 6 _ Disassembly and Reassembly; Assemble the stopper by pushing it by hand.
26 _ Disassembly and Reassembly Part Figure Description ASSY-HINGE RIGHT/ ASSY- HINGE LEFT (DW60A80**IB models) 3. Assemble the stopper by pushing it by hand. WARNING Do not this work without safety gloves. It can cause injury from sharp edge. 4. Fasten the 2 screws on the side of the INNER DOOR. 5....
Page 27 - Disassembly and Reassembly _ 27; Fasten 10 screws to fix the DOOR OUTER and
Disassembly and Reassembly _ 27 Part Figure Description ASSY-HINGE RIGHT/ ASSY- HINGE LEFT (DW60A80**IB models) C B A 6. Fasten 10 screws to fix the DOOR OUTER and ASSY CONTROL PANEL. - Type A: DD81-02756A / 2 pcs - Type B: DD81-02758A / 6 pcs - Type C: DD81-02757A / 6 pcs
Page 28 - 8 _ Disassembly and Reassembly; Be careful to touch the BRACKET SEAL TUB after; Put some water on new SEAL TUB PACKING to; Pay attention to the direction of seal. If it is; Assemble the SEAL TUB PACKING to center of the
28 _ Disassembly and Reassembly 2-9. SEAL TUB PACKING - SEAL TUB PACKING : DD81-02770A / SVC SEAL TUB PACKING Part Figure Description SEAL TUB PACKING Seal tub packing Bracket seal tub [DISASSEMBLY] 1. Remove the old seal from the BRACKET SEAL TUB. WARNING Be sure to remove the power plug before ser...
Page 29 - Disassembly and Reassembly _ 29; Press the seal from the top corner toward remaining; Pay attention to assemble not to deform the seal
Disassembly and Reassembly _ 29 Part Figure Description SEAL TUB PACKING About 3~4 cm 3. Put Seal in the left & right side of the bottom. The folded seal is about 3~4 cm long. 4. Press the seal from the top corner toward remaining side. CAUTION Pay attention to assemble not to deform the seal ti...
Page 30 - 0 _ Disassembly and Reassembly; Turn the COARSE FILTER counter-clockwise to; Make sure to reassemble to right location.
30 _ Disassembly and Reassembly 2-10. ROTOR LOWER / ASSY DUCT NOZZLE - ROTOR LOWER : DD81-02977A / SVC ROTOR LOWER - ASSY DUCT NOZZLE : DD82-01501A / SVC ASSY-DUCT NOZZLE Part Figure Description ROTOR LOWER / ASSY DUCT NOZZLE [DISASSEMBLY] 1. Open the dishwasher’s DOOR. Rotor lower 2. Take ROTOR LOW...
Page 31 - Disassembly and Reassembly _ 31; Put the HOLDER ROTOR LOWER on the SUMP.; Assemble the ASSY DUCT NOZZLE to hooks and
Disassembly and Reassembly _ 31 Part Figure Description ROTOR LOWER / ASSY DUCT NOZZLE Sump Guide of Holder Bottom of Holder Rib [ASSEMBLY] 1. Put the HOLDER ROTOR LOWER on the SUMP. CAUTION Pay attention to assemble the HOLDER ROTOR LOWER correctly. There’re risks of leakage or poor performance whe...
Page 32 - 2 _ Disassembly and Reassembly; Fasten 2 screws to fit the ASSY DUCT NOZZLE.
32 _ Disassembly and Reassembly Part Figure Description ROTOR LOWER / ASSY DUCT NOZZLE 3. Fasten 2 screws to fit the ASSY DUCT NOZZLE. - Screws: DD81-02718A / 2 pcs 4. Put the ROTOR LOWER onto the HOLDER ROTOR LOWER.
Page 33 - Disassembly and Reassembly _ 33; Be careful not to be broken the hooks.; Make sure to fit the hook to the right location of
Disassembly and Reassembly _ 33 2-11. ASSY ROTOR MIDDLE - ASSY ROTOR MIDDLE : DD82-01894A / SVC ASSY-ROTOR MIDDLE Part Figure Description ASSY ROTOR MIDDLE [DISASSEMBLY] 1. Open the dishwasher’s DOOR, and take off the BASKET MIDDLE. 2. Release 2 hooks to take off ASSY ROTOR MIDDLE from the BASKET MI...
Page 34 - 4 _ Disassembly and Reassembly; Turn the COARSE FILTER counter-clockwise to; Reassembly is the reverse order of disassembly.; Make sure the COARSE FILTER is closed
34 _ Disassembly and Reassembly 2-12. COARSE FILTER / FINE FILTER / MICRO FILTER - FILTER COARSE : DD81-02452A / SVC FILTER COARSE - FILTER MICRO : DD81-02453A / SVC FILTER MICRO - FILTER FINE : DD81-02454A / SVC FILTER FINE Part Figure Description COARSE FILTER / FINE FILTER / MICRO FILTER [DISASSE...
Page 35 - Disassembly and Reassembly _ 35; Lift up the BASKET 3RD TRAY and separate it.; Release the hook of ASSY ROLLER 3RD fixed to; Assemble the BASKET 3RD with ASSY ROLLER
Disassembly and Reassembly _ 35 2-13. BASKET 3RD / ASSY ROLLER 3RD / HANDLE BASKET - BASKET 3RD : DD82-01893A (DW60A8070* models) , DD82-01893B (DW60A8060*,DW60A8050* models) / SVC ASSY-BASKET 3RD Part Figure Description BASKET 3RD / ASSY ROLLER 3RD/ HANDLE BASKET BASKET 3RD TRAY [DISASSEMBLY] 1. Li...
Page 36 - 6 _ Disassembly and Reassembly
36 _ Disassembly and Reassembly 2-14. BASKET MIDDLE / ASSY ADJUSTER - BASKET MIDDLE : DD82-01887A (DW60A8070* models) , DD82-01887B (DW60A8060*,DW60A8050* models) / DD82-01887C (DW60A8040* models) SVC ASSY-BASKET UPPER Part Figure Description BASKET MIDDLE / ASSY ADJUSTER [DISASSEMBLY] 1. Open the d...
Page 37 - Disassembly and Reassembly _ 37; Remove the HANDLE BASKET by lifting the 2 RIB.; Release the 2 HOLDER TINE-UP hooks and
Disassembly and Reassembly _ 37 2-15. BASKET MIDDLE / GUIDE TINE / HANDLE BASKET - WIRE FOLDING : DD81-03173A / SVC WIRE FOLDING - HOLDER TINE-UP : DD81-03186A / SVC HOLDER TINE-UP - GUIDE BUTTON : DD81-03174A / SVC GUIDE BUTTON - HOLDER GUIDE TINE : DD81-03175A / SVC HOLDER GUIDE TINE - HOLDER GUID...
Page 38 - 8 _ Disassembly and Reassembly
38 _ Disassembly and Reassembly Part Figure Description BASKET MIDDLE/ HANDLE BASKET/ WIRE FOLDING/ HOLDER TINE- UP/ HOLDER GUIDE TINE/ GUIDE BUTTON / HOLDER GUIDE TINE-UP GUIDE BUTTON HOLDER GUIDE TINE 3. Release the 4 hooks of HOLDER GUIDE TINE and separate it from the BASKET MIDDLE. 4. Push the G...
Page 39 - Disassembly and Reassembly _ 39
Disassembly and Reassembly _ 39 2-16. BASKET LOWER - BASKET LOWER : DD82-01886A (DW60A8070* models) , DD82-01886B (DW60A8060*,DW60A8050*,DW60A8040* models) / SVC ASSY-BASKET LOWER Part Figure Description BASKET LOWER [DISASSEMBLY] 1. Open the dishwasher’s DOOR, and take off the BASKET LOWER. 2. Remo...
Page 40 - 0 _ Disassembly and Reassembly; Take off the HOLDER RAIL REAR by pulling back; Put the RAIL BASKET on the ROLLER RAIL.; Assemble the HOLDER RAIL REAR to RAIL
40 _ Disassembly and Reassembly 2-17. RAIL BASKET / HOLDER RAIL REAR - HOLDER RAIL MIDDLE REAR : DD81-02768A / SVC HOLDER RAIL MIDDLE REAR - RAIL BASKET LEFT : DD81-02766A / SVC RAIL MID-LEFT - RAIL BASKET RIGHT : DD81-02767A / SVC RAIL MID-RIGHT Part Figure Description RAIL BASKET & HOLDER RAIL...
Page 41 - Disassembly and Reassembly _ 41; Insert the COVER PLINTH inside the holder.
Disassembly and Reassembly _ 41 2-18. COVER PLINTH - COVER PLINTH : DD81-01650A (*FW models), DD81-01650B (*FS models) / SVC COVER PLINTH Part Figure Description COVER PLINTH (Only for Free standing models / DW6*R70**F*) [DISASSEMBLY] 1. Open the DOOR to 90˚, and release 2 screws. - Screws: DD81-026...
Page 42 - 2 _ Disassembly and Reassembly; Put the COVER TOP on the top of dishwasher, and
42 _ Disassembly and Reassembly 2-19. COVER TOP - COVER TOP : DD81-02552D (*FW models), DD81-02552C (*FS models) / SVC TOP COVER Part Figure Description COVER TOP (Only for Free standing models / DW60A80**F*) [DISASSEMBLY] 1. Release 2 screws. - Screws: DD81-02692A / 2 pcs WARNING Be sure to remove ...
Page 43 - Disassembly and Reassembly _ 43
Disassembly and Reassembly _ 43 2-20. SIDE PANEL / GUIDE TUB TOP / COVER TUB REAR - GUIDE TUB TOP : DD81-02733A / SVC GUIDE TUB TOP - HOUSING-LEFT : DD81-02928B (*BB, *IB models), DD81-02880A (*FS models). DD81-02880C (*FW models) / SVC HOUSING-LEFT - HOUSING_RIGHT : DD81-02929B (*BB, *IB models), D...
Page 44 - 4 _ Disassembly and Reassembly; Be careful not to be dented SIDE PANEL because; They are not fixed without SIDE PANEL.
44 _ Disassembly and Reassembly Part Figure Description SIDE PANEL/ GUIDE TUB TOP/ COVER TUB REAR (DW60A80**F*) Not to get stuck Could be dented Hook 4. Take the SIDE PANEL off a little, just enough not to get stuck to TUB FRAME. WARNING Do not this work without safety gloves. It can cause injury fr...
Page 45 - Disassembly and Reassembly _ 45; Put the hook of SIDE PANEL into the COVER
Disassembly and Reassembly _ 45 Part Figure Description SIDE PANEL/ GUIDE TUB TOP/ COVER TUB REAR (DW60A80**F*) 2. Put the hook of SIDE PANEL into the COVER PLINTH. WARNING Do not this work without safety gloves. It can cause injury from sharp edge. On The Tub Frame On The Guide Tub Top Could be den...
Page 46 - 6 _ Disassembly and Reassembly; Fasten the screws that was assembled to origin; Put the COVER TOP on the top of dishwasher, and
46 _ Disassembly and Reassembly Part Figure Description SIDE PANEL/ GUIDE TUB TOP/ COVER TUB REAR (DW60A80**F*) A B Cover Tub Rear B Guide Tub Top 5. Fasten Screws. - Front side ‧ Type A: DD81-02693A / 4 pcs - Rear side ‧ Type B: DD81-02694A / 4 pcs - Top side ‧ Type B: DD81-02694A / 2 pcs CAUTION F...
Page 47 - Disassembly and Reassembly _ 47; Disassemble the SIDE PANEL left & right from
Disassembly and Reassembly _ 47 Part Figure Description SIDE PANEL/ GUIDE TUB TOP/ COVER TUB REAR (DW60A80**BB/ DW60A80**IB/ DW60A80**U* models) A B B Cover Tub Rear C B Guide Tub Top [DISASSEMBLY] 1. Release Screws. - Front side (Type A): DD81-02693A / 4 pcs (Type B): DD81-02694A / 2 pcs - Rear sid...
Page 48 - 8 _ Disassembly and Reassembly; Assemble the GUIDE TUB TOP and COVER TUB
48 _ Disassembly and Reassembly Part Figure Description SIDE PANEL/ GUIDE TUB TOP/ COVER TUB REAR (DW60A80**BB/ DW60A80**IB/ DW60A80**U* models) [ASSEMBLY] 1. Assemble the GUIDE TUB TOP and COVER TUB REAR to back of dishwasher. CAUTION They are not fixed without SIDE PANEL. Recommend to work by 2 pe...
Page 49 - Disassembly and Reassembly _ 49; CHECKPOINTS AFTER FINISHING A SERVICE; unlocked when the dishwasher stops.
Disassembly and Reassembly _ 49 3. CHECKPOINTS AFTER FINISHING A SERVICE 1 Check the safety device Check the operation of the door lock switch. Make sure that it is locked while the dishwasher is running and that it is unlocked when the dishwasher stops. 2. Use authenticated parts only If any part i...
Page 50 - Asia
© 2021 Samsung Electronics Co.,Ltd. All rights reserved. Printed in Korea GSPN (GLOBAL SERVICE PARTNER NETWORK) Area Web Site Eurpoe, CIS, Mideast & africa gspn1.samsungcsportal.com Asia gspn2.samsungcsportal.com North & Latin America gspn3.samsungcsportal.com China china.samsungportal.com T...


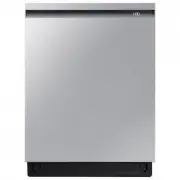
 Samsung DW50T6060US
User Manual
Samsung DW50T6060US
User Manual
 Samsung DW5343TGBWQ
User Manual
Samsung DW5343TGBWQ
User Manual
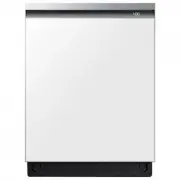
 Samsung DW60H6050FS
User Manual
Samsung DW60H6050FS
User Manual
 Samsung DW60R2014US
User Manual
Samsung DW60R2014US
User Manual
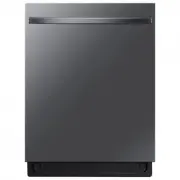
 Samsung DW80B6060UG
User Manual
Samsung DW80B6060UG
User Manual
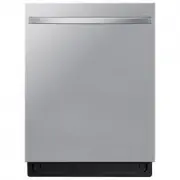
 Samsung DW80B6060US
User Manual
Samsung DW80B6060US
User Manual
 Samsung DW80B7070AP
User Manual
Samsung DW80B7070AP
User Manual
 Samsung DW80B7070UG
User Manual
Samsung DW80B7070UG
User Manual
 Samsung DW80B7070US
User Manual
Samsung DW80B7070US
User Manual
 Samsung DW80B7070US/AA
User Manual
Samsung DW80B7070US/AA
User Manual
 Samsung DW80B7071UG
User Manual
Samsung DW80B7071UG
User Manual
 Samsung DW80B7071US
User Manual
Samsung DW80B7071US
User Manual
 Samsung DW80BB707012
User Manual
Samsung DW80BB707012
User Manual
 Samsung DW80BB707012AA
User Manual
Samsung DW80BB707012AA
User Manual
 Samsung DW80CB545012
User Manual
Samsung DW80CB545012
User Manual
 Samsung DW80CG4021SR
User Manual
Samsung DW80CG4021SR
User Manual
 Samsung DW80CG4021SRAA
User Manual
Samsung DW80CG4021SRAA
User Manual
 Samsung DW80CG4051SR
User Manual
Samsung DW80CG4051SR
User Manual
 Samsung DW80CG5450MT
User Manual
Samsung DW80CG5450MT
User Manual