Samsung DW50K4050BB/EU - Manuals
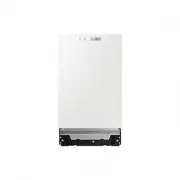
User Manual Samsung DW50K4050BB/EU


Summary
2_ Contents Contents SAFETY INFORMATION 3 5 Hydrogen gas is explosive 5 Proper use 6 Disposal 6 Instruction about the WEEE mark OPERATION INSTRUCTION 7 7 Control panel 10 Displays 12 Dishwasher features PRIOR USING FOR THE FIRST TIME 13 13 Set the water softener 14 Loading the salt into the softener...
Safety information _3 01 SAFETY INFORMA TION READ AND FOLLOW THIS SAFETY INFORMATION CAREFULLY SAVE THESE INSTRUCTIONS Safety information Please read this User Information carefully and keep it to refer to at a later date. Pass it on to any subsequent owner of the appliance.This manual contains sect...
Safety information _5 01 SAFETY INFORMA TION READ AND FOLLOW THIS SAFETY INFORMATION CAREFULLY SAVE THESE INSTRUCTIONS Hydrogen gas is explosive Under certain conditions, Hydrogen gas may be produced in a hot-water system that has not been used for two weeks or more. HYDROGEN GAS IS EXPLOSIVE. If th...
Samsung Dishwashers Manuals
-
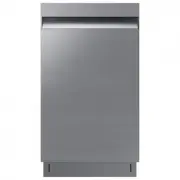 Samsung DW50T6060US
User Manual
Samsung DW50T6060US
User Manual
-
 Samsung DW5343TGBWQ
User Manual
Samsung DW5343TGBWQ
User Manual
-
 Samsung DW60H6050FS
User Manual
Samsung DW60H6050FS
User Manual
-
 Samsung DW60R2014US
User Manual
Samsung DW60R2014US
User Manual
-
 Samsung DW80B6060UG
User Manual
Samsung DW80B6060UG
User Manual
-
 Samsung DW80B6060US
User Manual
Samsung DW80B6060US
User Manual
-
 Samsung DW80B7070AP
User Manual
Samsung DW80B7070AP
User Manual
-
 Samsung DW80B7070UG
User Manual
Samsung DW80B7070UG
User Manual
-
 Samsung DW80B7070US
User Manual
Samsung DW80B7070US
User Manual
-
 Samsung DW80B7070US/AA
User Manual
Samsung DW80B7070US/AA
User Manual
-
 Samsung DW80B7071UG
User Manual
Samsung DW80B7071UG
User Manual
-
 Samsung DW80B7071US
User Manual
Samsung DW80B7071US
User Manual
-
 Samsung DW80BB707012
User Manual
Samsung DW80BB707012
User Manual
-
 Samsung DW80BB707012AA
User Manual
Samsung DW80BB707012AA
User Manual
-
 Samsung DW80CB545012
User Manual
Samsung DW80CB545012
User Manual
-
 Samsung DW80CG4021SR
User Manual
Samsung DW80CG4021SR
User Manual
-
 Samsung DW80CG4021SRAA
User Manual
Samsung DW80CG4021SRAA
User Manual
-
 Samsung DW80CG4051SR
User Manual
Samsung DW80CG4051SR
User Manual
-
Samsung DW80CG4051SRAA
User Manual
-
 Samsung DW80CG5450MT
User Manual
Samsung DW80CG5450MT
User Manual