Samsung DVD-HD860 - Manuals
Samsung DVD-HD860 Player – User Manual in PDF format online.
Manuals:
User Manual Samsung DVD-HD860


Summary
2 P R E C A U T I O N S P R E C A U T I O N S 1. Setting up - Refer to the identification label located on the rear of your player for its proper operat-ing voltage. - Install your player in a cabinet with ade- quate ventilation holes. (7~10cm) Do notblock ventilation holes on any of the compo-nents...
3 B E F O R E B E F O R E Y O U Y O U S T S T A R A R T T English 1. Open the battery cover on the back of the remote control. 2. Insert two AAA batteries. Make sure that the polarities (+ and -) are aligned correctly. 3. Replace the battery cover. Remote Control Batteries for Remote Control (AAA Si...
4 S E T U P S E T U P Excellent Sound Dolby Digital, a technology developed by DolbyLaboratories, provides crystal clear sound reproduc-tion. Screen Both regular and widescreen(16:9) pictures can beviewed. Slow Motion An important scene can be viewed in slow motion. Parental Control (DVD) The parent...
Samsung Players Manuals
-
 Samsung BD-H8500A
User Manual
Samsung BD-H8500A
User Manual
-
 Samsung BD-P1000
User Manual
Samsung BD-P1000
User Manual
-
Samsung BD-P1000
Manual
-
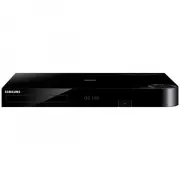
 Samsung BD-P1400
Manual
Samsung BD-P1400
Manual
-
 Samsung BD-P1500
Manual
Samsung BD-P1500
Manual
-
 Samsung DVD-C500
Manual
Samsung DVD-C500
Manual
-
 Samsung DVD-P380
User Manual
Samsung DVD-P380
User Manual
-
 Samsung DVD-P380 KT
User Manual
Samsung DVD-P380 KT
User Manual
-
 Samsung HT-BD2
Manual
Samsung HT-BD2
Manual
-
 Samsung BD-C5300
User Manual
Samsung BD-C5300
User Manual
-
 Samsung BD-C5900
User Manual
Samsung BD-C5900
User Manual
-
Samsung BD-C5900
Manual
-
 Samsung BD-C7500
User Manual
Samsung BD-C7500
User Manual
-
 Samsung BD-D5100
User Manual
Samsung BD-D5100
User Manual
-
 Samsung BD-D5500
User Manual
Samsung BD-D5500
User Manual
-
Samsung BD-D5500
Manual
-
 Samsung BD-D6500
Manual
Samsung BD-D6500
Manual
-
Samsung BD-D6500
User Manual
-
 Samsung BD-D7000
User Manual
Samsung BD-D7000
User Manual
-
Samsung BD-D7000
Manual