Samsung BF1N4T123 - Manuals
Samsung BF1N4T123 Oven – User Manual in PDF format online.
Manuals:
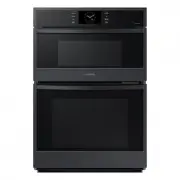
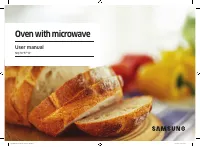
User Manual Samsung BF1N4T123


Summary
2 _using this manual using this manual Thank you for choosing a SAMSUNG Built - In Oven. This user Manual contains important information on safety and instructions intended to assist you in the operation and maintenance of your appliance. Please take the time to read this Owner’s Manual before using...
safety instructions_ 3 SAFETY DURING OPERATION • This oven has been designed only for the cooking of household foods. • During use, the oven interior surfaces become hot enough to cause burns. Do not touch heating elements or interior surfaces of the oven until they have had time to cool. • Never st...
4 _installation installation Safety instructions for the installation This oven may be installed only by an approved electrician. The installer is responsible for connecting the appliance to the mains and in so doing for observing the relevant safety regulations. • Ensure protection from live parts ...
Samsung Ovens Manuals
-
 Samsung NE63T8951SS
User Manual
Samsung NE63T8951SS
User Manual
-
 Samsung NQ50J5530BS
User Manual
Samsung NQ50J5530BS
User Manual
-
 Samsung NQ50J9530BS
User Manual
Samsung NQ50J9530BS
User Manual
-
 Samsung NQ70CB700D12
User Manual
Samsung NQ70CB700D12
User Manual
-
 Samsung NQ70CG600DMT
User Manual
Samsung NQ70CG600DMT
User Manual
-
 Samsung NQ70CG600DSR
User Manual
Samsung NQ70CG600DSR
User Manual
-
 Samsung NQ70CG700DMT
User Manual
Samsung NQ70CG700DMT
User Manual
-
 Samsung NQ70CG700DSR
User Manual
Samsung NQ70CG700DSR
User Manual
-
 Samsung NQ70T5511DG/AA
User Manual
Samsung NQ70T5511DG/AA
User Manual
-
Samsung NQ70T5511DS/AA
User Manual
-
 Samsung NV51CB700D12
User Manual
Samsung NV51CB700D12
User Manual
-
 Samsung NV51CB700S12
User Manual
Samsung NV51CB700S12
User Manual
-
 Samsung NV51CG600DMT
User Manual
Samsung NV51CG600DMT
User Manual
-
 Samsung NV51CG600DSR
User Manual
Samsung NV51CG600DSR
User Manual
-
 Samsung NV51CG600SMT
User Manual
Samsung NV51CG600SMT
User Manual
-
 Samsung NV51CG600SSR
User Manual
Samsung NV51CG600SSR
User Manual
-
 Samsung NV51CG700DMT
User Manual
Samsung NV51CG700DMT
User Manual
-
 Samsung NV51CG700DSR
User Manual
Samsung NV51CG700DSR
User Manual
-
 Samsung NV51CG700SMT
User Manual
Samsung NV51CG700SMT
User Manual
-
 Samsung NV51CG700SSR
User Manual
Samsung NV51CG700SSR
User Manual