Samsung B2230N - Manuals
Samsung B2230N Monitor – Manual in PDF format online.
Manuals:
Manual Samsung B2230N


Summary
Table Of Contents MAJOR SAFETY PRECAUTIONS Before You Start . . . . . . . . . . . . . . . . . . . . . . . . . . . . . . . . . . . . . . . . . . . 1-1Custody and Maintenance . . . . . . . . . . . . . . . . . . . . . . . . . . . . . . . . . . . 1-2Safety Precautions . . . . . . . . . . . . . . . . . ....
1-1 Major Safety Precautions 1 Major Safety Precautions 1-1 Before You Start Icons used in this manual Using this Manual • Make yourself fully aware of the safety precautions before using this product. • If a problem occurs, refer to the 'Troubleshooting' section. Copyright Notice The contents of th...
Major Safety Precautions 1-2 1-2 Custody and Maintenance External Surface and Screen Maintenance Securing the Installation Space • Keep the required distances between the product and other objects (e.g. walls) to ensure proper ventilation.Failing to do so may result in fire or a problem with the pro...
Samsung Monitors Manuals
-
 Samsung 2043NWX
Manual
Samsung 2043NWX
Manual
-
 Samsung 2043SN
User Manual
Samsung 2043SN
User Manual
-
Samsung 2043SN
Manual
-
 Samsung 943SN
User Manual
Samsung 943SN
User Manual
-
 Samsung B2230HD
User Manual
Samsung B2230HD
User Manual
-
 Samsung E1920N
User Manual
Samsung E1920N
User Manual
-
 Samsung E2220N
User Manual
Samsung E2220N
User Manual
-
 Samsung LC27R500FHEXXY
User Manual
Samsung LC27R500FHEXXY
User Manual
-
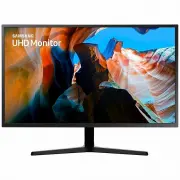
 Samsung LC32F391FWEXXY
User Manual
Samsung LC32F391FWEXXY
User Manual
-
 Samsung LC32R500FHEXXY
User Manual
Samsung LC32R500FHEXXY
User Manual
-
 Samsung LC34G55TWWNXZA
User Manual
Samsung LC34G55TWWNXZA
User Manual
-
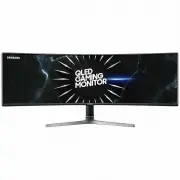
 Samsung LC49J890DKEXXY
User Manual
Samsung LC49J890DKEXXY
User Manual
-
 Samsung LC49RG90SSEXXY
User Manual
Samsung LC49RG90SSEXXY
User Manual
-
 Samsung LF24T350FHNXZA
User Manual
Samsung LF24T350FHNXZA
User Manual
-
 Samsung LS32A700NWNXZA
User Manual
Samsung LS32A700NWNXZA
User Manual
-
 Samsung LS55CG970NNXGO
User Manual
Samsung LS55CG970NNXGO
User Manual
-
 Samsung LS57CG952NNXZA
User Manual
Samsung LS57CG952NNXZA
User Manual
-
 Samsung LU28R550UQEXXY
User Manual
Samsung LU28R550UQEXXY
User Manual
-
 Samsung LU32J590UQEXXY
User Manual
Samsung LU32J590UQEXXY
User Manual
-
 Samsung P2070
User Manual
Samsung P2070
User Manual