Page 2 - Contents
2 A Contents Safety precautions ......................................................................................................................................................3Accessories ............................................................................................................
Page 3 - Safety precautions; WARNING
3 A ENGLISH Safety precautions (Carefully follow the precautions listed below because they are essential to guarantee the safety of the equipment.) WARNING • Always disconnect the air conditioner from the power supply before servicing it or accessing its internal components. • Verify that installati...
Page 5 - Accessories
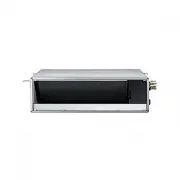
5 A ENGLISH Accessories The following accessories are supplied with the indoor unit. The type and quantity may differ depending on the specifications. ❈ Only AM018JNMPCH/AA include the last four accessories. Insulation cover Thermal insulation A (use for refrigerant pipe) Thermal insulation B (use f...
Page 6 - Selecting the installation location; Indoor Unit
6 A Selecting the installation location There must be no obstacles near the air inlet and outlet. Install the indoor unit on a ceiling that can support its weight. Maintain sufficient clearance around the indoor unit. Make sure that the water dripping from the drain hose runs away correctly ...
Page 8 - Name
8 Selecting the installation location AM007/009/012FNLD No. Name Description 1 Liquid pipe connection ø6.35 (1/4”) 2 Gas pipe connection ø12.70 (1/2”) 3 Drain pipe connection 3/4"(ODØ1.05"(26.67)) 4 Drain pipe connection (Option drain pump) 3/4"(ODØ1.05"(26.67)) 5 Power supply/Co...
Page 19 - Indoor unit installation; Unit
19 A ENGLISH Indoor unit installation Concrete Suspension bolt( ø9.52(3/8”) or M10) Hole in anchor Hole in plug Insert Drain hose port A Rubber Ceiling support It is recommended to install theY-joint before installing the indoor unit. 1 Place the pattern sheet on the ceiling at the spot where you wa...
Page 21 - Purging the unit; Connecting the refrigerant pipe
21 A ENGLISH On delivery, the indoor unit is loaded with inert gas. All this gas must therefore be purged before connecting the assembly piping. To purge the inert gas, proceed as follows. Unscrew the pinch pipe at the end of each refrigerant pipe. Result: All inert gas escapes from the indoor unit....
Page 23 - Cutting/flaring the pipes
23 A ENGLISH Cutting/flaring the pipes Inclined Damaged Surface Cracked Uneven Thickness 1 Make sure that you prepared the required tools. (pipe cutter, reamer, flaring tool and pipe holder) 2 If you want to shorten the pipe, cut it using a pipe cutter ensuring that the cut edge remains at 90° with ...
Page 24 - Performing leak test & insulation; Leak test; Must fit tightly against body
24 A Performing leak test & insulation LEAK TEST WITH NITROGEN (before opening valves) In order to detect basic refrigerant leaks, before recreating the vacuum and recirculating the R410A, it’s responsible of installer to pressurize the whole system with nitrogen (using a pressure regulator) at ...
Page 26 - Drain pipe and drain hose installation
26 A Drain pipe and drain hose installation Tighten the clamp to the maximum. 1 Install the drain hose as short as possible. note In order to discharge condensation water, the drain hose should keep tilted. Secure the drain hose with the cable-tie not to be separated from the unit. The drain p...
Page 27 - Drainpipe Connection
27 A ENGLISH Drain pipe and drain hose installation 1 The drain pipe should be installed within 11.81inch(300mm) to 21.65inch(550mm) from the flexible hose and then lift down 0.79inch(20mm) or more. 2 Install horizontal drainpipe with a slope of 1/100 or more and fix it by hanger space of 3.28~4.92f...
Page 28 - Centralized Drainage
28 A 1 Install horizontal drainpipe with a slope of 1/100 or more and fix it by hanger space of 3.28~4.92ft(1~1.5m). 2 Install U-trap at the end of the drainpipe to prevent a nasty smell to reach the indoor unit. Without the drain pump 1 Install main air vent at the front of the farthest indoor unit...
Page 29 - Testing the drainage
29 ENGLISH Water supply intake Prepare a little water about 2 liters. Loosen screws and take out the side cover plate. 1 Confirm that the water flows out through the drain hose. 3 When the drain pump is installed, operate the unit as cooling mode and check a drain pump pumping. 4 Pour water into the...
Page 30 - Wiring work; Power and communication cable connection
30 A Wiring work Silver solder 1 Before wiring work, you must turn off all power source. 2 Indoor unit power should be supplied through the breaker( ELCB or MCCB+ELB ) separated by the outdoor power. ELCB:Earth Leakage Circuit Breaker MCCB:Molded Case Circuit Breaker ELB:Earth Leakage Breaker 3 The ...
Page 31 - Specification of electronic wire
31 ENGLISH Power supply MCCB ELB or ELCB Power cable Earth cable Communication cable Max : 253V Min : 187V X A X A, 30mA 0.1 sec 0.0039inch 2 (2.5mm 2 ) 0.0039inch 2 (2.5mm 2 ) 0.0012~0.0023inch 2 (0.75~1.5mm 2 ) Decide the capacity of ELCB(or MCCB+ELB) by below formula. The capacity of ELCB(or MC...
Page 32 - Tightening torque
32 AWiring work(Cont.) Rating current Unit Model Rating current Unit Model Rating current Unit Model Rating current AM FNLD 007 009 012 018 024 030 036 048 0.32A0.40A0.51A0.94A0.98A0.80A1.05A1.40A AM FNMD 018 024 030 036 048 1.40A1.50A1.5...
Page 33 - Setting an indoor unit address and; The procedure of option setting
33 A ENGLISH Setting an indoor unit address and installation option Set the indoor unit address and installation option with remote controller option. Set the each option separately since you cannot set the ADDRESS setting and indoor unit installation setting option at the same time. You need to set...
Page 35 - Option setting
35 ENGLISH SEG16 SEG18 SEG21 SEG23 SEG17 SEG20 SEG22 SEG24 Step 4. Input option Press operation button with the direction of remote control for set. For the correct option setting, you must input the option twice. Step 5. Check operation 1. Reset the indoor unit by pressing the RESET button of indoo...
Page 37 - 2 series installation option; Setting an indoor unit installation option
37 ENGLISH 1. Check whether power is supplied or not. - When the indoor unit is not plugged in, there should be additional power supply in the indoor unit. 2. The panel(display) should be connected to an indoor unit to receive option. 3. Set the installation option according to the installation cond...
Page 40 - 5 series installation option
40 A Setting an indoor unit address and installation option (Cont.) SEG1 SEG2 SEG3 SEG4 SEG5 SEG6 0 5 Use of Auto Change Over for HR only in Auto mode (When setting SEG3) Standard heating temp. Offset (When setting SEG3) Standard cooling temp. Offset (When setting SEG3) Standard for mode change Heat...
Page 43 - Changing a particular option
43 ENGLISH Option SEG1 SEG2 SEG3 SEG4 SEG5 SEG6 Explanation PAGE MODE The option mode you want to change The tens’ digit of an option SEG you will change The unit digit of an option SEG you will change Changed value Indication and Details Indication Details Indication Details Indication Details Indi...
Page 44 - Final check and trial operation
44 To complete the installation, perform the following checks and tests to ensure that the air conditioner operates correctly. Check the following: Strength of the installation site Tightness of pipe connection to detect gas leak Electric wiring connection Heat-resistant insulation of the pi...
Page 45 - Providing information for user; LED Display on the receiver & display unit; Detection of errors
45 A ENGLISH After finishing the installation of the air conditioner, you should explain the following to the user. Refer to appropriate pages in the user & installation manual. 1 How to start and stop the air conditioner 2 How to select the modes and functions 3 How to adjust the temperature an...
Page 46 - On Flickering Off
46 A Troubleshooting (Contiued) Abnormal condition Error code LED Display Blue Red Error on indoor temperature sensor (Short or Open) E121 1. Error on Eva-in sensor (Short or Open)2. Error on Eva-out sensor (Short or Open)3. Discharge sensor error (Short or Open) E122E123E126 Indoor fan error E154 1...
Page 47 - Adjusting air flow; Performing the Automatic Air-Volume function.
47 A ENGLISH Adjusting air flow Automatic Air-Volume Away/MDS Main Menu Sub-menu 1 2 3 5 4 6 SEG Used 1).Press the and buttons at the same time for more than 3 seconds and then a Main menu will be displayed.2).Press the / button to select and then press button to enter a Sub-menu setting screen. 3)....
Page 54 - AExtending the power cable
54 AExtending the power cable 1. Prepare the following tools. Tools Crimping pliers Connection sleeve Insulation tape Contraction tube Spec MH-14 20xØ0.26 inch(6.5 mm) (HxOD) Width 0.75 inch(19 mm) 70xØ0.31 inch(8.0 mm) (LxOD) Shape 2. As shown in the figure, peel off the shields from the rubber and...
Page 55 - Method 1; Method 2; Apply heat to the contraction tube to contract it.; Incomplete wire connections can cause electric shock or a fire.; Make sure that the connection parts are not exposed to outside.
55 ENGLISH 1. Wrap it with the insulation tape twice or more and position your contraction tube in the middle of the insulation tape.Three or more layers of insulation are required. f f Method 1 1.57 inch (40 mm) Insulation tape f f Method 2 Insulation tape 1.38 inch (35 mm) 2. Apply heat to the con...
Page 57 - Air conditioner; Installation manual
Air conditioner Installation manual AM FN D / AM JNM / AM MN D / AM RNMD • Thank you for purchasing this Samsung air conditioner. • Before operating this unit, please read this user manual carefully and retain it for future reference.