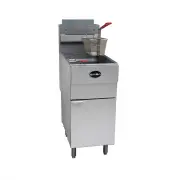
Page 3 - INTRODUCTION; GENERAL; UNPACKING; Crumb Rack; INSTALLATION; Do not use the door or its handle to lift the fryer.
INTRODUCTION GENERAL Our gas tube fryers are produced with quality workmanship and material. Proper installation, usage and maintenance will result in years of satisfactory performance. Before installing the fryer, thoroughly read this manual and carefully follow all instructions. This manual is app...
Page 4 - Location; CODES AND STANDARDS; In the United States:
Before installing the fryer, verify that the type of gas (natural or propane) is in conformity to the specifications on the fryer data plate, which is located on the inside of the door panel. Make sure the fryer is configured for the proper elevation. Clearances Minimum clearance from combustible ...
Page 5 - Local codes; ASSEMBLY; Comply with
In Canada: Local codes CAN/CSA-B149.1 Natural Gas and Propane Installation Code (latest edition),available from the Canadian Standards Association, 155 Queen Street, Suite 1300, Ottawa, Ontario Canada K1P 6L1. CSA C22.1 Canadian Electric Code (latest edition), available from the Canadian Stand...
Page 7 - GAS CONNECTION
GAS CONNECTION All gas supply connections and any pipe joint compound must be resistant to the action of propane gases. The gas inlet is located on the lower rear of the fryer. Codes require that a gas shutoff valve be installed in the gas line ahead of the fryer. The gas supply line must be at leas...
Page 8 - LEVELING THE FRYER; Lock the wheels after unit is level.; OPERATION
limiting the movement of the fryer. This device will prevent the gas line or quick disconnect from being strained. The restraining device should be attached to the cutout on the back panel. See illustration for location. The fryer must be installed with a connector (not supplied by Factory) comply...
Page 9 - Fryer is not to be used during a power outage; OVER-TEMPERATURE SHUTDOWN; Cleaning; Wash any accessories shipped with unit.; FILLING TANK WITH SHORTENING
Spilling hot frying compound can cause severe burns. Do not move fryer without draining all frying compound from the tank. Fryer is not to be used during a power outage OVER-TEMPERATURE SHUTDOWN If the shortening becomes overheated, a high-temperature shutoff device will turn the gas valve off and e...
Page 10 - LIGHTING THE PILOT
A Frying tank B Oil filling indicating line C Heating tube D Cold zone E Drain cock Close the drain valve. Fill the fryer tank with liquid shortening. Shortening level should be between the min and max lines in the fryer tank. Shortening will expand when heated. Do not fill the fryer tank ov...
Page 11 - TURNING ON THE FRYER; Set the temperature knob to desired temperature.
1. Open the door. 2. Make sure that thermostat is set to OFF. The thermostat is located behind the door. 3. Push the gas control valve knob and turn to OFF. Wait 5 minutes for unburned gas to vent. 4. Push and turn gas control valve knob to the “L” in PILOT (see figure below, view B). 5. While still...
Page 12 - Fry Basket Capacity:; EXTENDING SHORTENING LIFE
After the set temperature has been reached, the thermostat shuts off the gas flow to burners. The pilot remains lit. The burners will cycle on and off, maintaining the set temperature. TURNING OFF THE FRYER 1. Turn the thermostat OFF. 2. To keep the pilot lit, turn the gas valve to “L” in Pilot....
Page 13 - Daily
Do not salt foods over the fryer. Use good-quality shortening. Filter shortening daily (at a minimum). Replace shortening if it becomes poorly flavored. Keep equipment and surrounding clean. Set thermostat correctly. Remove excess moisture and particles from food products before placin...
Page 14 - BOIL OUT PROCEDURE; Drain the tank as described under DRAINING THE TANK.; MAINTENANCE
Remove discolorations by washing with any detergent or soap and water. Use a self-soaping, non-metallic scouring pad for particularly stubborn discolorations. Always rub with the grain of the stainless steel. Do not use a metallic scoring pad or harsh cleaners. BOIL OUT PROCEDURE Weekly or a...
Page 15 - Parts List
Problem: Probable Cause: No Heat Thermostat dial not turned on.Pilot not lit. Gas supply not turned on. Wire connections loose (call service). Wires connections need cleaning (call service). Thermopile (call service) Insufficient or too much heat Thermostat dial not set to desired temperature. High ...