Page 2 - RYOBI; WHAT THIS WARRANTY COVERS:; ADDITIONAL LIMITATIONS:
2 - English Introduction ..................................................................................................................................................................... 2 Warranty .................................................................................................
Page 3 - WORK AREA SAFETY; Keep work area clean and well lit.; ELECTRICAL SAFETY; Do not expose power tools to rain or wet conditions.; PERSONAL SAFETY; GENERAL POWER TOOL SAFETY WARNINGS; POWER TOOL USE AND CARE; Keep cutting tools sharp and clean.
3 - English WARNING! Read all safety warnings and all instructions. Failure to follow the warnings and instructions may result in electric shock, fire and/or serious injury. Save all warnings and instructions for future reference. The term “power tool” in the warnings refers to your mains-operated (...
Page 4 - CIRCULAR SAW SAFETY WARNINGS AND INSTRUCTIONS; SERVICE; Do not reach underneath the workpiece.
4 - English CIRCULAR SAW SAFETY WARNINGS AND INSTRUCTIONS Use the power tool, accessories and tool bits etc. in ac-cordance with these instructions, taking into account the working conditions and the work to be performed. Use of the power tool for operations different from those intended could res...
Page 5 - Do not use dull or damaged blades.; ADDITIONAL SAFETY RULES; Do not use on a ladder or unstable support.
5 - English CIRCULAR SAW SAFETY WARNINGS AND INSTRUCTIONS Support large panels to minimise the risk of blade pinching and kickback. Large panels tend to sag under their own weight. Supports must be placed under the panel on both sides, near the line of cut and near the edge of the panel. Do not ...
Page 6 - CALIFORNIA PROPOSITION 65
6 - English CIRCULAR SAW SAFETY WARNINGS AND INSTRUCTIONS WARNING: This product and some dust created by power sanding, sawing, grinding, drilling, and other construction activities may contain chemicals, including lead, known to the State of California to cause cancer, birth defects, or other repro...
Page 7 - SYMBOLS
7 - English SYMBOLS The following signal words and meanings are intended to explain the levels of risk associated with this product. Indicates an imminently hazardous situation, which, if not avoided, will result in death or serious injury. Indicates a potentially hazardous situation, which, if not ...
Page 8 - EXTENSION CORDS; Cord Length; ELECTRICAL; DOUBLE INSULATION; ELECTRICAL CONNECTION; power supply that is 120 V, AC only
8 - English EXTENSION CORDS When using a power tool at a considerable distance from a power source, be sure to use an extension cord that has the capacity to handle the current the product will draw. An undersized cord will cause a drop in line voltage, resulting in overheating and loss of power. Us...
Page 10 - ASSEMBLY
10 - English WARNING: If inner flange bushing has been removed, replace it be-fore placing blade on spindle. Failure to do so will prevent blade from tightening properly and could result in serious personal injury. Retract the lower blade guard into the upper blade guard using the lower blade guar...
Page 11 - INSTALLING DUST NOZZLE KIT; To attach dust nozzle:; OPERATION; APPLICATIONS
11 - English ASSEMBLY INSTALLING DUST NOZZLE KIT See Figure 6, page 18. The adaptor fits over the dust chute which is located on the upper blade guard. The nozzle attaches to the adaptor. NOTE: If you use the nozzle, you should always connect it to a standard vacuum hose. To attach dust nozzle: Un...
Page 12 - SAW BLADES; Do not remove the saw from the; ADJUSTING BLADE DEPTH; To adjust the blade depth:; USING THE LASER GUIDE
12 - English OPERATION SAW BLADES The best of saw blades will not cut efficiently if they are not kept clean, sharp, and properly set. Using a dull blade will place a heavy load on the saw and increase the danger of kickback. Keep extra blades on hand, so that sharp blades are always available.Gum a...
Page 13 - LED WORKLIGHT; ON; OPERATING THE SAW; To make the best possible cut:; LENGTH OF CUT SCALE; To rip cut without edge guide:
13 - English OPERATION Plug the tool into a power supply and press the laser guide button to activate the laser. Start the motor. NOTE: Do not touch the blade to the workpiece until the saw has reached maximum speed. Slowly push the saw forward into the workpiece. NOTE: Keep the laser beam on ...
Page 14 - BEVEL CUTTING; To Adjust Bevel Setting; TO ADJUST BEVEL SETTING; To check 0° bevel stop:
14 - English OPERATION BEVEL CUTTING See Figures 22 - 24, page 20. To make the best possible cut, follow these helpful hints. Align the line of cut with the inner blade guide notch on the base when making 45° bevel cuts. Make a trial cut in scrap material along a guideline to determine how much ...
Page 15 - ADJUSTMENTS; DO NOT; ADJUSTING THE LASER; To adjust the laser laterally:
15 - English ADJUSTMENTS WARNING: Before performing any adjustment, make sure the product is unplugged from the power supply and the switch is in the OFF position. Failure to heed this warning could result in serious personal injury. WARNING: DO NOT point the laser at yourself or others. Class IIIa ...
Page 16 - MAINTENANCE; LUBRICATION; ACCESSORIES; AFTER FRENCH AND SPANISH LANGUAGE SECTIONS.
16 - English Look for these accessories where you purchased this product or call 1-800-525-2579: 7-1/4 in. Thin Kerf Blade WARNING: Current attachments and accessories available for use with this product are listed above. Do not use any attachments or accessories not recommended by the manufacture...
Page 17 - GARANTIE
2 - Français Introduction ..................................................................................................................................................................... 2 Garantie ................................................................................................
Page 18 - LIEU DE TRAVAIL; Garder le lieu de travail propre et bien éclairé.; SÉCURITÉ ÉLECTRIQUE; SÉCURITÉ PERSONNELLE; Utiliser l’équipement protectif blessures.
3 - Français AVERTISSEMENTS GÉNÉRAUX ET INSTRUCTIONS GÉNÉRALES DE SÉCURITÉ EN CE QUI A TRAIT AUX OUTILS ÉLECTRIQUES AVERTISSEMENT ! Lire tous les avertissements et toutes les instructions de sécurité. Ne pas suivre l’ensemble des avertissements et des instructions peut entraîner une électrocution, u...
Page 19 - Garder les outils bien affûtés et propres.; DÉPANNAGE; AVERTISSEMENTS GÉNÉRAUX ET INSTRUCTIONS GÉNÉRALES
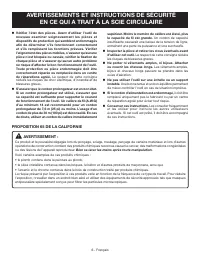
4 - Français AVERTISSEMENTS ET INSTRUCTIONS DE SÉCURITÉ EN CE QUI A TRAIT À LA SCIE CIRCULAIRE Débrancher l’outil et / ou retirer le bloc de batteries avant d’effectuer des réglages, de changer d’accessoire ou de ranger l’outil. Ces mesures de sécurité réduisent les risques de démarrage accidentel...
Page 20 - Ne pas utiliser de lames émoussées ou endommagées.; RÈGLES DE SÉCURITÉ SUPPLÉMENTAIRES; AVERTISSEMENTS ET INSTRUCTIONS DE SÉCURITÉ
5 - Français Tenir fermement la scie avec les deux mains et positionner les bras de manière à pouvoir résister aux rebonds. Se tenir d’un côté de lame, et non dans la trajectoire de celle-ci. En cas de rebond, la scie peut être propulsée vers l’arrière. L’utilisateur peut toutefois résister aux re...
Page 21 - PROPOSITION 65 DE LA CALIFORNIE; Si le cordon d’alimentation est endommagé,
6 - Français AVERTISSEMENTS ET INSTRUCTIONS DE SÉCURITÉ EN CE QUI A TRAIT À LA SCIE CIRCULAIRE AVERTISSEMENT : Ce produit et la poussière dégagée lors du ponçage, sciage, meulage, perçage de certains matériaux et lors d’autres opérations de construction contient des produits chimiques reconnus cause...
Page 22 - SYMBOLES; SYMBOLE SIGNAL
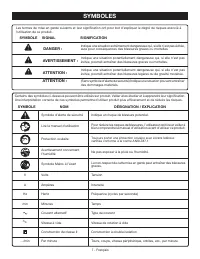
7 - Français Certains des symboles ci-dessous peuvent être utilisés sur produit. Veiller à les étudier et à apprendre leur signification. Une interprétation correcte de ces symboles permettra d’utiliser produit plus efficacement et de réduire les risques. SYMBOLE NOM DÉSIGNATION / EXPLICATION Symbol...
Page 23 - CARACTÉRISTIQUES ÉLECTRIQUES; CORDONS PROLONGATEURS; DOUBLE ISOLATION; CONNEXION ÉLECTRIQUE
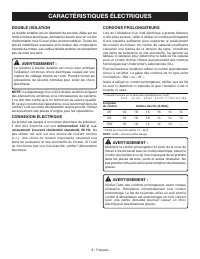
8 - Français CARACTÉRISTIQUES ÉLECTRIQUES CORDONS PROLONGATEURS Lors de l’utilisation d’un outil électrique à grande distance d’une prise secteur, veiller à utiliser un cordon prolongateur d’une capacité suffisante pour supporter le prélèvement de courant du moteur. Un cordon de capacité insuffisant...
Page 24 - CARACTÉRISTIQUES; ASSEMBLAGE
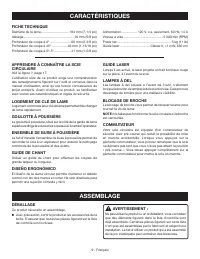
9 - Français CARACTÉRISTIQUES FICHE TECHNIQUE Diamètre de la lame............................... 184 mm (7-1/4 po)Alésage ........................................................16 mm (5/8 po)Profondeur de coupe à 0º ....................... 60 mm (2-3/8 po)Profondeur de coupe à 45º ....................
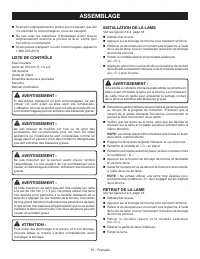
Page 25 - INSTALLATION DE LA LAME; RETRAIT DE LA LAME; LISTE DE CONTRÔLE
10 - Français INSTALLATION DE LA LAME Voir les figures 2 à 4, page 18. Débrancher la scie. Appuyer sur le blocage de broche et le maintenir enfoncé. Retirer le vis de la lame en le tournant vers la gauche, à l’aide de la clé de lame, tout en maintenant le bouton de blocage de broche enfoncé. ...
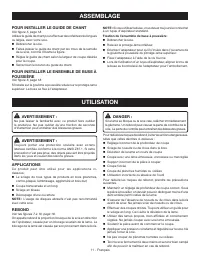
Page 26 - POUR INSTALLER LE GUIDE DE CHANT; UTILISATION
11 - Français POUR INSTALLER LE GUIDE DE CHANT Voir figure 5, page 18. Utilisez le guide de chant pour effectuer des refentes très longues ou larges, avec votre scie. Débrancher la scie. Faites passer le guide de chant par les trous de la semelle de la scie, comme l’illustre la figure. Réglez ...
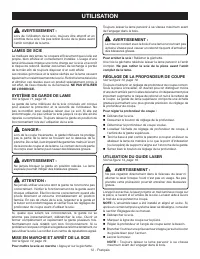
Page 27 - LAMES DE SCIE; SYSTÈME DE GARDE DE LAME; RÉGLAGE DE LA PROFONDEUR DE COUPE; UTILISATION DU GUIDE LASER
12 - Français UTILISATION AVERTISSEMENT : Lors de l’utilisation de la scie, toujours être attentif et en contrôle de la scie. Ne pas retirer la scie de la pièce avant l’arrêt complet de la lame. LAMES DE SCIE La meilleure des lames ne coupera efficacement que si elle est propre, bien affûtée et corr...
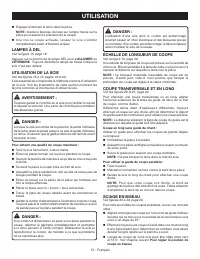
Page 28 - LAMPES À DEL
13 - Français UTILISATION Engager lentement la lame dans la pièce. NOTE : Garde le faisceau du laser sur la ligne tracée sur la pièce pour assurer la précision de la coupe. Une fois la coupe achevée, laissez la scie s’arrêter complètement avant d’éteindre le laser. LAMPES À DEL Voir la figur...
Page 29 - POUR SCIER EN BISEAU; Pour vérifier la butée 0° de coupe en biseau :; Pour régler la butée 0° de coupe en biseau :
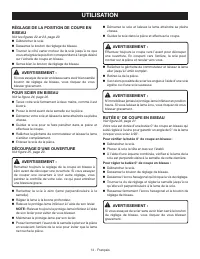
14 - Français UTILISATION RÉGLAGE DE LA POSITION DE COUPE EN BISEAU Voir les figures 22 et 23, page 20. Débrancher la scie. Desserrez le bouton de réglage de biseau. Tourner le côté carter moteur de la scie jusqu’à ce que vous atteigniez la position correspondant à l’angle désiré sur l’échelle...
Page 30 - RÉGLAGES; NE PAS; RÉGLAGE DE LASER; Pour ajuster le laser latéralement :
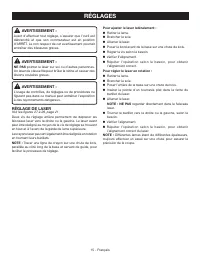
15 - Français RÉGLAGES AVERTISSEMENT : Avant d’effectuer tout réglage, s’assurer que l’outil est débranché et que son commutateur est en position d’ARRÊT. Le non respect de cet avertissement pourrait entraîner des blessures graves. AVERTISSEMENT : NE PAS pointer le laser sur soi ou d’autres personne...
Page 31 - ENTRETIEN; LUBRIFICATION; ACCESSOIRES; SUR 17 DE PAGE APRÈS LE SECTION ESPAGNOL.
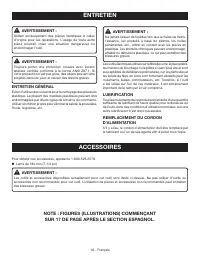
16 - Français ENTRETIEN AVERTISSEMENT : Ne jamais laisser de liquides tels que le fluide de freins, l’essence, les produits à base de pétrole, les huiles pénétrantes, etc., entrer en contact avec les pièces en plastique. Les produits chimiques peuvent endommager, affaiblir ou détruire le plastique, ...
Page 33 - ÁREA DE TRABAJO; Mantenga limpia y bien iluminada el área de trabajo.; SEGURIDAD ELÉCTRICA
3 - Español INSTRUCCIONES Y ADVERTENCIAS DE SEGURIDAD GENERALES PARA EL USO DE HERRAMIENTAS ELÉCTRICAS ADVERTENCIA! Lea las advertencias de seguridad y todas las instrucciones. La inobservancia de las advertencias e instrucciones puede causar descargas eléctricas, incendios o lesiones graves. Guarde...
Page 34 - Mantenga las herramientas de corte afiladas y limpias.; SERVICIO; No trate de alcanzar nada bajo la pieza de trabajo.; INSTRUCCIONES Y ADVERTENCIAS DE SEGURIDAD
4 - Español EMPLEO Y CUIDADO DE LA HERRAMIENTA ELÉCTRICA No fuerce la herramienta eléctrica. Utilice la herramienta eléctrica adecuada para cada trabajo. La herramienta eléctrica adecuada efectúa mejor y de manera más segura el trabajo, si además se maneja a la velocodad para la que está diseñada....
Page 35 - No utilice hojas de corte desafiladas o dañadas.; REGLAS DE SEGURIDAD ADICIONALES
5 - Español INSTRUCCIONES Y ADVERTENCIAS DE SEGURIDAD PARA EL USO DE LA SIERRA CIRCULAR Cuando el corte al irse cerrando pellizca o atora ajustada-mente la hoja de corte, ésta tiende a detenerse y la reacción del motor impulsa de forma rápida y violenta la unidad hacia el operador.Si la hoja se tuer...
Page 36 - Si está dañado el cordón de corriente,
6 - Español INSTRUCCIONES Y ADVERTENCIAS DE SEGURIDAD PARA EL USO DE LA SIERRA CIRCULAR ADVERTENCIA: Este producto puede contener sustancias químicas (por ejemplo, plomo) reconocidas por el estado de California como causantes de cáncer, defectos congénitos y otras afecciones del aparato reproductor....
Page 37 - SÍMBOLOS; SÍMBOLO SEÑAL; SÍMBOLO
7 - Español SÍMBOLOS Las siguientes palabras de señalización y sus significados tienen el objeto de explicar los niveles de riesgo relacionados con este producto. SÍMBOLO SEÑAL SIGNIFICADO Indica una situación peligrosa inminente, la cual, si no se evita, causará la muerte o lesiones serias. Indica ...
Page 38 - DOBLE AISLAMIENTO; CONEXIÓN ELÉCTRICA; una línea de voltaje; CORDONES DE EXTENSIÓN; Longitud; ASPECTOS ELÉCTRICOS
8 - Español DOBLE AISLAMIENTO El doble aislamiento es una característica de seguridad de las herramientas eléctricas, la cual elimina la necesidad de usar el típico cordón eléctrico de tres conductores con conexión a tierra. Todas las partes metálicas expuestas están aisladas de los componentes metá...
Page 39 - CARACTERISTICAS; GUÍA LÁSER; ARMADO
9 - Español CARACTERISTICAS ESPECIFICACIONES DEL PRODUCTO Diámetro de la hoja ............................... 184 mm (7-1/4 pulg.)Eje de la hoja ...............................................16 mm (5/8 pulg.)Profundidad de corte a 0º ....................... 60 mm (2-3/8 pulg.)Profundidad de corte a...
Page 40 - MONTAJE DE LA HOJA
10 - Español ARMADO ADVERTENCIA: Si hay piezas dañadas o faltantes, no utilice esta herramienta sin haber reemplazado las piezas dañadas o faltantes. Usar este producto con falta o está dañada alguna pieza podría tener como resultado herida personal grave. ADVERTENCIA: No intente modificar esta herr...
Page 41 - INSTALACION DE LA JUEGO DE BOQUILLA; FUNCIONAMIENTO; USOS
11 - Español ARMADO INSTALACION DE LA JUEGO DE BOQUILLA PARA EL POLVO Vea la figura 6, página 18. Calza sobre la guía para el polvo que está ubicada en el protector superior de la hoja. La boquilla se instala en el adaptador. NOTA: Si usa la boquilla, usted siempre debe conectarla a una manguera de ...
Page 42 - AJUSTE DE LA PROFUNDIDAD DE LA HOJA; UTILIZACIÓN DE LA GUÍA LÁSER
12 - Español La goma y la resina endurecidas en las hojas hacen más lenta la sierra. Retire la hoja de la sierra y utilice limpiador de goma y de resina, agua caliente o queroseno para limpiar la acumulación de estas sustancias. NO UTILICE GASOLINA. SISTEMA DE PROTECCIÓN DE LA HOJA Vea la figura 11,...
Page 43 - LUZ DE TRABAJO DE DIODO LUMINISCENTE; UTILIZACIÓN DE LA SIERRA; ESCALA DE LARGO DEL CORTE
13 - Español FUNCIONAMIENTO NOTA: No toque la pieza de trabajo con la hoja sin que la sierra haya alcanzado su máxima velocidad. Empuje lentamente la sierra hacia la pieza de trabajo. NOTA: Mantenga el rayo láser en la línea marcada en la pieza de trabajo para lograr un corte de precisión. Una v...
Page 44 - CORTES EN BISEL; PARA REGULAR EL AJUSTE EN BISEL
14 - Español FUNCIONAMIENTO CORTES EN BISEL Vea las figuras 22 a 24, página 20. Para hacer el mejor corte posible, siga estos consejos útiles: Alinee su línea de corte con la muesca de guía interior de la hoja en la base de la sierra cuando haga cortes en bisel de 45°. Haga un corte de prueba en...
Page 45 - AJUSTES; AJUSTE DE LOS RAYOS LÁSER; Para ajustar lateralmente el láser:
15 - Español AJUSTES ADVERTENCIA: Antes de efectuar cualquier ajuste, asegúrese de que la herramienta esté desconectada de la fuente de alimentación y que el interruptor esté en la posición “OFF”. El incumplimiento de esta advertencia puede causar una lesión personal grave. ADVERTENCIA: NO apunte el...
Page 46 - MANTENIMIENTO; LUBRICACIÓN; ACCESORIOS
16 - Español MANTENIMIENTO Las herramientas eléctricas que se utilizan en materiales de fibra de vidrio, paneles de yeso para paredes, compuestosde resanar o yeso, están sujetas a desgaste acelerado y posible fallo prematuro porque las partículas y limaduras de fibra de vidrio son altamente abrasiva...
Page 49 - SOPORTE CORRECTO
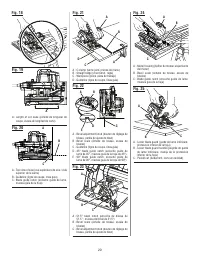
19 15 30 45 51.5 A - Lower blade guard is in up position when making a cut (pendant la coupe, la garde inférieure est relevée, la protección inferior de la hoja está en la posición elevada al efectuarse cortes) B - Blade exposed on underside of workpiece (lame dépassant au-dessous de la pièce, porci...
Page 52 - PARTS AND SERVICE; • HOW TO OBTAIN REPLACEMENT PARTS:; • HOW TO LOCATE AN AUTHORIZED SERVICE CENTER:; • HOW TO OBTAIN CUSTOMER OR TECHNICAL SUPPORT:
• PIEZAS DE REPUESTO Y SERVICIO Antes de solicitar servicio técnico o comprar piezas de repuesto, obtenga su modelo y número de serie de la placa de datos del producto. • NÚMERO DE MODELO ______________________ • NÚMERO DE SERIE ______________________ • CÓMO OBTENER PIEZAS DE REPUESTO: Las piezas de...


 Ryobi SS630
User Manual
Ryobi SS630
User Manual
 Ryobi 18A-C06-734
User Manual
Ryobi 18A-C06-734
User Manual
 Ryobi 21AB454B734
User Manual
Ryobi 21AB454B734
User Manual
 Ryobi 41CD875A034
User Manual
Ryobi 41CD875A034
User Manual
 Ryobi 767R
User Manual
Ryobi 767R
User Manual
 Ryobi 2079R
User Manual
Ryobi 2079R
User Manual
 Ryobi 725R
User Manual
Ryobi 725R
User Manual
 Ryobi 890R
User Manual
Ryobi 890R
User Manual
 Ryobi 825R
User Manual
Ryobi 825R
User Manual
 Ryobi 96116000202
User Manual
Ryobi 96116000202
User Manual