Page 4 - TABLE OF CONTENTS; TABLE DES MATIÈRES / ÍNDICE DE CONTENIDO; INTRODUCTION; INTRODUCTION / INTRODUCCIóN
2 Introduction ...................................................................................................................................................................... 2 Introduction / Introducción General Safety Rules ................................................................
Page 5 - SAVE THESE INSTRUCTIONS; gENERAL SAFETY RULES
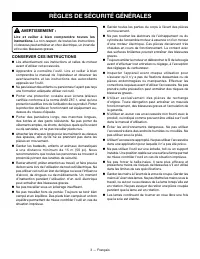
3 — English WARNINg: Read and understand all instructions. Failure to fol- low all instructions listed below, may result in electric shock, fire, and/or serious personal injury. SAVE THESE INSTRUCTIONS Read these instructions and the instructions for the power head thoroughly before using hedge tr...
Page 6 - SPECIFIC SAFETY RULES
4 — English Use heavy gloves when operating the hedge trimmer, adjusting the cutting angle, and when installing or remov-ing blades. Always stop the engine and remove the spark plug wire before attempting to remove any obstruction caught or jammed in the blade, adjusting the cutting angle, or be...
Page 7 - SYMBOLS
5 — English Some of the following symbols may be used on this product. Please study them and learn their meaning. Proper interpretation of these symbols will allow you to operate the product better and safer. SYMBOL NAME EXPLANATION Safety Alert Symbol Precautions that involve your safety. Read Oper...
Page 9 - APPLICATIONS
7 — English DANgER: Never cut near electric cords or lines. If blade jams on any electrical cord or line, DO NOT TOUCH THE BLADE! IT CAN BECOME ELECTRICALLY LIVE AND VERY DANGEROUS. Continue to hold the hedge trimmer by the insulated rear handle or lay it down and away from you in a safe manner. Dis...
Page 10 - OPERATION
8 — English ADjUSTINg THE CUTTINg ANgLE See Figures 5 - 6. The cutting angle can be adjusted 90°. Remove the spark plug wire on the power head. Disconnect the hedge trimmer attachment from the power head. Allow hedge trimmer gear box to cool down. Place the hedge trimmer attachment on a flat...
Page 11 - MAINTENANCE
9 — English WARNINg: When servicing, use only identical replacement parts. Use of any other parts can create a hazard or cause product damage. WARNINg: Always wear eye protection with side shields marked to comply with ANSI Z87.1 as well as hearing protection when operating this product. Wear head p...
Page 12 - MAKE THE MOST OF YOUR PURCHASE!
10 — English MAKE THE MOST OF YOUR PURCHASE! Go to www.ryobitools.com and register your new tool on-line. Your product has been fully tested prior to shipment to ensure your complete satisfaction. For any questions about operating or maintaining your product, call the Ryobi Help Line! To register yo...
Page 13 - WARRANTY; LIMITED WARRANTY STATEMENT
11 — English WARRANTY LIMITED WARRANTY STATEMENT Techtronic Industries North America, Inc., warrants to the original retail purchaser that this RYOBI ® brand outdoor product is free from defect in material and workmanship and agrees to repair or replace, at Techtronic Industries North America, Inc.’...
Page 14 - CONSERVER CES INSTRUCTIONS; RÈGLES DE SÉCURITÉ GÉNÉRALES
3 — Français AVERTISSEMENT : Lire et veiller à bien comprendre toutes les instructions. Le non-respect de toutes les instructions ci-dessous peut entraîner un choc électrique, un incendie et/ou des blessures graves. CONSERVER CES INSTRUCTIONS Lire attentivement ces instructions et celles du moteur...
Page 15 - RÈGLES DE SÉCURITÉ PARTICULIÈRES
4 — Français Porter des gants épais lors de l’utilisation du taille-haies, réglage de l’angle de coupe, ainsi que lors de l’installation et du retrait des lames. Toujours arrêter le moteur et débrancher le fil de la bougie avant d’essayer de retirer des objets pris dans la lame ou la bloquant, r...
Page 16 - SyMbOLES; SyMbOLE
5 — Français Certains des symboles ci-dessous peuvent être présents sur l’outil. Veiller à les étudier et à apprendre leur signification. Une interprétation correcte de ces symboles permettra d’utiliser l’outil plus efficacement et de réduire les risques. SyMbOLE NOM EXPLICATION Symbole d’alerte de ...
Page 17 - DÉbALLAGE; CARACTÉRISTIQUES; ANGLE DE COUPE RÉGLAbLE
6 — Français DÉbALLAGE Ce produit doit être assemblé. Retirer soigneusement les articles du carton. S’assurer que toutes les pièces figurant sur la liste de contrôle sont incluses. AVERTISSEMENT : Ne pas utiliser le produit si, en le déballant, vous constatez que des éléments figurant dans la List...
Page 18 - ASSEMbLAGE
7 — Français DANGER : Ne jamais effectuer de coupes près de cordons ou de fils électriques. Si la lame se prend dans un cordon ou une ligne électrique, NE PAS LA TOUCHER! ELLE PEUT ÊTRE SOUS TENSION ET DONC, EXTRÊMEMENT DANGEREUSE. Continuer de tenir le taille-haies par la poignée arrière isolée ou ...
Page 19 - UTILISATION DU TAILLE-hAIES; UTILISATION
8 — Français ANGLE DE COUPE RÉGLAbLE Voir les figures 5 et 6. L’angle de coupe peut être réglé à 90°. Débrancher le fil de la bougie sur le bloc moteur. Retirer l’accessoire taille-haies de la tête motorisée. Laisser la boîte d’engrenages le temps de refroidir. Déposer l’accessoire de ...
Page 20 - ENTRETIEN DES LAMES; ENTRETIEN
9 — Français AVERTISSEMENT : Les lames sont tranchantes. Pour réduire le risque de blessure grave, toujours porter des gants lors de l’entretien des lames de taille-haies. Lors de la manipulation de l’ensemble de lames, ne pas placer la main ou les doigts entre les lames ou dans une position où ils ...
Page 21 - Tirez le meilleur parTi de voTre achaT!; BESOIN D’AID
10 — Français ENTRETIEN Tirez le meilleur parTi de voTre achaT! Visitez le site www.ryobitools.com pour enregistrer votre nouvel outil en ligne. Ce produit à été entièrement testé avant expédition pour assurer la complète satisfaction de l’utilisateur. Pour toute question concernant l’utilisation ou...
Page 22 - GARANTIE; ÉNONCÉ DE LA GARANTIE LIMITÉE
11 — Français GARANTIE ÉNONCÉ DE LA GARANTIE LIMITÉE Techtronic Industries North America, Inc., garantit à l’acheteur original que ce produit RYOBI ® est exempt de tous vices de matériaux ou de fabrication et s’engage à réparer ou remplacer gratuitement, à son choix, tout produit s’avérant défectueu...
Page 23 - GUARDE ESTAS INSTRUCCIONES; REGLAS DE SEGURIDAD GENERALES
3 — Español ADVERTENCIA: Lea y comprenda todas las instrucciones. El incumplimiento de las instrucciones señaladas abajo puede causar descargas eléctricas, incendios y lesiones serias. GUARDE ESTAS INSTRUCCIONES Lea detenidamente estas instrucciones y las instrucciones para su cabezal motor antes ...
Page 24 - REGLAS DE SEGURIDAD ESPECÍFICAS
4 — Español Para utilizar la podadora de setos, ajuste del ángulo de corte, e instalar o desmontar las hojas póngase guantes gruesos. Siempre apague el motor y desconecte el cable de la bujía antes de retirar el material atascado o que obstruye la hoja, ajuste del ángulo de corte, o antes de e...
Page 25 - SÍMBOLOS
5 — Español Es posible que se empleen en este producto algunos de los siguientes símbolos. Le suplicamos estudiarlos y aprender su significado para mayor seguridad al manejar este producto. SÍMBOLO NOMBRE EXPLICACIÓN Símbolo de alerta de seguridad Precauciones para su seguridad. Lea el manual del op...
Page 26 - CARACTERÍSTICAS; DESEMPAQUETADO
6 — Español CARACTERÍSTICAS FAMILIARÍCESE CON EL ACCESORIO PARA PODAR SETOS Vea la figura 1. Para usar este producto con la debida seguridad se debe comprender la información indicada en la producto misma y en este manual, y se debe comprender también el trabajo que intenta realizar. Antes de usar e...
Page 27 - APLICACIONES; ARMADO
7 — Español DANGER: Nunca corte cerca de los cables o líneas eléctricas. Si la hoja se atasca con los cables o líneas eléctricas, ¡NO TOQUE LA HOJA! PUEDE ADQUIRIR TENSIÓN ELÉCTRICA Y SER MUY PELIGROSA. Siga sosteniendo la podadora de setos por el mango trasero aislado o apóyela en un lugar seguro y...
Page 28 - ÁNGULO DE CORTE AJUSTABLE; FUNCIONAMIENTO
8 — Español ÁNGULO DE CORTE AJUSTABLE Vea las figuras 5 y 6.El ángulo de corte se puede ajustar 90°. Desconecte el cable de la bujía en el cabezal motor. Desconecte el accesorio para podar setos del cabezal motor. Deje enfriar la caja de engranajes. Coloque el accesorio para podar setos sobr...
Page 29 - MANTENIMIENTO GENERAL; MANTENIMIENTO
9 — Español ADVERTENCIA: Al dar servicio a la unidad, sólo utilice piezas de repuesto idénticas. El empleo de piezas diferentes puede causar un peligro o dañar el producto. ADVERTENCIA: Use siempre protección ocular con protección lateral con la marca de cumplimiento de la norma ANSI Z87.1 junto con...
Page 30 - ¡Aproveche Al máximo su comprA!
10 — Español MANTENIMIENTO ¡Aproveche Al máximo su comprA! Dirijase a www.ryobitools.com y registre en linea su nueva herramienta. Este producto ha sido probado enteramente antes de embarcarse para asegurar la completa satisfacción del consumidor. ¡Si tiene preguntas sobre el funcionamiento o el man...
Page 31 - GARANTÍA
11 — Español GARANTÍA DECLARACIÓN DE LA GARANTÍA LIMITADA Techtronic Industries North America, Inc. garantiza al comprador original al menudeo que este producto de la marca RYOBI ® carece de defectos en los materiales y en la mano de obra, y acuerda reparar o remplazar, a la sola discreción de Techt...
Page 32 - ILLUSTRATED PARTS LIST; LISTE DES PIÈCES ILLUSTRÉES / LISTA DE PIEzAS ILUSTRADAS
12 ILLUSTRATED PARTS LIST LISTE DES PIÈCES ILLUSTRÉES / LISTA DE PIEzAS ILUSTRADAS 3 2 35 34 36 1 4 5 6 8 7 9 10 11 12 13 14 16 17 18 19 20 20 21 22 23 24 25 26 26 32 31 28 33 29 30 27 15
Page 34 - TECHTRONIC INDUSTRIES NORTH AMERICA, INC.; OPeratOr’s MaNUaL; MaNUeL D’UtiLisatiON / MaNUaL DeL OPeraDOr; HEDgE TRIMMER ATTACHMENT; accessOire De taiLLe-haies / accesOriO Para PODar; CALIfORNIA PROPOSITION 65; PrOPOsitiON 65 De L’État
99000010911-26-12 (REV:02) TECHTRONIC INDUSTRIES NORTH AMERICA, INC. 1428 Pearman Dairy Road, Anderson, SC 29625 USA 1-800-860-4050 • www.ryobitools.com A subsidiary of Techtronic Industries Co., Ltd. • OTC: TTNDY • PARTS AND SERvICE Prior to requesting service or purchasing replacement parts, pleas...