Page 2 - LIMITED TWO YEAR WARRANTY AND 90 DAY EXCHANGE POLICY
2 Introduction ..................................................................................................................................................................... 2 Warranty ...........................................................................................................
Page 3 - IMPORTANT SAFETY INSTRUCTIONS; SAVE THESE INSTRUCTIONS
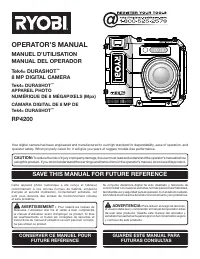
3 IMPORTANT SAFETY INSTRUCTIONS WARNING - Read all instructions. To reduce the risk of injury, user must read instruction manual. Failure to follow all instructions listed below may result in electric shock, fire and/or serious injury. SAVE THESE INSTRUCTIONS Know your digital camera. Read operato...
Page 4 - SYMBOLS; SYMBOL
4 SYMBOLS Some of the following symbols may be used on this product. Please study them and learn their meaning. Proper inter-pretation of these symbols will allow you to operate the product better and safer. SYMBOL NAME DESIGNATION/EXPLANATION Safety Alert Indicates a potential personal injury hazar...
Page 5 - FEATURES
5 FEATURES KNOW YOUR DIGITAL CAMERA See Figure 1, page 11. Icon/Function Button Guide , page 13. The safe use of this product requires an understanding of the information on the product and in this operator’s man-ual. Before use of this product, familiarize yourself with all operating features and s...
Page 6 - UNPACKING; To install the battery pack:
6 OPERATION WARNING: Always remove battery pack from the product when you are assembling parts, making adjustments, cleaning, or when not in use. WARNING: Do not use any attachments or accessories not recom-mended by the manufacturer of this product. The use of attachments or accessories not recomme...
Page 7 - OPERATION; POWER) button is located on the top right side; OK button are used to navigate; Yes or; OK button. The card should now be formatted.
7 OPERATION WATERPROOF RATING The IP57 waterproof rating denotes that the product is totally protected against dust and against the effect of immersion up to 1 m.Do not use this camera for diving or any other prolonged underwater use. If the camera is exposed to rain or immersed in water, wipe it dr...
Page 8 - VIEWING SAVED PHOTOS; VIDEO MODE
8 OPERATION Features Options Image Size (pixels)The larger the number, the higher the resolution will be. 3264x24882560x19202048x1536 1600x1200 1280x960 640x480 Compression Quality Fine, Standard, EconomyISOAdustments for the aperture/shutter speed,depending on the available light Auto, 100, 200, 40...
Page 9 - BASIC OPERATION SETTINGS
9 BASIC OPERATION SETTINGS Some of the camera’s basic operations are factory-set to defaults that can be changed depending on operator preference. These settings can be changed in the utilities menu. Utility Settings Date/Time Display Month/Day/Year, Hour/ Minuteor, Month/Day/Year Set Date Date and ...
Page 10 - MAINTENANCE; GENERAL MAINTENANCE; START ON PAGE 11 AFTER FRENCH; VOICE MEMO RECORDING; PLAY button to enter Playback mode.; PLAY button to enter playback mode and select
10 MAINTENANCE WARNING: When servicing, use only identical replacement parts. Use of any other parts may create a hazard or cause product damage. WARNING: Always wear eye protection marked to comply with ANSI Z87.1 during maintenance. If operation is dusty, also wear a dust mask. GENERAL MAINTENANCE...
Page 11 - PROPOSITION 65 DE LA CALIFORNIE
2 GARANTIE LIMITÉE DE DEUX ANS ET POLITIQUE D’ÉCHANGE DE TRENTE (90) JOURS POLITIQUE D’ÉCHANGE DE TRENTE (90) JOURS : Pendant les 90 premiers jours suivant la date d’achat, l’utilisateur peut demander un entretien sous garantie ou échanger le produit en le retournant, accompagné d’une preuve d’achat...
Page 12 - A V E R T I S S E M E N T -; L i r e t o u t e s l e s; CONSERVER CES INSTRUCTIONS; INSTRUCTIONS IMPORTANTES CONCERNANT LA SÉCURITÉ
3 A V E R T I S S E M E N T - L i r e t o u t e s l e s instructions. Pour réduire les risques de blessures, l’utilisateur doit lire le manuel d’utilisation. Le non-respect de toutes les instructions ci-dessous peut entraîner un choc électrique, un incendie et/ou des blessures graves. CONSERVER CES ...
Page 13 - SYMBOLES
4 SYMBOLES Certains des symboles ci-dessous peuvent être utilisés sur produit. Veiller à les étudier et à apprendre leur signification. Une interprétation correcte de ces symboles permettra d’utiliser produit plus efficacement et de réduire les risques. SYMBOLE NOM DÉSIGNATION / EXPLICATION Symbole ...
Page 14 - FONCTION D’ARRÊT AUTOMATIQUE; FICHE TECHNIQUE; CARACTÉRISTIQUES
5 APPRENDRE À BIEN APPAREIL PHOTO NUMÉRIQUE Voir la figure 1, page 11. Guide d’icône et de bouton, page 13. La sécurité d’utilisation de ce produit exige la compréhension des informations apposées sur l’outil et contenues dans ce manuel d’utilisation. Avant d’utiliser ce produit, se familiariser ave...
Page 15 - TO INSTALL / REMOVE BATTERY PACK; ASSEMBLAGE; DÉBALLAGE; UTILISATION
6 AVERTISSEMENT : Toujours retirer la pile de l’outil au moment d’assembler des pièces, d’effectuer des réglages et de procéder au nettoyage, ou lorsque l’outil n’est pas utilisé. AVERTISSEMENT : Ne pas utiliser d’outils ou accessoires non recommandés pour ce produit. L’utilisation de pièces et acce...
Page 17 - RÉGLAGES D’UTILISATION DE BASE
8 MODE « CAMERA » (APPAREIL PHOTO) Voir la figure 1, page 11. Il est possible de régler les caractéristiques de l’appareil photo selon ses préférences pour diverses applications. Le bouton du mode « Camera » (Appareil photo) est situé sur la partie supérieure gauche de l’appareil. Pour visualiser le...
Page 18 - SUPPRIMER ET VERROUILLER LES
9 Utiliser les touches de navigation pour faire défiler les menus et sélectionner les éléments à modifier. Appuyer sur le bouton « OK ». Utiliser les touches de navigation pour sélectionner ses préférences, puis appuyer sur le bouton « OK » pour confirmer chaque nouveau réglage. Pour repasse...
Page 19 - PHOTOS, LES VIDÉOS OU LES MESSAGES; ENTRETIEN GÉNÉRAL; Pour télécharger des photos sur un ordinateur :
10 PHOTOS, LES VIDÉOS OU LES MESSAGES Voir la figure 1, page 11. Sélectionner la photo, le message ou la vidéo à supprimer. Appuyer sur le bouton « DELETE » (icône de corbeille). Une liste des options de suppression est affichée pour les photos ou les vidéos sélectionnées : Annuler; Supprimer ...
Page 21 - ADVERTENCIA; GUARDE ESTAS INSTRUCCIONES; INSTRUCCIONES DE SEGURIDAD IMPORTANTES
3 ADVERTENCIA - Lea todas las instrucciones. Para reducir el riesgo de lesiones, el usuario debe leer el manual de instrucciones. El incumplimiento de las instrucciones señaladas abajo puede causar descargas eléctricas, incendios y lesiones serias. GUARDE ESTAS INSTRUCCIONES Familiarícese con cáma...
Page 22 - SÍMBOLOS; SÍMBOLO
4 SÍMBOLOS Es posible que se empleen en este producto algunos de los siguientes símbolos. Le suplicamos estudiarlos y aprender su significado. Una correcta interpretación de estos símbolos le permitirá utilizar mejor y de manera más segura el producto. SÍMBOLO NOMBRE DENOMINACIÓN/EXPLICACIÓN Alerta ...
Page 23 - APAGADO AUTOMÁTICO; CARACTERÍSTICAS
5 CONOZCA SU CONJUNTO Vea la figura 1, página 11. Guía del botón del icono/de función , página 13. Para usar este producto con la debida seguridad se debe comprender la información indicada en la herramienta misma y en este manual. Antes de usar este producto, familiarícese con todas las característ...
Page 24 - DESEMPAQUETADO; CLASIFICACIÓN DE RESISTENCIA AL AGUA
6 FUNCIONAMIENTO ARMADO DESEMPAQUETADO Embarcamos este producto completamente armado. Extraiga cuidadosamente de la caja el producto y los accesorios. Asegúrese de que estén presentes todos los artículos enumerados en la lista de empaquetado. Inspeccione cuidadosamente el producto para asegurars...
Page 25 - BOTONES DE NAVEGACIÓN; BOTÓN DEL OBTURADOR; FUNCIONAMIENTO; BOTÓN DE REPRODUCCIÓN; MODO CÁMARA
7 abra la puerta de acceso a la tarjeta SD/conector USB y extraiga la tapa de la batería y la batería. Colóquela en un área fresca y seca y deje abiertas tanto la tapa de la batería como la puerta del conector USB. Aguarde al menos una hora antes de volver a encender la cámara.Después de usar la cám...
Page 26 - VER FOTOGRAFÍAS GUARDADAS; MODO VIDEO
8 Use los / para seleccionar sus preferencias y oprima OK (aceptar) para confirmar cada configuración nueva. Para regresar al modo Cámara, oprima nuevamente el botón menu (menú). VER FOTOGRAFÍAS GUARDADAS Oprima el botón de PLAY ( Reproducción) para ingresar al modo de Reproducción y ver las f...
Page 28 - DESCARGA DE FOTOGRAFÍAS A SU; MANTENIMIENTO GENERAL; COMPUTADORA; Para descargar fotografías a su computadora:
10 hay una pantalla de seguridad para confirmar el borrado. La fotografía/el video se borra directamente. PARA ASEGURAR LAS FOTOGRAFÍAS, NOTAS O VIDEOS QUE NO DESEA BORRAR: Prima el botón de PLAY (Reproducción) para ingresar al modo de Reproducción y seleccione una fotografía, video o nota. Opri...
Page 29 - AA
11 menu memo date/time Fig. 1 A Z AA G H E D B X I W V C A - Power (On/off button) (Alimentation (Bouton « On/off » (Marche/arrêt) / botón Power [encendido] [encendido/apagado]) B - Shutter button (Bouton « Shutter » (Obturateur)/botón del obturador) C - Flash (flash/flash)D - USB port (Port USB/pue...
Page 32 - REPLACEMENT PARTS; • HOW TO OBTAIN REPLACEMENT PARTS:; • HOW TO OBTAIN CUSTOMER OR TECHNICAL SUPPORT:; OPERATOR’S MANUAL; MANUEL D’UTILISATION/MANUAL DEL OPERADOR; DURASHOT
14 987000-668 9-23-11 (REV:06) • REPLACEMENT PARTS Prior to purchasing replacement parts, please obtain your model and serial number from the product data plate . • MODEL NUMBER _______________________ • SERIAL NUMBER _______________________ • HOW TO OBTAIN REPLACEMENT PARTS: Replacement parts can b...