Page 2 - TABLE OF CONTENTS
2 − English Introduction ..................................................................................................................................................................... 2 Warranty .................................................................................................
Page 3 - GENERAL POWER TOOL SAFETY WARNINGS; WARNING
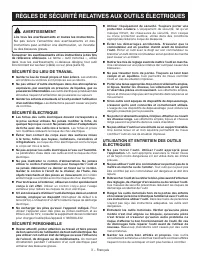
3 − English GENERAL POWER TOOL SAFETY WARNINGS WARNING Read all safety warnings and all instructions. Failure to follow the warnings and instructions may result in electric shock, fire and/or serious injury. Save all warnings and instructions for future reference. The term “power tool” in the warnin...
Page 4 - BATTERY TOOL USE AND CARE; DRILL-DRIVER SAFETY WARNINGS
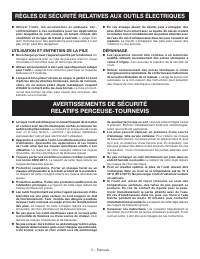
4 − English GENERAL POWER TOOL SAFETY WARNINGS Keep cutting tools sharp and clean. Properly maintained cutting tools with sharp cutting edges are less likely to bind and are easier to control. Use the power tool, accessories and tool bits etc. in accordance with these instructions, taking into a...
Page 5 - SYMBOLS
5 − English Some of the following symbols may be used on this product. Please study them and learn their meaning. Proper inter-pretation of these symbols will allow you to operate the product better and safer. SYMBOL NAME DESIGNATION/EXPLANATION Safety Alert Indicates a potential personal injury haz...
Page 6 - FEATURES; ASSEMBLY
6 − English FEATURES PRODUCT SPECIFICATIONS Chuck .......................................................... 3/8 in. KeylessMotor ..................................................................... 18 V DCSwitch ..........................................................Variable Speed No Load Speed...
Page 7 - OPERATION
7 − English OPERATION WARNING: Do not allow familiarity with tools to make you care- less. Remember that a careless fraction of a second is sufficient to inflict serious injury. WARNING: Always wear eye protection with side shields marked to comply with ANSI Z87.1. Failure to do so could result in o...
Page 8 - KEYLESS CHUCK; REMOVING BITS
8 − English OPERATION Avoid running the drill at low speeds for extended periods of time. Running at low speeds under constant usage may cause the drill to become overheated. If this occurs, cool the drill by running it without a load and at full speed. KEYLESS CHUCK See Figure 3, page 11. The drill...
Page 9 - DRILLING
9 − English OPERATION DRILLING See Figure 8, page 12. A level is located on top of the motor housing to help keep the drill bit level during use. Check the direction of rotation selector for the correct setting (forward or reverse). Secure the material to be drilled in a vise or with clamps to ...
Page 10 - MAINTENANCE; GENERAL MAINTENANCE; TO RETIGHTEN A LOOSE CHUCK; AFTER FRENCH AND SPANISH LANGUAGE SECTIONS.
10 − English MAINTENANCE WARNING: When servicing, use only identical replacement parts. Use of any other parts can create a hazard or cause product damage. WARNING: Always wear eye protection with side shields marked to comply with ANSI Z87.1. Failure to do so could result in objects being thrown in...
Page 12 - RÈGLES DE SÉCURITÉ RELATIVES AUX OUTILS ÉLECTRIQUES; AVERTISSEMENT; SÉCURITÉ DU LIEU DE TRAVAIL
3 − Français RÈGLES DE SÉCURITÉ RELATIVES AUX OUTILS ÉLECTRIQUES AVERTISSEMENT Lire tous les avertissements et toutes les instructions. Ne pas suivre l’ensemble des avertissements et des instructions peut entraîner une électrocution, un incendie ou des blessures graves. Conserver les avertissements ...
Page 13 - UTILISATION ET ENTRETIEN DE LA PILE; AVERTISSEMENTS DE SÉCURITÉ
4 − Français RÈGLES DE SÉCURITÉ RELATIVES AUX OUTILS ÉLECTRIQUES U t i l i s e r l ’ o u t i l , l e s a c c e s s o i r e s e t e m b o u t s , e t c . , conformément à ces instrutions pour les applications pour lesquelles ils sont conçus, en tenant compte des conditions et du type de travail à e...
Page 14 - SYMBOLES
5 − Français Certains des symboles ci-dessous peuvent être utilisés sur produit. Veiller à les étudier et à apprendre leur signification. Une interprétation correcte de ces symboles permettra d’utiliser produit plus efficacement et de réduire les risques. SYMBOLE NOM DÉSIGNATION / EXPLICATION Symbol...
Page 15 - CARACTÉRISTIQUES; ASSEMBLAGE
6 − Français CARACTÉRISTIQUES SPÉCIFICATIONS Mandrin ....................................... 10 mm (3/8 po), sans clé Moteur ................................................................... 18 V c.c. Commutateur ............................................. Vitesse variable Vitesse à vide ..........
Page 16 - UTILISATION; APPLICATIONS; VITESSE VARIABLE; SÉLECTEUR DE SENS DE ROTATION
7 − Français UTILISATION AVERTISSEMENT : Ne pas laisser la familiarité avec l’outil faire oublier la prudence. Ne pas oublier qu’une fraction de seconde d’inattention peut entraîner des blessures graves. AVERTISSEMENT : Toujours porter une protection oculaire certifiée conforme à la norme ANSI Z87.1...
Page 17 - MANDRIN SANS CLÉ; TRAIN D’ENGRENAGES À DEUX VITESSES; EMBRAYAGE DE COUPLE RÉGLABLE; RÉGLAGE DU COUPLE
8 − Français NOTE: La perceuse ne peut fonctionner que si le sélecteur de sens de rotation est poussé à fond vers la droite ou la gauche.Éviter d’utiliser la perceuse à basse vitesse pendant des périodes prolongées. Ceci pourrait causer une surchauffe. Si la perceuse surchauffe, la refroidir en la l...
Page 18 - PERÇAGE; PERÇAGE DU BOIS
9 − Français UTILISATION PERÇAGE Voir la figure 8, page 12. Les niveaux qui se trouvent sur le dessus et l’arrière du boîtier moteur permettent de s’assurer de l’alignement de l’outil pendant l’utilisation. Vérifier la position du sélecteur de rotation (rotation avant ou arrière). Bloquer la pi...
Page 19 - RETRAIT DU MANDRIN; SERRAGE D’UN MANDRIN DESSERRÉ; ENTRETIEN; SUR 11 DE PAGE APRÈS LE SECTION ESPAGNOL.
10 − Français RETRAIT DU MANDRIN Voir les figures 9 à 11, page 12. Le mandrin peut être retiré et remplacé. Verrouiller la gâchette en mettant le sélecteur de sens de rotation en position centrale. Insérer une clé hexagonale de 7,9 mm (5/16 po) ou plus grosse dans le mandrin et serrer fermement ...
Page 21 - ADVERTENCIA; SEGURIDAD ELÉCTRICA; SEGURIDAD PERSONAL; ADVERTENCIAS DE SEGURIDAD PARA HERRAMIENTAS
3 − Español ADVERTENCIA Lea todas las advertencias de seguridad y instrucciones. El incumplimiento de las advertencias e instrucciones puede ocasionar descarga eléctrica, fuego o lesiones graves. Guarde todas las advertencias e instrucciones para futuras consultas. El término “herramienta eléctrica”...
Page 22 - EMPLEO Y CUIDADO DE LA HERRAMIENTA DE
4 − Español Mantenga las herramientas de corte afiladas y limpias. Las herramientas de corte bien cuidadas y con bordes bien afilados, tienen menos probabilidad de atascarse en la pieza de trabajo y son más fáciles de controlar. Utilice la herramienta eléctrica, los accesorios y brocas, hojas y ...
Page 23 - SÍMBOLOS
5 − Español SÍMBOLOS Es posible que se empleen en este producto algunos de los siguientes símbolos. Le suplicamos estudiarlos y aprender su significado. Una correcta interpretación de estos símbolos le permitirá utilizar mejor y de manera más segura el producto. SÍMBOLO NOMBRE DENOMINACIÓN/EXPLICACI...
Page 24 - CARACTERÍSTICAS; BANDEJA MAG TRAYTM; ARMADO
6 − Español CARACTERÍSTICAS ESPECIFICACIONES DEL PRODUCTO Portabrocas ................. 10 mm (3/8 pulg.), de apriete sin llave Motor ............................................................... 18 V, corr. cont. Interruptor ................................................... Velocidad variable V...
Page 25 - FUNCIONAMIENTO; APLICACIONES
7 − Español FUNCIONAMIENTO ADVERTENCIA: No permita que su familarización con las herramientas lo vuelva descuidado. Tenga presente que un descuido de un instante es suficiente para causar una lesión grave. ADVERTENCIA: Siempre póngase protección ocular con protección lateral con la marca de cumplimi...
Page 26 - SELECTOR DE SENTIDO DE ROTACIÓN; PRECAUCIÓN; EMBRAGUE DE FUERZA DE TORSIÓN
8 − Español FUNCIONAMIENTO SELECTOR DE SENTIDO DE ROTACIÓN (MARCHA ADELANTE / ATRÁS / SEGURO EN EL CENTRO) Vea la figura 3, página 11 . El sentido de rotación de la broca es invertible y se controla con un selector, el cual está situado arriba del gatillo del interruptor. Con el taladro sostenido en...
Page 27 - REMOCIÓN DE LAS BROCAS; TALADRADO EN MADERA
9 − Español FUNCIONAMIENTO ADVERTENCIA: Asegúrese de introducir la broca recta en las mordazas del portabrocas. No introduzca en ángulo la broca en las mordazas del portabrocas para después apretarla, como se muestra en la figura 7. Podría causar que la broca salga disparada del taladro, y por conse...
Page 28 - MANTENIMIENTO; DESMONTAJE DEL PORTABROCAS; PARA APRETAR EL PORTABROCAS CUANDO; MANTENIMIENTO GENERAL
10 − Español MANTENIMIENTO DESMONTAJE DEL PORTABROCAS Vea las figuras 9 a 11, página 12 . El portabrocas puede desmontarse y reemplazarse con uno nuevo. Asegure el gatillo del interruptor; para ello, coloque el selector de sentido de rotación en la posición central. Introduzca una llave hexagona...
Page 32 - PARTS AND SERVICE; • HOW TO OBTAIN REPLACEMENT PARTS:; • HOW TO LOCATE AN AUTHORIZED SERVICE CENTER:; • HOW TO OBTAIN CUSTOMER OR TECHNICAL SUPPORT:; MANUEL D’UTILISATION / PERCEUSE-TOURNEVIS 18 V
• PIEZAS DE REPUESTO Y SERVICIO Antes de solicitar servicio técnico o comprar piezas de repuesto, obtenga su modelo y número de serie de la placa de datos del producto. • NÚMERO DE MODELO ______________________ • NÚMERO DE SERIE ______________________ • CÓMO OBTENER PIEZAS DE REPUESTO: Las piezas de...