Page 2 - Contents
004 Contents 005 Safety Information 009 Roborock Robotic Vacuum Cleaner Troubleshooting 010 Product Overview 016 Installation 021 Connect to the App 023 Instructions 027 Routine Maintenance 037 Basic Parameters 038 Errors 040 Common Issues 042 EU Declaration of Conformity 046 WEEE Information 047 Wa...
Page 3 - Restrictions; Do not use the product when the ambient temperature is higher than; Safety Information
005 Restrictions Ŏ This product is designed for indoor floor cleaning only, do not use it outdoors (such as on an open-ended terrace), on any surface other than the ground (such as a sofa), or in any commercial or industrial environment. Ŏ Do not use this product on elevated surfaces without barrier...
Page 4 - Keep the main brush cleaning tools out of reach of children.
006 Safety Information Ŏ This product can be used by children aged from 8 years and above and persons with reduced physical, sensory or mental capabilities or lack of experience and knowledge if they have been given supervision or instruction concerning use of the product in a safe way and understan...
Page 6 - any other antenna or transmitter.
008 Ŏ If placing the robot into storage, charge it fully and turn it off before placing it in a cool dry place. Recharge it at least every three months to prevent the battery over discharging. Ŏ To satisfy RF exposure requirements, a separation distance of 20 cm or more should be maintained between ...
Page 7 - Roborock Robotic Vacuum Cleaner Troubleshooting
009 Roborock Robotic Vacuum Cleaner Troubleshooting Name Troubleshooting Robot Problem listed in the User Manual Charging dock The product cannot be powered on The main brush, side brush, fan, or main wheels do not work Power cable The robot does not receive power The charging dock cannot be supplie...
Page 8 - Robot; Product Overview
010 Robot Clean/Power Ŏ Press to clean Ŏ Press and hold to turn on/off Power Indicator Dock Ŏ Press to return to the dock Note: Press any button to pause the robot when cleaning or returning to the dock. Spot Clean/Child Lock Ŏ Press to Spot clean Ŏ Press and hold for 3 seconds to turn the child loc...
Page 9 - Parts List
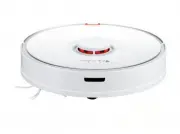
011 Parts List Charging Dock VibraRise Mop Cloth Mount VibraRise Mop Cloth Power Cable Product Overview
Page 11 - Robot and Sensors
013 Robot and Sensors Dock Locator Bumper LiDAR Sensor Vertical Bumper Water Tank Latch Cliff Sensors Omni-Directional Wheel Wall Sensor Charging Contacts Carpet Sensor Side Brush Main WheelMain Brush Main Brush Cover Latch Product Overview
Page 12 - VibraRise Module
014 VibraRise Module Water Tank Stopper Water Filter Electric Water Tank Water Tank Latch Mop Cloth Attachment Slot VibraRise Mop Cloth Mount VibraRise Mop Cloth Attachment Area Mop Cloth Mount Latch Vibration Module Product Overview
Page 14 - Important; Installation
016 Important Tidy cables and loose items from the ground and move any unstable, fragile, precious, or dangerous objects to prevent personal injury or property damage due to things becoming tangled in, struck by, or knocked over by the robot. 1. If using this robot in a raised area, always use a sec...
Page 16 - Mopping the floor; Power on and charge the robot
018 Mopping the floor Note: To prevent excessive buildup of dirt on the mop, floors should be vacuumed at least three times before the first mopping cycle. 1. Remove the water tank 2. Fill the water tank Release the water tank latch and slide the tank backward. Open the water tank, fill it with wate...
Page 18 - WARNING
020 6. Remove the VibraRise mop cloth mount After returning to the dock, remove the VibraRise mop cloth mount by pressing both side latches and sliding back. Note: Ŏ Wash the VibraRise mop cloth after each use, and regularly empty the water tank of unused water. Ŏ Remove the VibraRise mop cloth moun...
Page 19 - Connect to the App; Download the app
021 This robot supports both Roborock and Xiaomi Home apps. Choose the one that best meets your needs. 1. Search for “Roborock” in the App Store or Google Play or scan the QR code to download and install the app. 2. Search for “Xiaomi Home” in the App Store or Google Play or scan the QR code to down...
Page 20 - Reset WiFi
022 1. Open the upper cover and find the WiFi indicator. 2. Press and hold the and buttons until you hear the “Resetting WiFi” voice alert. The reset is complete when the WiFi indicator flashes slowly. The robot will then wait for a connection. On the app homepage, tap “+” in the top right corner an...
Page 21 - Start Cleaning; Mode Setting; Instructions
023 On/Off Press and hold the button to turn on the robot. The power in- dicator will turn on, and the robot will enter standby mode. Press and hold the button to turn off the robot and end the current cleaning cycle. Note: The robot cannot be turned off when it is charging. Note: Ŏ Cleaning cannot ...
Page 22 - Spot Clean; Child Lock; Sleep; Refilling the Water Tank or Cleaning the
024 Spot Clean Press to start Spot cleaning. Area: 1.5m (4.9ft) square centered on the robot. Note: After spot cleaning, the robot will return to the starting point and enter Standby mode. 1.5m 1.5m Do Not Disturb (DND) mode DND mode is enabled by default from 22:00 to 08:00. It can be disabled or c...
Page 24 - Scheduled Cleaning; More App Functions
026 Instructions Scheduled Cleaning Set cleaning schedules, and at the defined times, the robot will clean and return to the dock. Note: Ŏ Only in-app No-Go Zones and Invisible Wall are supported. Ŏ Map Saving mode must be switched on, and a full clean completed before this function can be used. Ŏ N...
Page 25 - Routine Maintenance
027 Routine Maintenance To maintain optimum performance, maintain the robot according to the following guidelines: Part Maintenance Frequency Omni-Directional Wheel Use a screwdriver or similar tool to pry out the axles. Rinse, allow to dry and press the wheel back in place. As required / Charging C...
Page 26 - Main Brush
028 Main Brush 1. Turn the robot over, then unlatch and remove the main brush cover. Main brush cover Main brush bearing Latch Main brush Main brush cap Routine Maintenance 2. Take out the main brush, then remove and clean the bearings.
Page 28 - Omni-Directional Wheel
030 2. Rinse the wheel and axle to remove any hair or dirt. 3. Dry and reattach the wheel, pressing it firmly in place. 1. Use a small screwdriver or similar tool to pry out the axles and remove the wheel. Omni-Directional Wheel Note: The omni-directional wheel bracket cannot be removed. Routine Mai...
Page 29 - Main Wheels; Dustbin
031 Main Wheels Use a soft dry cloth to wipe and clean the main wheels. Dustbin 1. Open the top cover of the robot and remove the dustbin. Routine Maintenance
Page 31 - Washable Filter
033 Washable Filter 1. Open the filter cover and remove the filter. 2. Rinse repeatedly and tap the filter frame to remove as much dirt as possible. Note: To avoid damage, do not touch the filter with hands, brushes, or sharp objects. 3. Leave the filter to dry thoroughly before reinstalling it. Not...
Page 32 - Water Tank
034 Water Tank 1. Open the water tank and fill it with clean water. 2. Close up the water tank and shake it gently. 3. Pour out dirty water. Routine Maintenance
Page 33 - VibraRise Mop Cloth; Robot Sensors
035 VibraRise Mop Cloth 1. Remove the VibraRise mop cloth from the VibraRise mop cloth mount. 2. Clean the VibraRise mop cloth and air-dry it. Note: A dirty VibraRise mop cloth will affect mopping performance. Always start with a clean cloth. Robot Sensors Use a soft dry cloth to wipe and clean all ...
Page 34 - Charging Contact Areas; Battery
036 Charging Contact Areas Use a soft dry cloth to wipe the charging contacts on the charging dock and the robot. Battery The robot is equipped with a high-performance lithium-ion re- chargeable battery pack. To maintain battery performance, keep the robot charged. Note: If the robot will not be use...
Page 35 - Basic Parameters
037 Robot Charging Dock Model Dimensions Battery Weight Wireless Connection Rated Input Charging Time roborock S7 353×350×96.5mm 14.4V/5200mAh lithium battery Approx. 4.7kg WiFi Smart Connect 20VDC 1.2A < 6 hours Model Dimensions Rated Power Rated Input Rated Output Rated Frequency Charging Batte...
Page 36 - Errors
038 Errors If an error occurs while the robot is cleaning, the power indicator will flash red quickly, and a voice alert will sound. Refer to the following table for troubleshooting. 1. After resolving any of the following errors, relocate your robot and restart cleaning. 2. After any sensor errors,...
Page 38 - Common Issues
040 Common Issues Unable to power on Ŏ The battery level is low. Put the robot on the charging dock and charge it before use. Ŏ The battery temperature is too low or too high. Only use the robot within the range of 4-40°C (39-104°F). Unable to charge Ŏ Check the power indicator light turns on and bo...
Page 40 - EU Declaration of Conformity
042 EU Declaration of Conformity Hereby we: declare that this DoC is issued under our sole responsibility and that the products: Name of manufacturer Product description Address Type(model) designation(s) Beijing Roborock Technology Co., Ltd. Robotic Vacuum Cleaner and Accessories Floor 6, Suite 601...
Page 42 - Person responsible for making this declaration:
044 EU Declaration of Conformity are in conformity and verified through testing with the provision of the following EU directives: Person responsible for making this declaration: Printed name: Rui.Shen Position/Title: Quality Director Signature:Date of issue: 22/01/2021 Place of issue: Floor 6, Suit...
Page 44 - WEEE Information
046 WEEE Information Correct Disposal of this product . This marking indicates that this product should not be disposed with other household wastes throughout the EU. To prevent possible harm to the environment or human health from uncontrolled waste disposal, recycle it responsibly to promote the s...
Page 45 - Warranty Information
047 Warranty Information The warranty period depends on the laws of the country in which the product is sold, and the warranty is the responsibility of the seller. The warranty only covers defects in material or workmanship. The repairs under warranty may only be carried out by an authorized service...