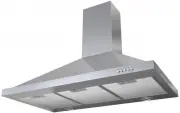
2 Pre-installation Thank you for purchasing a quality Robinhood rangehood. Robinhood has a high standard of quality control and every rangehood is tested and approved before it leaves the factory. Important: Please read the entire instructions before installing the rangehood. Always switch power off...
Page 3 - Ducting Options; Duct mounting option; 634 and
3 Pre-Installation - continued Ducting Options The method of ducting should be carefully considered before installing the rangehood. The guide below recommends the ducting components to use for all common ducting configurations - through the top of the home (for the roof and soffit) and through the ...
Page 4 - continued; Minimum; height from the hob surface to the underside face of the rangehood; Any installation above 750mm will compromise performance.; Distance between mounting screw holes on Fixing Plate
4 Pre-Installation - continued Installation position A Minimum height from the hob surface to the underside face of the rangehood 600mm electric hob 650mm gas hob Notes: If the instructions for the gas hob specify a greater distance, this has to be taken into account. Any installation above 750mm wi...
Page 5 - Installation; Only if ducting
5 Installation Mounting to a stud is recommended. However, if fitted to other wall linings (plasterboard, concrete etc) suitable fixings will be required. Before drilling any holes check that the wall and ceiling are clear of any electrical cables, pipes etc. 1. Pre drill pilot holes in the position...
Page 6 - Recirculation mode; Upper chimney
6 Installation - continued 5. Connect and secure the ducting (use duct tape if required). 6. Remove the protective plastic covering from all parts including the filters. Fit the canopy hood on the fixing bracket. Mark and drill the two holes required for the safety screws. Secure the canopy in place...
7 Operating instructions Controls Light The light can be operated independently from the fan and is controlled in accordance with the graphics printed above. Fan The fan is operated by turning the power switch on. It can be run at three different speeds (Speed 1 / Speed 2 / Speed 3) depending on the...
Page 8 - Product approvals and ratings; Product approval number; Important safety information; Disconnect the power supply when changing light bulbs.
8 Product approvals and ratings Product approval number VO71158, A/11730EA, SAA103676EA Product rating 230W (1.15A) Max at 240V 50Hz Electric approval AS/NZS 60335.2.31:2004 EMC AS/NZS CISPR14:2001 Performance tested IEC61591 Important safety information All electrical work must be done by a registe...