Page 2 - REQUIREMENTS, FEATURES AND OPERATION OF YOUR NEW APPLIANCE.
Rinnai 2 Portable Room AC OIM BEFORE PROCEEDING WITH THE OPERATION OF YOUR NEW RINNAI PORTABLE ROOM AIR CONDITIONER PLEASE READ THIS MANUAL THOROUGHLY AND GAIN A FULL UNDERSTANDING OF THE REQUIREMENTS, FEATURES AND OPERATION OF YOUR NEW APPLIANCE.
Page 3 - TABLE OF CONTENTS; Safety & Important Points
Rinnai 3 Portable Room AC OIM TABLE OF CONTENTS Safety & Important Points 4 Warranty & Specifications 5 Unpacking The Appliance ................................................................................................................................... 5Warranty .........................
Page 4 - dataplate of the appliance.; SAFETY & IMPORTANT POINTS
Rinnai 4 Portable Room AC OIM READ ALL INSTRUCTIONS BEFORE USING THE APPLIANCE. Always comply with the following precautions to avoid dangerous situations and to ensure optimum performance. Failure to carefully read and follow all instructions in this manual can result in ...
Page 5 - UNPACKING THE APPLIANCE; WARRANTY & SPECIFICATIONS
Rinnai 5 Portable Room AC OIM UNPACKING THE APPLIANCE If any damage is evident DO NOT INSTALL or OPERATE and contact your supplier for advice. WARRANTY The benefits to the consumer given by this warranty are in addition to all other rights and remedies of the consumer under a law in relation to t...
Page 6 - APPLIANCE COMPONENTS; Remote control and cradle; Front; AIR CONDITIONER BASICS
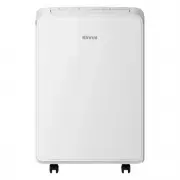
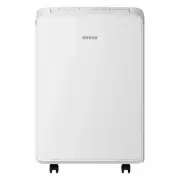
Rinnai 6 Portable Room AC OIM APPLIANCE COMPONENTS 1. Control panel 2. Cool air outlet 3. Receiver window 4. Remote control and cradle 5. Exhaust outlet 6. Carry handles 7. Drain outlet 1 8. Drain outlet 2 (not used on this model) 9. Room air intake (filter located behind grill) 10. Lower air intake...
Page 7 - CONTROL PANEL AND REMOTE CONTROL LAYOUT; Timer function button; REMOTE CONTROL BATTERIES; REMOTE CONTROL CRADLE
Rinnai 7 Portable Room AC OIM CONTROL PANEL AND REMOTE CONTROL LAYOUT 21. Fan Speed Indicators 22. Fan speed button 23. Mode indicators 24. Mode selection button 25. Temperature Display 26. Temperature buttons 27. Function indicators 28. On / Off button 29. LCD display 30. Button not in use for this...
Page 8 - BASIC OPERATION; BASIC OPERATION REMOTE CONTROL; OPERATION
Rinnai 8 Portable Room AC OIM IMPORTANT Before operating this appliance ensure that the location, installation and condensation requirements have been met, refer to installation instructions starting on page 13 for details. For the best cooling results ensure that the filters are clean, refer page 1...
Page 9 - ADVANCED FUNCTIONS; ADVANCED FUNCTIONS REMOTE CONTROL
Rinnai 9 Portable Room AC OIM DRY (DEHUMIDIFYING) 1. Press the On / Off button (34). 2. Press the mode button (31) until the DRY mode indicator is illuminated. 3. Use temperature button (37) to select the desired temperature (16°C to 32°C) 4. Press the On / Off button (34) FAN 1. Press the On / Off ...
Page 10 - OFF TIMER; SLEEP FUNCTION; ridden and the appliance will turned OFF.
Rinnai 10 Portable Room AC OIM OFF TIMER 1. With the appliance ON, press the TIMER button (35), the Clock symbol and a flashing OFF timer icon will be displayed. 2. Use the timer / clock adjustment buttons to select the desired stop time. 3. Press the TIMER button (35) to lock in the tim...
Page 11 - GENERAL MAINTENANCE; It is recommended that after each cooling season the exterior; ALWAYS turn off the power before you perform any; The power may now be reconnected.; Back
Rinnai 11 Portable Room AC OIM GENERAL MAINTENANCE It is recommended that after each cooling season the exterior panels and display of the appliance are cleaned with a soft damp cloth. Air filters should be checked and cleaned every week during periods of heavy use. For intermit...
Page 12 - SAVE A SERVICE CALL
Rinnai 12 Portable Room AC OIM SAVE A SERVICE CALL SYMPTOM POSSIBLE CAUSES POSSIBLE SOLUTIONS Appliance will not operate. Not plugged into power. Plug into power. Power switch OFF. Switch power ON. Timer Function set. Wait or reset timer function. Power to Appliance but it will not start. After swit...
Page 13 - LOCATION; This portable air conditioner must be installed on a flat and; The appliance is fitted with a 1.2m flexible 2 pin; INSTALLATION
LOCATION This portable air conditioner must be installed on a flat and dry surface. A minimum clearance of 500mm from walls or other appliances is required as well as easy access to a power point (GPO). The air outlets and the ducting system must not be obstructed. IMP...
Page 14 - EXHAUST DUCTING OPTIONS; permanent wall installation.; Kinked ducting causes air flow restrictions and lowers the; length of the kit using the supplied slide lock nut and bolt.; Window
EXHAUST DUCTING OPTIONS There are two ducting options available for this appliance, these are a Window installation or an optional Semi- permanent wall installation. IMPORTANT DO NOT over extend the exhaust duct.Over extension of the exhaust duct can lead to kinking. Kinked ducting causes air flow r...
Page 15 - CONDENSATE DRAINAGE; Remove the plug from Drain Tray Outlet (12) and drain out the; Option
SEMI-PERMANENT WALL INSTALLATION In some cases a window opening might not be assessable; therefore this appliance is supplied with semi-permanent wall flange kit that can be connected the Exhaust Duct. WARNING The positioning and installation of the wall flange should be completed by an authorised ...
Page 16 - CONTACTS; Head Office
Rinnai 16 Portable Room AC OIM Issue 2 - 08/09/2015 CONTACTS Australia Pty. Ltd. ABN 74 005 138 769 Rinnai has a Service and Spare Parts network with personnel who are fully trained and equipped to give the best service on your Rinnai appliance. If your appliance requires service, please call our ...