Page 2 - INSTALLATION REQUIREMENTS
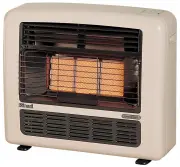
Rinnai Australia i Energysaver® - Operation & Installation Manual INSTALLATION REQUIREMENTS This heater must be installed by an authorised person. The installation must conform to local regulations. The installation must also comply with the instructions supplied by Rinnai. Service and removal m...
Page 3 - ABOUT YOUR ENERGYSAVER; TABLE OF CONTENTS
Rinnai Australia ii Energysaver® - Operation & Installation Manual INSTALLATION REQUIREMENTS ......................................................................................... i CERTIFICATION ....................................................................................................
Page 5 - Important; Important Points; SAFETY
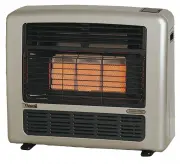
Rinnai Australia 2 Energysaver® - Operation & Installation Manual Important Unpack the heater and check for damage. DO NOT INSTALL DAMAGED HEATER. If the heater is damaged, contact your supplier for advice. Before installing the heater, check the label for the correct gas type (refer rating plat...
Page 10 - FEATURES
Rinnai Australia 7 Energysaver® - Operation & Installation Manual ROOM SEALED Air for combustion is taken from the outside and the flueproduct are exhausted to the outside. This means heateroperation has no effect on the composition and quality of air inthe room. PUSH BUTTON IGNITION Only one to...
Page 11 - To turn the unit ‘ON’; Room temperature on the TIME/TEMP Display; CUSTOMER INFORMATION - OPERATION
Rinnai Australia 8 Energysaver® - Operation & Installation Manual To turn the unit ‘ON’ Press the ‘ON’/’OFF’ button to operate the heater. The ‘ON’ indicator will glow green. The spark generator will be heard before the burner ignites and the ‘ON’ indicator glows red, indicating that the heater ...
Page 12 - Economy Mode
Rinnai Australia 9 Energysaver® - Operation & Installation Manual Economy Mode The Economy (ECON) function is an energy saving features designed to control the room temperatureand prevent discomfort from over heating. • When the room temperature reaches the set temperature, the set temperature d...
Page 13 - Setting the Clock/Timers; SETTING THE CLOCK
Rinnai Australia 10 Energysaver® - Operation & Installation Manual Setting the Clock/Timers When the appliance is first plugged in or after a power failure, the Digital Display with show --:-- As an example, let’s set the clock to 10:35 am; 1. Press the Set Times button once, the Clock/Timer ind...
Page 14 - Operating the Timers; Set and Forget Operation; OPERATING THE TIMERS
Rinnai Australia 11 Energysaver® - Operation & Installation Manual Operating the Timers The timers can be programmed to operate for any two time periods in any 24 hours. Before operatingthe Timer(s), the clock time must be correct and a starting time and finishing time for the Timer(s) mustbe pr...
Page 15 - Humidifier Tray; Vertical Louvre Adjustment; OTHER OPERATING INFORMATION
Rinnai Australia 12 Energysaver® - Operation & Installation Manual Pre-Heat This function operates automatically inconjunction with the Timers. When a Timer isselected, the heater may operate anywherewithin an hour prior to the programmed startingtime on the Timer. This function is called Pre-he...
Page 16 - Cleaning; Fan Filter; CARE OF YOUR ENERGYSAVER
Rinnai Australia 13 Energysaver® - Operation & Installation Manual Cleaning Your heater requires very little maintenance, but the following information will help you to keep itlooking like new and working efficiently. • Unplug electrical cord before cleaning. • All parts of the heater can be cle...
Page 17 - Flame Failure Device:; SAFETY DEVICES
Rinnai Australia 14 Energysaver® - Operation & Installation Manual Overheat Switch: This device automatically shuts the gas supply off if the heater exceeds a predetermined temperature. This is normally caused by an obstruction in front of the louvres, or a blocked fan filter.If the overheat swi...
Page 19 - INSTALLATION MANUAL - TABLE OF CONTENTS
Rinnai 16 Energysaver® - Operation & Installation Manual SPECIFICATIONS .................................................................................................... 17 Specification Table ............................................................................................ 17 DIME...
Page 20 - Specification Table; General; SPECIFICATIONS
Rinnai Australia 17 Energysaver® - Operation & Installation Manual Specification Table NOTE : For other appliance Specifications refer to appliance data plate. General RHFE-309FT RHFE-559FT Dimensions 695mmH x 257mmD x 465mmW 582mmH x 257mmD x 760mmW Weight 21 kg 26 kg Gas Control valve Rinnai ®...
Page 21 - DIMENSIONS
Rinnai Australia 18 Energysaver® - Operation & Installation Manual RHFE-309FT GAS INLET 124 mm 335 mm DIMENSIONS
Page 23 - Location; HEATER LOCATION
Rinnai Australia 20 Energysaver® - Operation & Installation Manual Location When positioning the heater the main variables governing the location are Flueing and Warm AirDistribution. This heater must not be installed where curtains or other combustible materials could come intocontact with it. ...
Page 24 - FLUE INSTALLATION CONFIGURATIONS
Rinnai Australia 21 Energysaver® - Operation & Installation Manual . Consult the ‘Energysaver ® Space Heater Co-Axial Flue Systems Installation Manual’ included with the ‘On Wall’ or ‘Direct’ flue kits for detailed flue installationinstructions. Use only Rinnai Flue components with this applianc...
Page 25 - Flue Terminal Location; FLUE POSITIONING
Rinnai Australia 22 Energysaver® - Operation & Installation Manual Flue Terminal Location The flue terminal should be positioned away fromflammable materials. Ensure that the location of the flue terminal can complywith the requirements of AS 5601 2004 Clause 5.13.6.2 andFig. 5.3 which is reprod...
Page 26 - SECURING; HEATER INSTALLATION
Rinnai Australia 23 Energysaver® - Operation & Installation Manual 1. UNPACKING THE APPLIANCE The heater is supplied in one carton containing; Heater, Standard Rear Cover Set and Bolt Pack. Remove all packaging materials. Check for damage. If any damage is evident DO NOT install or operate this ...
Page 28 - Trouble Shooting Check List; Please check this list before asking for Service; TROUBLE SHOOTING
Rinnai Australia 25 Energysaver® - Operation & Installation Manual Trouble Shooting Check List If you are unsure about the way the unit is operating, contact Rinnai or your Agent. Please check this list before asking for Service Fault Cause No Power ON/Co m bu sto n In dicator Burne r does n ’t ...
Page 29 - Symptom; When the unit is turned ‘OFF’:
Rinnai Australia 26 Energysaver®- Operation & Installation Manual Before asking for a service call please check the following.These symptoms are part of the normal operation of the unit and do not indicate a fault. Symptom Explanation At Ignition: Warm air does not start when the burner lights. ...
Page 30 - Code Displayed; ERROR MESSAGES
Rinnai Australia 27 Energysaver® - Operation & Installation Manual The Energysaver ® Range of heaters has the ability to monitor its own operation continuously. If a fault occurs, an Error Message will flash on the Digital Display on the control panel. This assists with diagnosing the fault, and...
Page 31 - WIRING DIAGRAM
Rinnai Australia 28 Energysaver® - Operation & Installation Manual / RHFE-309FT/RHFE-559FT WIRING DIAGRAM
Page 32 - CONTACT INFORMATION
Rinnai Australia 29 Energysaver® - Operation&Installation Man.Ref: 2109030 Issue 1 -10/3/10 Head Office 10-11 Walker Street,Braeside, Victoria 3195P.O. Box 460Tel: (03) 9271 6625Fax: (03) 9271 6622 National Help Line Sales & Service Tel: 1300 555 545* Fax: 1300 555 665* *Cost of a local call...