Page 2 - GENERAL POWER TOOL SAFETY WARNINGS; WARNING
2 – English GENERAL POWER TOOL SAFETY WARNINGS WARNING R e a d a l l s a f e t y w a r n i n g s , i n s t r u c t i o n s , illustrations and specifications provided with this power tool. Failure to follow all instructions listed below may result in electric shock, fire and/ or serious injury. Save...
Page 3 - BATTERY TOOL USE AND CARE
3 – English Wait for the cutter to stop before setting the tool down. An exposed rotating cutter may engage the surface lead- ing to possible loss of control and serious injury. Use clamps or another practical way to secure and support the workpiece to a stable platform. Holding the work by hand...
Page 4 - NOTICE; SYMBOLS; PRODUCT SPECIFICATIONS
4 – English The following signal words and meanings are intended to explain the levels of risk associated with this product. SYMBOL SIGNAL MEANING DANGER: Indicates a hazardous situation, which, if not avoided, will result in death or serious injury. WARNING: Indicates a hazardous situation, which, ...
Page 5 - OPERATION; APPLICATIONS; ASSEMBLY
5 – English OPERATION WARNING: Do not allow familiarity with products to make you careless. Remember that a careless fraction of a second is sufficient to inflict severe injury. WARNING: Always remove battery pack from the tool when you are assembling parts, making adjustments, cleaning, or when not...
Page 7 - PLANING; CHAMFER SETTINGS; PLANING SETTINGS; CHAMFERING/PLANING DEPTH ADJUSTMENT SCALE
7 – English WARNING: Always use two hands on the tool for any operation; this ensures that you maintain control and avoid risk of serious personal injury. Always properly support and clamp the workpiece so that both hands are free to control the planer. Never operate the tool overhead or inverted fr...
Page 8 - MAINTENANCE
8 – English MAINTENANCE NOTE: We suggest that you always keep an extra set of blades on hand. As soon as the blades in the planer show signs of becoming dull, replace them. The blades are revers-ible and can be used until both sides become dull. CHAMFERING See Figure 10, page 13. The planer is desig...
Page 9 - ILLUSTRATIONS START ON PAGE 11 AFTER FRENCH AND
9 – English MAINTENANCE ILLUSTRATIONS START ON PAGE 11 AFTER FRENCH AND SPANISH LANGUAGE SECTIONS. This product has a 90-Day Satisfaction Guarantee Policy, as well as a Three-year Limited Warranty. For Warranty and Policy details, please go to www.RIDGID.com or call (toll free) 1-866-539-1710. CLEAN...
Page 10 - AVERTISSEMENTS DE SÉCURITÉ GÉNÉRALES RELATIVES; AVERTISSEMENT; SÉCURITÉ DU LIEU DE TRAVAIL
2 — Français AVERTISSEMENTS DE SÉCURITÉ GÉNÉRALES RELATIVES AUX OUTILS ÉLECTRIQUES AVERTISSEMENT Lire les avertissements de sécurité, les instructions et les précisions et consulter les illustrations fournis avec cet outil électrique. Le fait de ne pas se conformer à l’ensemble des consignes présent...
Page 11 - UTILISATION ET ENTRETIEN DE LA PILE; DÉPANNAGE; AVERTISSEMENTS DE SÉCURITÉ RELATIFS AU RABOTEUSE
3 — Français AVERTISSEMENTS DE SÉCURITÉ GÉNÉRALES RELATIVES AUX OUTILS ÉLECTRIQUES Utiliser l’outil, les accessoires et embouts, etc. conformément à ces instrutions pour les applications pour lesquelles ils sont conçus, en tenant compte des conditions et du type de travail à exécuter. L’usage d’un...
Page 12 - SYMBOLES; SYMBOLE SIGNAL; CARACTÉRISTIQUES; FICHE TECHNIQUE; SYMBOLE
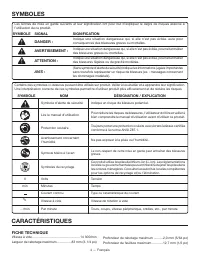
4 — Français SYMBOLES Les termes de mise en garde suivants et leur signification ont pour but d’expliquer le degré de risques associé à l’utilisation de ce produit. SYMBOLE SIGNAL SIGNIFICATION DANGER : Indique une situation dangereuse qui, si elle n’est pas évitée, aura pour conséquences des blessu...
Page 13 - UTILISATION; ASSEMBLAGE
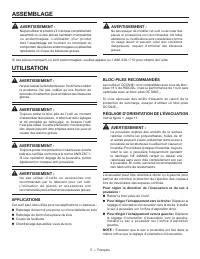
5 — Français UTILISATION AVERTISSEMENT : Ne pas laisser la familiarité avec l’outil faire oublier la prudence. Ne pas oublier qu’une fraction de seconde d’inattention peut entraîner des blessures graves. AVERTISSEMENT : Toujours retirer la bloc-pile de l’outil au moment d’assembler des pièces, d’eff...
Page 14 - INSTALLATION DU SAC À POUSSIÈRE; BÉQUILLE
6 — Français UTILISATION INSTALLATION DU SAC À POUSSIÈRE Voir la figure 2, page 11. Retirer le bloc-piles. Glisser le collier du sac à poussière sur l’orifice d’évacuation. NOTE : Pour enlever le sac à poussière, le tirer en droite ligne de l’orifice d’évacuation. AVIS : Le sac se remplit rapide...
Page 15 - UTILISATION DE LA RABOTEUSE; RÉGLAGES DE CHANFREIN; RÉGLAGES; ÉCHELLE DE PROFONDEUR DE RABOTAGE/CHANFREINAGE
7 — Français UTILISATION AVERTISSEMENT : Le déplacement de la pièce pendant le rabotage peut causer une perte de contrôle pouvant entraîner des blessures graves. UTILISATION DE LA RABOTEUSE Assujettir solidement la pièce à raboter. S’assurer que le matériau à raboter est exempt de clous, agrafes...
Page 16 - CHANFREINS; INSTALLATION DU GUIDE; FEUILLURES
8 — Français UTILISATION Pousser la poignée arrière vers le bas lorsque la raboteuse parvient en fin de passe. Ceci aide à garder l’arrière de la semelle de la raboteuse en contact avec la pièce et à empêcher l’avant d’entamer le bois. AVERTISSEMENT : Veiller à ne pas heurter de clous pendant le r...
Page 17 - ENTRETIEN
9 — Français NETTOYAGE DE L’ORIFICE D’ÉVACUATION ET VIDAGE DU SAC À POUSSIÈRE Voir la figure 14, page 13. Lorsque la raboteuse à été utilisée pour un travail de longue durée ou sur du bois vert ou humide, des copeaux peuvent s’accumuler dans l’orifices d’évacuation, qui devra alors être nettoyé. L’a...
Page 18 - REMPLACEMENT DE LA COURROIE
10 — Français ILLUSTRATIONS COMMENÇANT SUR 11 DE PAGE APRÈS LE SECTION ESPAGNOL. Ce produit est accompagné d’une politique de satisfaction de 90 jours et d’une garantie limitée de trois (3) ans. Pour obtenir les détails de la garantie et de la politique, visiter le site www.RIDGID.com ou appeler (sa...
Page 19 - ADVERTENCIA; SEGURIDAD EN EL ÁREA DE TRABAJO; ADVERTENCIAS DE SEGURIDAD GENERALES PARA LA
2 — Español ADVERTENCIA Lea todas las advertencias de seguridad y las instrucciones. El incumplimiento de las advertencias e instrucciones puede ocasionar descarga eléctrica, fuego o lesiones graves. Guarde todas las advertencias e instrucciones para futuras consultas. El término “herramienta eléctr...
Page 20 - EMPLEO Y CUIDADO DE LA HERRAMIENTA DE
3 — Español afectar el funcionamiento de la herramienta. Si está dañada la herramienta eléctrica, permita que la reparen antes de usarla. Numerosos accidentes son causados por herramientas eléctricas mal cuidadas. Mantenga las herramientas de corte afiladas y limpias. Las herramientas de corte bie...
Page 21 - SÍMBOLOS; SÍMBOLO; ESPECIFICACIONES; CARACTERÍSTICAS
4 — Español SÍMBOLOS Las siguientes palabras de señalización y sus significados tienen el objeto de explicar los niveles de riesgo relacionados con este producto. SÍMBOLO SEÑAL SIGNIFICADO PELIGRO: Indica una situación peligrosa, la cual, si no se evita, causará la muerte o le-siones serias. ADVERTE...
Page 22 - USOS; FUNCIONAMIENTO; PAQUETES DE BATERÍAS RECOMENDADOS; ARMADO
5 — Español ADVERTENCIA: No permita que su familarización con las herramientas lo vuelva descuidado. Tenga presente que un descuido de un instante es suficiente para causar una lesión grave. ADVERTENCIA: Siempre retire el paquete de baterías de la herramienta cuando esté ensamblando partes, realizan...
Page 23 - MONTAJE DEL SACO CAPTAPOLVO; SOPORTE PROTECTOR
6 — Español FUNCIONAMIENTO MONTAJE DEL SACO CAPTAPOLVO Vea la figura 2, página 11. Retire el paquete de baterías. Con un movimiento de deslizamiento monte el saco captapolvo en el escape de salida de desechos. NOTA: Para desmontar el saco captapolvo, tire del mismo para extraerlo del escape de s...
Page 24 - CONFIGURACIÓN DE ACHAFLANADO; ESCALA DE AJUSTE DE PROFUNDIDAD DE ACHAFLANADO/CEPILLADO
7 — Español NOTA: Use solo configuraciones de profundidad establecidas. Si intenta cortes con una configuración de profundidad entre posiciones establecidas, los cortes podrían ser desparejos. NOTA: Para proteger las hojas durante el almacenamiento, transporte, etc., gire la perilla de ajuste de pro...
Page 25 - ACHAFLANADO; MONTAJE DE LA GUÍA; REBAJADO DE CANTOS
8 — Español NOTA: Asegúrese de que las cuchillas no estén tocando la pieza de trabajo. Aplique presión al perilla de ajuste de profundidad de manera que la zapata delantera quede completamente plana sobre la pieza de trabajo. Arranque el cepillo y permita al motor alcanzar su velocidad máxima. ...
Page 26 - MANTENIMIENTO; MANTENIMIENTO GENERAL
9 — Español MANTENIMIENTO ADVERTENCIA: Al dar servicio a la unidad, sólo utilice piezas de repuesto idénticas. El empleo de piezas diferentes puede presentar un peligro o causar daños al producto. ADVERTENCIA: Siempre póngase protección ocular con protección lateral con la marca de cumplimiento de l...
Page 27 - CAMBIO DE LA CORREA
10 — Español Este producto tiene una política de satisfacción garantizada de 90 días y una garantía limitada de tres años. Para obtener detalles sobre la garantía y la política de satisfacción garantizada, diríjase a www.RIDGID.com o llame sin cargo al 1-866-539-1710. Limpie el aserrín o las astil...
Page 32 - OPERATOR’S MANUAL; Customer Service Information:; Información sobre servicio al consumidor:
OPERATOR’S MANUAL MANUEL D’UTILISATIONMANUAL DEL OPERADOR BRUSHLESS 18 VOLT 3-1/4 IN. HAND PLANER RABOTEUSE À MAIN DE 3-1/4 PO (83 MM) RABOT DE 18 V SANS BALAICEPILLO ELÉCTRICO DE MANO DE 3-1/4 PULG. (83 MM) DE 18 V SIN ESCOBILLAS R8481 995000621 9-19-18 (REV:02) ONE WORLD TECHNOLOGIES, INC. P.O. Bo...