Page 2 - GENERAL POWER TOOL SAFETY WARNINGS
2 - English WARNING Read all safety warnings and all instructions. Failure to follow the warnings and instructions may result in electric shock, fire and/or serious injury. Save all warnings and instructions for future reference. The term “power tool” in the warnings refers to your mains- operated (...
Page 3 - CUTTING PROCEDURES
3 - English DANGER: Keep hands away from cutting area and the blade. Keep your second hand on auxiliary handle, or motor housing. If both hands are holding the saw, they cannot be cut by the blade. Do not reach underneath the workpiece. The guard can not protect you from the blade below the workpi...
Page 4 - CALIFORNIA PROPOSITION 65; CIRCULAR SAW SAFETY WARNINGS
4 - English LOWER GUARD FUNCTION Check lower guard for proper closing before each use. Do not operate the saw if lower guard does not move freely and close instantly. Never clamp or tie the lower guard into the open position. If saw is accidentally dropped, lower guard may be bent. Raise the lower...
Page 5 - SYMBOLS; NOTICE
5 - English SYMBOLS Some of the following symbols may be used on this product. Please study them and learn their meaning. Proper interpretation of these symbols will allow you to operate the product better and safer. Safety Alert Indicates a potential personal injury hazard. Read Operator’s Manual T...
Page 6 - ELECTRICAL; EXTENSION CORDS; ELECTRICAL CONNECTION; SPEED AND WIRING
6 - English ELECTRICAL EXTENSION CORDS Use only 3-wire extension cords that have 3-prong grounding plugs and 3-pole receptacles that accept the tool's plug. When using a power tool at a considerable distance from the power source, use an extension cord heavy enough to carry the current that the tool...
Page 7 - FEATURES; SPECIFICATIONS; ASSEMBLY; INSTALLING/REMOVING THE BLADE
7 - English FEATURES SPECIFICATIONS Blade Diameter ....................................... 7-1/4 in. (184 mm)Blade Arbor ...............................Diamond (Bolt-LH Combo)Cutting Depth at 0° ................................................. 2-3/8 in.Cutting Depth at 45° ............................
Page 8 - APPLICATIONS; SAW BLADES
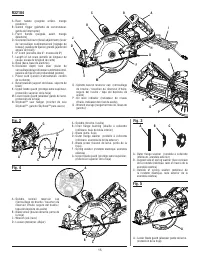
8 - English ASSEMBLY Retract the lower guard into the upper guard, making sure the lower guard spring works properly, allowing the guard to move freely. Check to see that the saw teeth and arrow on the saw blade and the arrow on the lower guard are pointing in the same direction. NOTE: The saw t...
Page 9 - OPERATION; BLADE GUARD SYSTEM
9 - English OPERATION BLADE GUARD SYSTEM See Figure 5, page 15. The lower blade guard attached to your saw is there for your protection and safety. Do not alter it for any reason. If it becomes damaged, do not operate the saw until you have the guard repaired or replaced. Always leave guard in opera...
Page 10 - LENGTH OF CUT SCALE
10 - English OPERATION LENGTH OF CUT SCALE See Figure 11, page 16. The length of cut scale on the saw base is parallel with the saw blade and is used to measure the distance which the blade cuts into the material. NOTE: Nine inches is the maximum length of cut that you can measure. Also, it is accur...
Page 11 - BEVEL CUTTING; SETTING THE BEVEL ANGLE
11 - English OPERATION To rip cut using a straight edge: Secure the workpiece. Clamp a straight edge to the workpiece using C-clamps. Saw along the straight edge to achieve a straight rip cut. NOTE: Do not bind the blade in the cut. BEVEL CUTTING The base of the saw may be adjusted for bevel c...
Page 12 - ADJUSTING THE DEPTH LOCK LEVER; POCKET CUTTING
12 - English OPERATION ADJUSTMENTS ADJUSTING THE DEPTH LOCK LEVER See Figure 23, page 17. Over time, due to wear, the depth lock lever may move from its original setting. If the lever prematurely contacts any part of the saw during tightening and loosening, adjust the lever by following these steps:...
Page 13 - MAINTENANCE; GENERAL MAINTENANCE
13 - English MAINTENANCE WARNING: When servicing use only identical replacement parts. Use of any other parts may create a hazard or cause product damage. WARNING: Always wear eye protection with side shields marked to comply with ANSI Z87.1. Failure to do so could result in objects being thrown int...
Page 14 - BRUSH REPLACEMENT; ACCESSORIES; NOTE: ILLUSTRATIONS START ON PAGE 15 AFTER; This product has a 90-Day Satisfaction Guarantee Policy,
14 - English BRUSH REPLACEMENT See Figure 26, page 17. The tool has externally accessible brush assemblies that should be periodically checked for wear. Unplug the tool. Remove the brush cap by turning it counterclockwise. The brush assembly is spring loaded and will pop out when you remove the ...
Page 15 - AVERTISSEMENT
2 - Français AVERTISSEMENTS DE SÉCURITÉ GÉNÉRALES RELATIVES AUX OUTILS ÉLECTRIQUES AVERTISSEMENT L i re t o u s l e s a v e r t i s s e m e n t s e t t o u t e s l e s instructions de sécurité. Ne pas suivre l’ensemble des avertissements et des instructions peut entraîner une électrocution, un incen...
Page 16 - DÉPANNAGE; AVERTISSEMENTS DE SÉCURITÉ RELATIFS SCIE CIRCULAIRE; MÉTHODE DE COUPE
3 - Français AVERTISSEMENTS DE SÉCURITÉ GÉNÉRALES RELATIVES AUX OUTILS ÉLECTRIQUES conditions de travail et de la tâche à effectuer. L’utilisation de cet outil électrique pour effectuer une opération pour laquelle il n’est pas conçu peut occasionner une situation dangereuse. DÉPANNAGE Les réparati...
Page 17 - PROPOSITION 65 DE LA CALIFORNIE; RÈGLES DE SÉCURITÉ SUPPLÉMENTAIRES
4 - Français PROPOSITION 65 DE LA CALIFORNIE AVERTISSEMENT : Ce produit et la poussière dégagée lors du ponçage, sciage, meulage, perçage de certains matériaux et lors d’autres opérations de construction contient des produits chimiques, notamment du plomb, identifiés par l’état de Californie comme c...
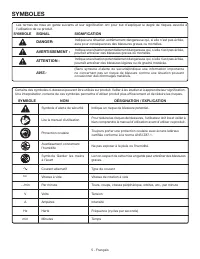
Page 18 - SYMBOLES
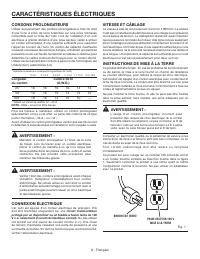
5 - Français SYMBOLES Certains des symboles ci-dessous peuvent être utilisés sur produit. Veiller à les étudier et à apprendre leur signification. Une interprétation correcte de ces symboles permettra d’utiliser produit plus efficacement et de réduire les risques. SYMBOLE NOM DÉSIGNATION / EXPLICATI...
Page 19 - CARACTÉRISTIQUES ÉLECTRIQUES; CORDONS PROLONGATEURS; CONNEXION ÉLECTRIQUE; VITESSE ET CÂBLAGE
6 - Français CARACTÉRISTIQUES ÉLECTRIQUES CORDONS PROLONGATEURS Utiliser exclusivement des cordons prolongateurs à trois fils doté d’une fiche à prise de terre brabchés sur une prise triphasée compatible avec la fiche de l’outil. Lors de l’utilisation d’un outil électrique à grande distance d’une pr...
Page 20 - CARACTÉRISTIQUES; FICHE TECHNIQUE; ASSEMBLAGE; INSTALLATION/RETRAIT DE LA LAME
7 - Français CARACTÉRISTIQUES FICHE TECHNIQUE Diamètre de la lame................................184 mm (7-1/4 po)Axe de lame ........ Losange (Boulon combiné pas à gauche)Profondeur de coupe à 0° .....................60,3 mm (2-3/8 po)Profondeur de coupe à 45° ...................44,5 mm (1-3/4 po) ...
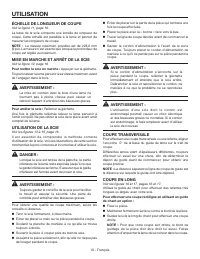
Page 21 - UTILISATION; SYSTÈME DE GARDE DE LAME
8 - Français ASSEMBLAGE Pour retirer la lame : Débrancher la scie. Appuyer sur le verrouillage de broche. Retirer le boulon de lame en le tournant vers la droite, à l’aide de la clé hexagonal. Retirer la rondelle élastique. Retirer la rondelle à collerette inférieure. Relever la garde de...
Page 22 - REBOND
9 - Français UTILISATION DANGER : Lors de la coupe traversante, la garde inférieure ne protège pas la partie de la lame se trouvant au-dessous de la planche. De ce fait, il est impératif de garder les mains à l’écart de la zone de coupe et de la lame. Le contact de toute partie du corps avec la lame...
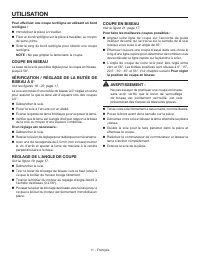
Page 23 - ÉCHELLE DE LONGUEUR DE COUPE; UTILISATION DE LA SCIE
10 - Français UTILISATION ÉCHELLE DE LONGUEUR DE COUPE Voir la figure 11, page 16. La base de la scie comporte une échelle de longueur de coupe. Cette échelle est parallèle à la lame et permet de mesurer les longueurs de coupe. NOTE : La mesure maximum possible est de 228,6 mm (9 po). La mesure n’es...
Page 24 - COUPE EN BISEAU; RÉGLAGE DE L'ANGLE DE COUPE
11 - Français UTILISATION Pour effectuer une coupe rectiligne en utilisant un bord rectiligne : Immobiliser la pièce à travailler. Fixer un bord rectiligne sur la pièce à travailler, au moyen de serre-joints. Scier le long du bord rectiligne pour obtenir une coupe rectiligne. NOTE : Ne pas gri...
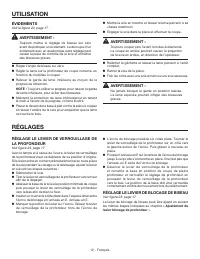
Page 25 - ÉVIDEMENTS; RÉGLAGE LE LEVIER DE BLOCAGE DE BISEAU
12 - Français ÉVIDEMENTS Voir la figure 22, page 17. AVERTISSEMENT : Toujours mettre le réglage de biseau sur zéro avant de pratiquer un évidement. La découpe d’un évidement avec un quelconque autre réglage peut causer la prete de contrôle de la scie et entraîner des blessures graves. Régler l’ang...
Page 26 - ENTRETIEN; GÉNÉRALITÉS
13 - Français ENTRETIEN AVERTISSEMENT : Utiliser exclusivement des pièces d’origine pour les réparations. L’usage de toute autre pièce pourrait créer une situation dangereuse ou endommager l’outil. AVERTISSEMENT : Toujours porter une protection oculaire certifiée conforme à la norme ANSI Z87.1. Si c...
Page 27 - NOTE: ILLUSTRATIONS COMMENÇANT; REMPLACEMENT DES BALAIS
14 - Français ENTRETIEN ACCESSOIRES Pour obtenir ces accessoires, s’adresser au revendeur après duquel vous avez acheté ce produit. Guide de chant .................................................................................................................................................6901...
Page 28 - ADVERTENCIAS DE SEGURIDAD GENERALES PARA DE
2 - Español ADVERTENCIA Lea todas las advertencias de seguridad y todas las instrucciones. La inobservancia de las advertencias e instrucciones puede causar descargas eléctricas, incendios o lesiones graves. Guarde todas las advertencias e instrucciones para consultarlas en el futuro. El término “he...
Page 29 - PROCEDIMIENTOS DE CORTE; CAUSAS Y PREVENCIÓN DE CONTRAGOLPES; SERVICIO
3 - Español PROCEDIMIENTOS DE CORTE PELIGRO: Mantenga las manos alejadas del área de corte y de la hoja. Mantenga la otra mano en el mango auxiliar o en el alojamiento del motor. Si ambas manos están sujetando la sierra, la hoja de corte no puede lesionarlas. No trate de alcanzar nada bajo la piez...
Page 30 - REGLAS DE SEGURIDAD ADICIONALES; ADVERTENCIA; ADVERTENCIAS DE SEGURIDAD PARA SIERRA CIRCULAR
4 - Español la hoja de corte ni ninguna otra parte, en todos los ángulos y profundidades de corte. Verifique el funcionamiento del resorte de la protección inferior. Si la protección y el resorte no funcionan correctamente, debe proporcionárseles servicio antes de utilizar la unidad. La protección...
Page 31 - SÍMBOLOS; SÍMBOLO
5 - Español SÍMBOLOS Es posible que se empleen en este producto algunos de los siguientes símbolos. Le suplicamos estudiarlos y aprender su significado. Una correcta interpretación de estos símbolos le permitirá utilizar mejor y de manera más segura el producto. SÍMBOLO NOMBRE DENOMINACIÓN/EXPLICACI...
Page 32 - ASPECTOS ELÉCTRICOS; CORDONES DE EXTENSIÓN; CONEXIÓN ELÉCTR; VELOCIDAD Y CABLEADO
6 - Español ASPECTOS ELÉCTRICOS CORDONES DE EXTENSIÓN Sólo utilice cordones de extensión de 3 conductores con clavijas de tres patillas y receptáculos de tres polos que acepten la clavija del cordón de la herramienta. Al utilizar una herramienta eléctrica a una distancia considerable del suministro ...
Page 33 - CARACTERÍSTICAS; ESPECIFICACIONES; DESEMPAQUETADO; ARMADO; MONTAJE/REMOCIÓN DE LA HOJA
7 - Español CARACTERÍSTICAS ESPECIFICACIONES Diámetro de la hoja ................................ 184 mm (7-1/4 pulg.) Árbol de la hoja de corte ............................................ Rómbico (comb. c/ perno de rosca izq.) Profundidad de corte a 0° ..................... 60,3 mm (2-3/8 pulg.)Pr...
Page 34 - USOS
8 - Español Apriete firmemente el perno de la hoja; para ello, gírelo hacia la izquierda con la llave de tuercas. No aplique un apriete excesivo. NOTA: Nunca utilice una hoja tan gruesa que no permita acoplar la arandela de brida exterior en la parte plana del husillo. Para quitar la hoja: Desc...
Page 35 - FUNCIONAMIENTO; CONTRAGOLPE
9 - Español FUNCIONAMIENTO PELIGRO: Al cortar de lado a lado, la protección inferior no cubre la hoja por dicho lado de la pieza de trabajo. Puesto que la hoja queda expuesta por la parte inferior de la pieza de trabajo, mantenga las manos y los dedos alejados del área de corte. Cualquier parte del ...
Page 36 - ESCALA DE LONGITUD DE CORTE; UTILIZACIÓN DE LA SIERRA
10 - Español FUNCIONAMIENTO Mantenga horizontal la base contra la pieza de trabajo. Eleve o baje la sierra para alinear la medida deseada de la escala con la profundidad del indicador de flecha de profundidad, ubicado directamente arriba del mecanismo de bloqueo. Empuje hacia abajo la palanca de...
Page 37 - PARA CORTAR AL HILO; CORTE A BISEL; AJUSTAR EL TOPE DE BISEL
11 - Español FUNCIONAMIENTO PARA CORTAR AL HILO Vea las figuras 16 y 17, páginas 16 y 17. Use la guía de bordes cuando haga cortes largos o anchos con su sierra. Para cortar al hilo utilizando la guía de bordes opcional: Sujete la pieza de trabajo. Coloque la cara de la guía de bordes firmemente...
Page 38 - CORTE EN CAVIDAD; AJUSTES
12 - Español FUNCIONAMIENTO CORTE EN CAVIDAD Vea la figura 22, página 17. ADVERTENCIA: Siempre ajuste el ángulo de biselado a cero antes de efectuar un corte en cavidad. Si se intenta efectuar un corte en cavidad a cualquier otro ángulo puede producirse una pérdida de control de la sierra, y por con...
Page 39 - MANTENIMIENTO; REEMPLAZO DEL CORDÓN DE CORRIENTE
13 - Español MANTENIMIENTO ADVERTENCIA: Para el servicio de la unidad sólo utilice piezas de repuesto idénticas. El empleo de piezas diferentes puede causar un peligro o dañar el producto. ADVERTENCIA: Siempre póngase protección ocular con la marca de cumplimiento de la norma ANSI Z87.1. Si no cumpl...
Page 40 - REEMPLAZO DE LAS ESCOBILLAS; ACCESORIOS
14 - Español Cambio de aceite: Para un drenaje más rápido, haga funcionar la sierra libremente durante aproximadamente tres minutos para calentar el aceite. Desconecte la herramienta. Coloque la base de la sierra sobre una superficie horizontal. Retire la tapa del seguro del husillo/depósito...
Page 44 - OPERATOR’S MANUAL; Customer Service Information:; Información sobre servicio al consumidor:
990000973 1-30-16 (REV:03) OPERATOR’S MANUAL MANUEL D’UTILISATIONMANUAL DEL OPERADOR 7-1/4 in. WORM DRIVE SAW 184 mm SCIE À TRANSMISSION À VIS184 mm SIERRA CON ENGRANAJE SINFÍN R32104 ONE WORLD TECHNOLOGIES, INC. P.O. Box 35, Hwy. 8Pickens, SC 29671, USA1-866-539-1710 www.RIDGID.com RIDGID is a re...