Ramsond RHDZ-36-24C/12W - Manuals

User Manual Ramsond RHDZ-36-24C/12W


Summary
Table of Contents Installation Manual Indoor Unit Installation ......... 11 1. Select installation location ........................... 112. Attach mounting plate to wall .................. 123. Drill wall hole for connective piping ....... 124. Prepare refrigerant piping ..............................
Page 4 This symbol indicates that ignoring instructions may cause death or serious injury. This symbol indicates that ignoring instructions may cause moderate injury to your person, or damage to your unit or other property. Safety Precautions Read safety precautions before installation Incorrect...
Page 5 WARNING 6. For all electrical work, follow all local and national wiring standards, regulations, and the installation manual. You must use an independent circuit and single outlet to supply power. Do not connect other appliances to the same outlet. Insufficient electrical capacity or defe...
Ramsond Air Conditioners Manuals
-
 Ramsond 101GWi
User Manual
Ramsond 101GWi
User Manual
-
 Ramsond 27GW2
User Manual
Ramsond 27GW2
User Manual
-
 Ramsond 27SEG
User Manual
Ramsond 27SEG
User Manual
-
 Ramsond 37GW2
User Manual
Ramsond 37GW2
User Manual
-
 Ramsond 37GWi
User Manual
Ramsond 37GWi
User Manual
-
 Ramsond 37GWX
User Manual
Ramsond 37GWX
User Manual
-
 Ramsond 37SEG
User Manual
Ramsond 37SEG
User Manual
-
 Ramsond 55GWi
User Manual
Ramsond 55GWi
User Manual
-
 Ramsond 74GW2
User Manual
Ramsond 74GW2
User Manual
-
 Ramsond 74GWi
User Manual
Ramsond 74GWi
User Manual
-
 Ramsond CH09/09/09/09/09MSPHCT230VI-CH48MSPH230V
User Manual
Ramsond CH09/09/09/09/09MSPHCT230VI-CH48MSPH230V
User Manual
-
 Ramsond CH09/09/09/09/09MSPHWM230VI-CH48MSPH230V
User Manual
Ramsond CH09/09/09/09/09MSPHWM230VI-CH48MSPH230V
User Manual
-
 Ramsond CH09/09/09/09/MSPHCT230VI-CH36MSPH230VOA
User Manual
Ramsond CH09/09/09/09/MSPHCT230VI-CH36MSPH230VOA
User Manual
-
 Ramsond CH09/09/09/09MSPHDT230VI-CH36MSPH230VOA
User Manual
Ramsond CH09/09/09/09MSPHDT230VI-CH36MSPH230VOA
User Manual
-
 Ramsond CH09/09/09/09MSPHWM230VI-CH36MSPH230VOA
User Manual
Ramsond CH09/09/09/09MSPHWM230VI-CH36MSPH230VOA
User Manual
-
 Ramsond CH09/09/09MSPHCT230VI-CH27MSPH230VOA
User Manual
Ramsond CH09/09/09MSPHCT230VI-CH27MSPH230VOA
User Manual
-
 Ramsond CH09/09/09MSPHDT230VI-CH27MSPH230VOA
User Manual
Ramsond CH09/09/09MSPHDT230VI-CH27MSPH230VOA
User Manual
-
 Ramsond CH09/09/09MSPHWM230VI-CH27MSPH230VOA
User Manual
Ramsond CH09/09/09MSPHWM230VI-CH27MSPH230VOA
User Manual
-
 Ramsond CH09/09MSPHCT230VI-CH18MSPH230VOA
User Manual
Ramsond CH09/09MSPHCT230VI-CH18MSPH230VOA
User Manual
-
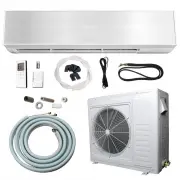
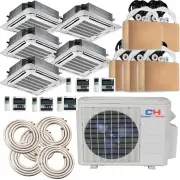
 Ramsond RH5Z-48-5X12WM
User Manual
Ramsond RH5Z-48-5X12WM
User Manual